Download these free horror DnD battlemaps & be ready to play in minutes! Many come with system-agnostic adventures written just for them. Perfect for VTTs.
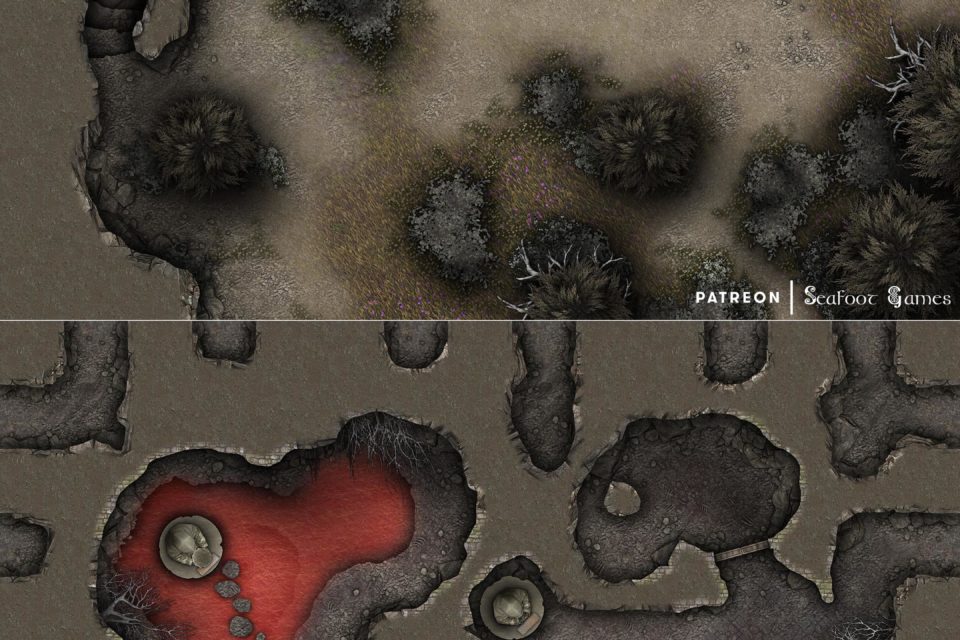
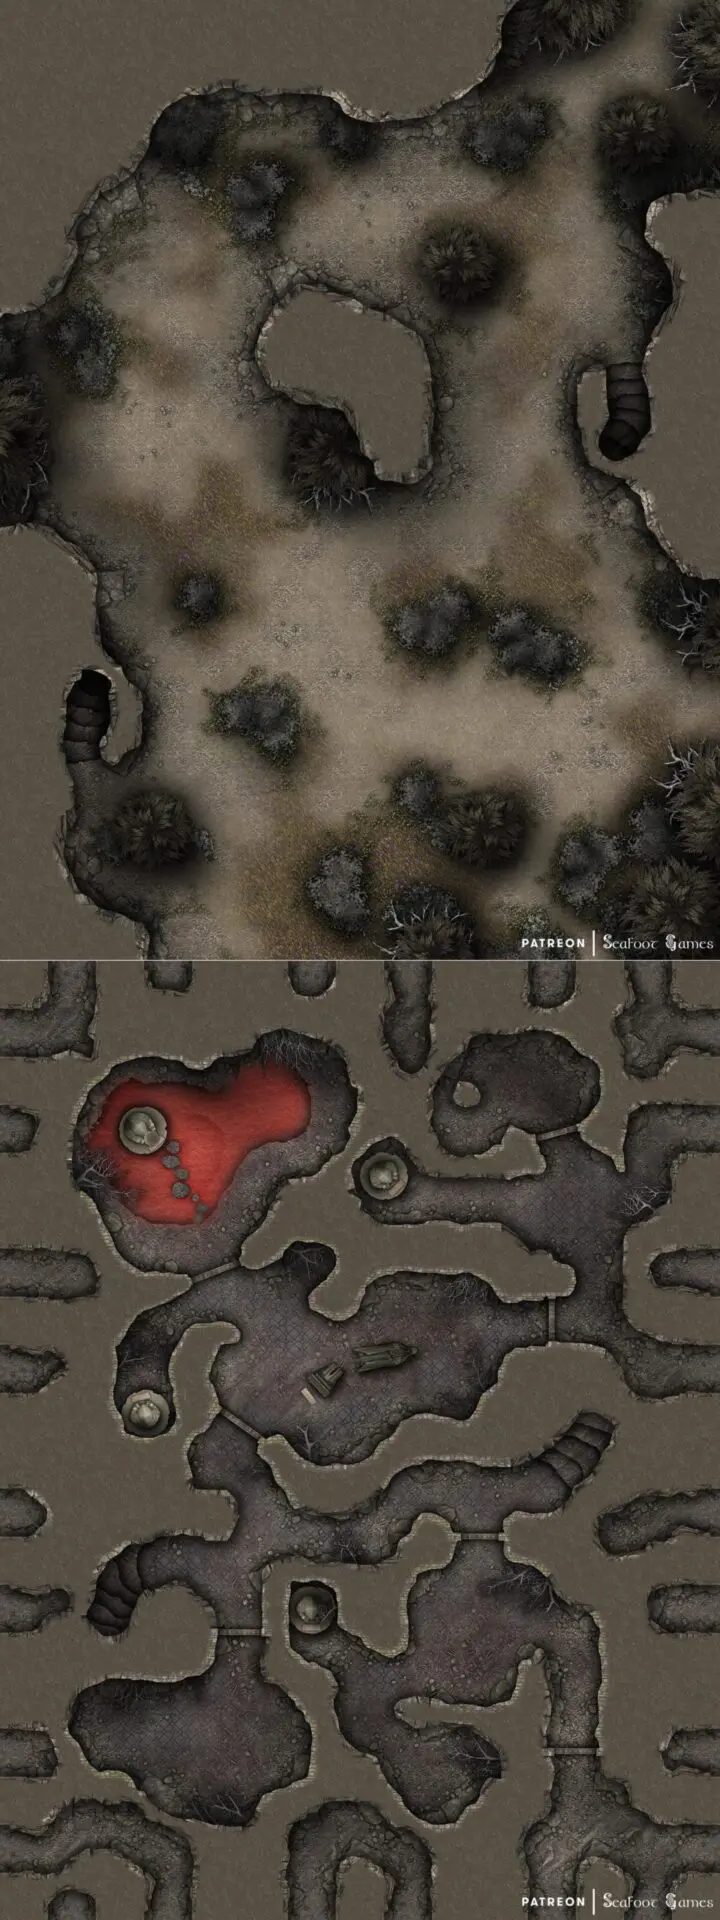
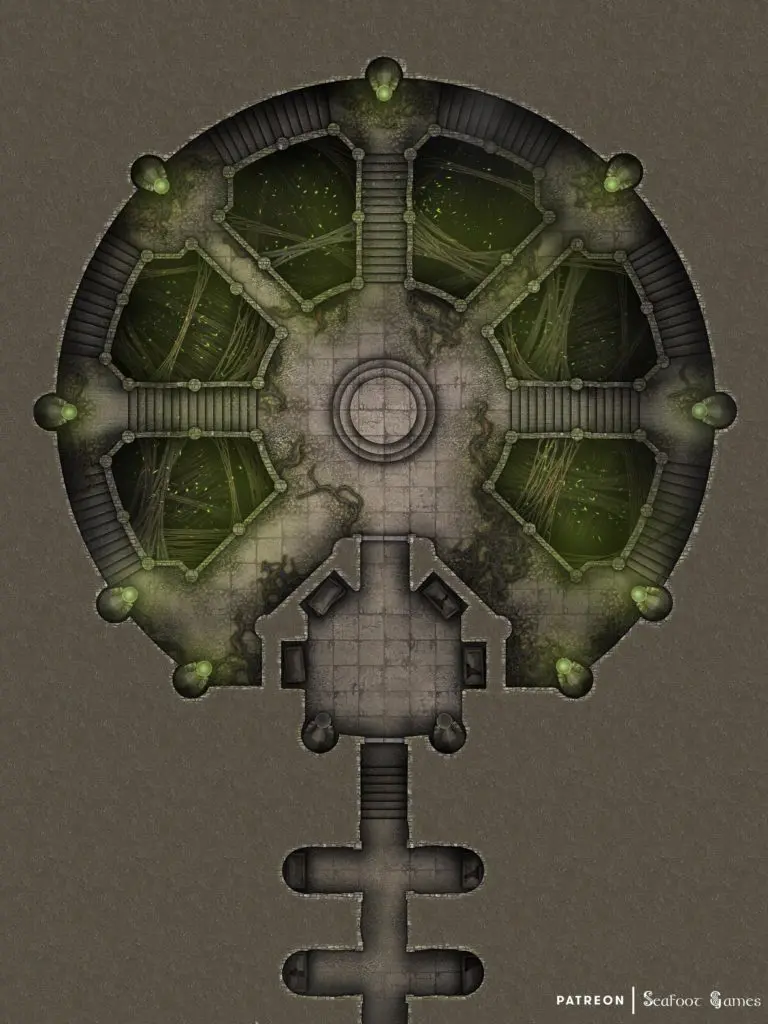
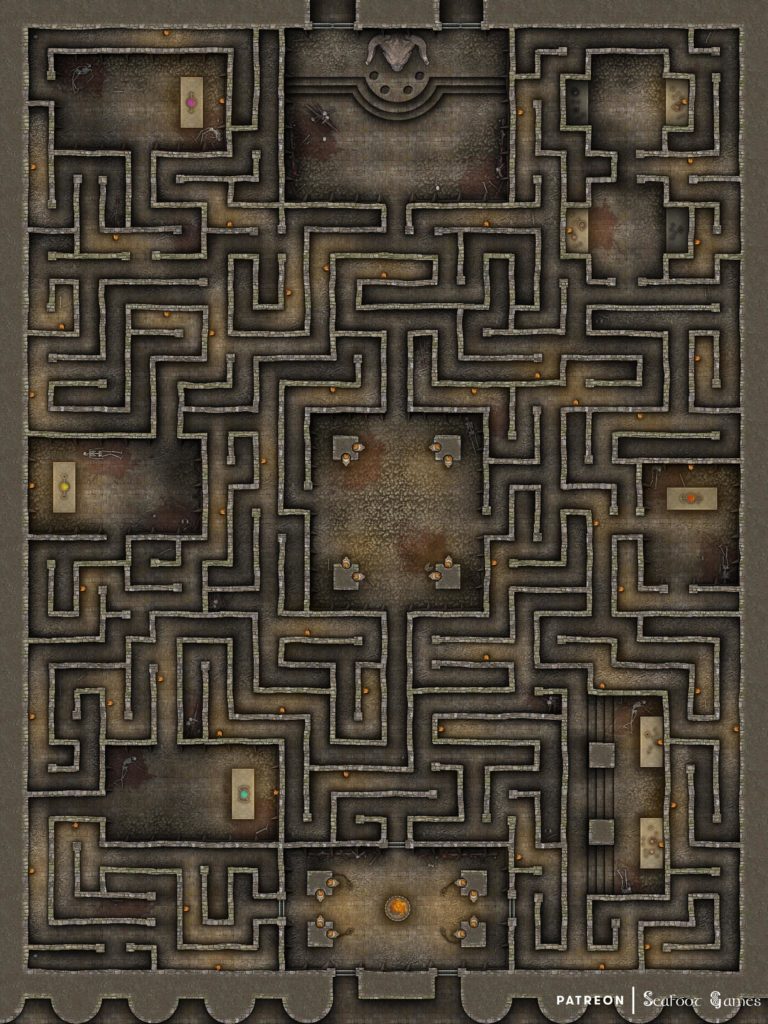
Dark Shrine Barrows Free Multi-Level 40×30 DnD Battlemap & Adventure
Atoning for Crimes Past
While traveling through the wilderness as the sun is about to set, you spot someone camping not far from the highway. If you go in for a closer look, you see a rough-looking man, unkempt and poking at the fire with a stick, until he senses your approach and leaps to his feet.
“What do you want?” he asks with a tremor in his voice, appearing ready to flee at the slightest provocation. Should you greet him calmly and assure him you mean no harm, he calms down.
“I thought you were something else,” he mutters sitting down once more. He extends an offer to join his humble camp, and should you accept, he will tell you why his nerves are frayed.
“I’m a thief and a scoundrel,” he explains without shame. I used to operate with a bunch of like-minded lads, and we’d go around the land looking for stuff to steal. We made a pretty good living, until a few weeks ago.
“We heard of a legend about an old shrine that had been built under a barrow, forgotten out in the wilds. There were some strange earthen monsters protecting it, but we fought through them and found what we were looking for.
“A small gold figurine sat on the outstretched hands of a statue, probably worth more than all the loot we’d stolen for the past year combined. We celebrated, getting blind drunk that very night. When I woke, I had the horrible feeling I’d had dreadful nightmares all night, but I couldn’t remember anything specific.
“I don’t know to what god that shrine was built, but every few nights for the last three weeks, one of our gang didn’t wake up. Their faces were twisted in fear, as if something had scared them to death.”
Your host takes a long swig of some strong liquor, before composing himself to speak further. “I’m one of the last from our gang who’s still alive and sane. The others are either dead, or ran away screaming. I have no intention of going out like they did. I haven’t slept in three days, and I won’t until I get this cursed figurine back to the shrine and hope that fixes things.
“Honestly, I’m exhausted and I don’t know if I can do this on my own. Those earth-creatures were kind of nasty and if they’ve returned, I doubt I’ll be able to fight my way through them. You look like an experienced traveler; could I ask you to get me into that shrine? I’m trying to undo the trouble I started. Yeah, I’m a thief, but I don’t think I deserve to go out like that.”
If you agree to help this man atone for his crime, he offers you his thanks. “The name’s Morgan. The shrine isn’t far from here. Let’s get this over with.” He douses the fire and if you follow, he leads you away from his camp in the twilight, over some terrain covered in sparse vegetation.
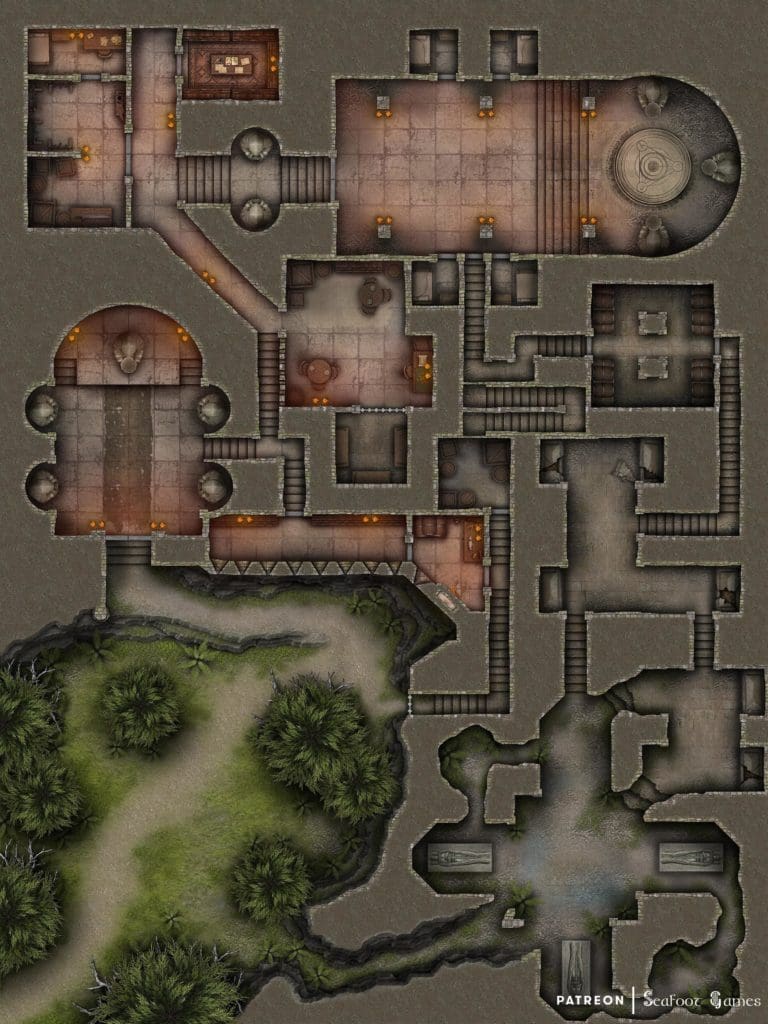
You travel for nearly half an hour, and in the dim half-light of the early evening you come across a narrow gully with rocky walls. Morgan draws a dagger and tells you to be wary, for this is the place near where he acquired the cursed figurine.
“There are stairs down along the east and west walls of this place,” he whispers. “We just have to go to one of them, which go down to a series of tunnels that lead to the shrine.” Just as he finishes speaking, you hear someone jump out at you from behind a pillar of rock in the center of the gully. A few more follow him, rushing straight for you with swords and daggers drawn!
“Give it to me!” screams the one in front, coming right for Morgan! “We have to stop the voices talking in our minds!”
“Lann, you’ve gone mad!” Morgan shouts, even as he backs away. There’s no time for further talk as you are forced to defend yourselves from these mad ruffians!
Should you survive, Morgan tells you that they were part of the crew he was with. “The poor bastards were driven mad. I guess the figurine spoke to them, telling them where to find me? This cursed thing has to go back right away!” He goes to the walls of the gully and looks around until he finds the stairs down.
If you follow, you soon find yourself in a small network of caves that appear to have been carved by people long ago. As you wander around, you see signs of former habitation, and sense a feeling of disquiet around you. Soon, you notice some of the walls are moving! Earth elementals emerge from the stone and dirt, layered with clumps of roots and soil as they flail at you!
“Hold them off while I return this thing to the shrine!” Morgan yells. If you survive the fight, you quickly find Morgan has entered a chamber with a statue that seems to be surrounded by a pond filled with blood-red water. Morgan places the figurine back on the statue’s extended hands, and immediately there is a sense of relief in the tunnels.
The remains of the elementals seep back into the ground, and Morgan staggers towards the stairs.
“Thanks for the assist,” he mumbles as he staggers towards the stairs. “I wish I could repay you… wait, I have an old stash not far from here. You can take it, I owe you that much at least. Let’s head back to my camp and rest up.”
The next day, Morgan gives you directions to his stash before he packs up, then waves farewell, telling you he’s going to find a quiet place to sleep for a few days. If you follow his directions, you soon find a small chest buried behind a dead tree. Inside is a pile of gold coins and a few gems, a fine reward for your assistance!
If you’d enjoy more DnD resources like this Dark Shrine Barrows free multi-level 40×30 DnD battlemap & adventure, Luke and I are currently offering 520+ battlemaps for $39. It’s your chance to have a great deal on some of our most popular DnD battlemaps! With over 520 total maps that are now also FoundryVTT ready, we guarantee that is something here for every GM—no matter what genre or setting you prefer, from grimy dungeons to beautiful overgrown ruins.
Paying just $39 rather than full price saves you over 96%! Take a look at all the extra maps you can download with one click here.
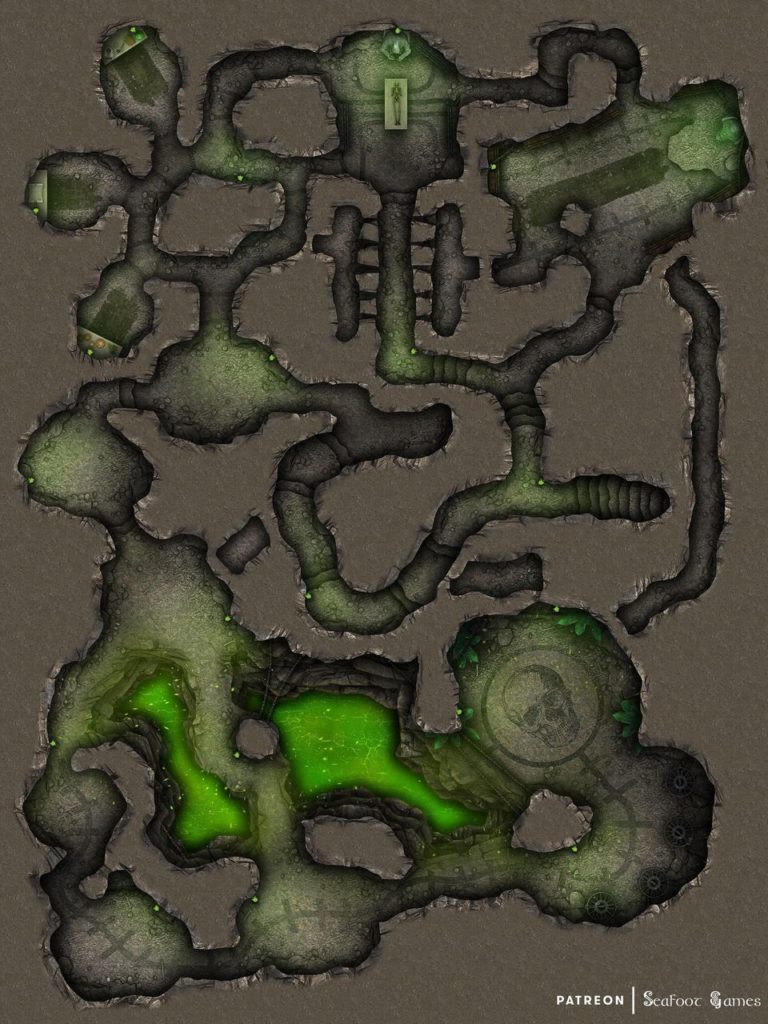
Upside Down Portal Free 40×30 Battlemap & Adventure
Forgotten Elder Blood
One day while walking to a remote town situated in a dark redwood forest, you pass a lone, playing girl of about 13 who is drawing an unusual monster in the dirt road with a stick. There are some cuts and scrapes on her body. If you try to talk to the girl, however, she is too shy to say anything and will start running back to town.
When you arrive at the town, the place seems partially abandoned and many of the houses are boarded up. You hear voices from the tavern. If you go in, there’s a meeting where the townsfolk are discussing the disappearances of local children.
They’re clearly frightened, and talking over one another about how the kids have been snatched from their rooms from behind closed doors. The kids will scream or call for help but by the time the parents rush in, they’re just gone. But sometimes there’s… Disturbing signs. The children aren’t just disappearing, there’s something snatching them!
Then a very old man will shake his cane at the crowd, insisting that it smacks of “Elder Blood” but the others will brush him off, saying that’s just a myth and there’s never been any sign of Elder Blood being real.
At this point the locals notice you, and are excited to see that you’re an adventurer. They ask if you could investigate the rooms where the three missing children have disappeared, and then hunt down the monster that took them.
Should you go look at the houses, the distressed parents of missing children will lead you to the rooms of their lost children. There are three in total, and in general the rooms look normal. There are toys scattered about, some scribbles on the walls, or they are otherwise neat children’s rooms. There’s no damage to the door, walls, or window.
If you look closely in the rooms, you might find fingernail scratches leading under the bed-as if a child was dragged there unwillingly. The scratches end under the bed, however, and there is no further damage there or signs where the child went. There’s also sap, from a specific kind of tree, but you haven’t seen any in the area.
As you approach the last room, however, you’ll hear noises from within. The voice of a child, saying “Mom, I’m scared…” But if you go inside, there isn’t the missing child¬-instead, there’s what appears to be an inhumanely tall figure, with pale, slick skin. It’s playing with the blocks on the ground, but when it sees you its face will split apart into a giant mouth and roar at you, with tentacles bursting from its back and writhing, before it disappears into a puff of black smoke that implodes upon itself and vanishes.
You might remember the monster the little girl was drawing on the side of the road, as it’s similar to what you just saw. If you ask the locals about the girl, they’ll explain that she’s an orphan whose parents died in a tragic accident some years back, and give you directions to where she lives.
If you go to the girl’s home (she lives in her deceased parent’s house) and she sees you, the color will drain from her face. She will try to run away into the forest.
Should you manage to catch her, she will cry in distress and say that she didn’t mean to do it. If you ask her what she’s talking about, she’ll explain, sniffling, that the other children were always mean to her. Usually she’d run into the forest and it would be OK, but not last time. The main bully followed her, and pushed her up against a tree after having thrown rocks at her while she ran away.
She was so scared, the girl explains, she screamed and then the tree split open and a monster came out. It killed him, she says, and she managed to escape. At first, she thought the monster was her friend, because after the main bully disappeared, so did two of the others. But now it’s started coming after her and she’s terrified of it. She can… Sense it. It’s full of hatred, and fear, and confusion-and it’s coming after her.
At this point the old man from the town meeting will call out to the girl from afar while away, asking if she’s alright. As he approaches, he says he was worried about her so came to check in. Seeing you, he’ll ask what you’ve learned about the disappearances so far. If you tell him, he’ll sigh and nod his head, saying he thought as much.
He’ll then tell you about the Elder Blood, saying it’s a gift the bloodline of the villagers held, but that it hasn’t been seen in at least six generations¬-until now. He says it gives those who have it strange and powerful psychic abilities which has historically kept their village safe from all kinds of calamities. However, the old man explains, the gift is incredibly dangerous. He says he was one of a select handful trained to recognize the Elder Blood in others, as an untrained mind with the gift can wreak untold havoc. It takes many years of training and mental discipline to control.
He’ll then explain that the girl has the gift, but cannot control it consciously yet. If you ask if the monster is just a figment of her psyche, he’ll shake his head and say no, explaining that the monster is very real. He’ll say that, very occasionally, one highly gifted in these abilities can tear a rip into another dimension, allowing monsters like the one you met to come through. The monsters, called Imitators… Well, they take on aspects of their victims, for a time. What they said before they die, memories of where home was. They eventually fade, but until they do it allows them to better hunt new victims with.
The old man says that you need to go to the tree where the rip is and defeat the monster that’s been coming out of it-but that you need to take him and the girl as well. The girl will be bait, the old man explains, saying that the two are inexorably linked seeing as she summoned it here.
The girl will protest at this, but the old man will look at her sharply and ask if she’d rather the monster hunt her while there are friendly adventurers ready to kill it, or to snatch her in the night like it did those other children?
She’ll pipe down at this, beginning to cry quietly, while the old man continues to explain that once the monster is dead he’ll try guide the girl into closing the rift she created. She needs strong emotions, such as fear, to utilize her powers and close the rift. If she doesn’t succeed, he concludes, more monsters will keep coming through.
Should you let the girl guide you to where the tree is (prodded by the stern old man), the monster will emerge from the rift, sniffing after her with a sightless face. It has the ability to faze between dimensions with a puff of black smoke as you saw in the child’s bedroom, and will attack with bites and its tentacles from its back (which have little toothy protuberances on them).
While you are fighting the monster, the old man will guide the girl in closing the rift. She will struggle but eventually it will seal, and she’ll faint with a bloody nose from the effort.
Once the monster is dead, the old man will come up to you for a quiet word. He’ll explain that if the village learns of what happened, they will want her dead. It’s been a long time since they’ve seen the Elder Blood, and they’ll be afraid of it. He asks that you keep the source of the monster to yourself, but tell them that it has been dealt with, so that he can take the girl on and train her as he was taught to do. It is a precious gift, the old man explains, and one which must not be squandered.
If you go back to the village and lie to the townsfolk, saying that you found and killed the monster, but omitting the other important details, they will all be relieved and pay you with some valuable relics they’ve passed down through many generations. However, the parents of the dead children will break down into tears, having been holding onto hope that perhaps they had just run away or were missing.
Should you tell the villagers the truth instead, they will work themselves up into an angry mob over what happened, and set out to kill both the old man for doing nothing to stop the “young witch” and the girl for her dangerous abilities. But, if they reach the girl, her stress will open another rift while her and the old man will vanish without a trace.
GM’s Notes:
Try make sure your players see the monster jump scare in the child’s bedroom. If you get the feeling they’re not going to go see all the rooms, put it in the first, or the second, that they visit.
If your players decide to follow up the path of the tree sap instead of visiting the girl, the locals will explain that there’s only one tree like that in the forest, before giving you directions. It is the tree that contains the rift, and the sap that was on the monster from where it crawled through.
The old man came to check on the young girl with the Elder Blood because he knows he was right about the blood and was worried that you investigating the monster would lead you to believe she was a witch and try to kill her or turn her in to the other villagers.
The girl is the one who accidentally killed her parents, when she was much younger. One day, while having a tantrum, they just disappeared. Other villagers eventually found their bodies in the forest later, at the bottom of a cliff, and had assumed they had slipped and fallen down while walking together. They didn’t believe the then very young girl’s story of her parents just disappearing.
If you’d enjoy more TTRPG resources like this Upside Down Portal free 40×30 battlemap & adventure, Luke and I are currently offering 520+ battlemaps for $39. It’s your chance to have a great deal on some of our most popular battlemaps! With over 520 total maps that are now also FoundryVTT ready, we guarantee that is something here for every GM—no matter what genre or setting you prefer, from grimy dungeons to beautiful overgrown ruins.
Paying just $39 rather than full price saves you over 96%! Take a look at all the extra maps you can download with one click here.
Ruins of the Eternal City Free DnD Battlemap & Adventure:
Heaven Beneath the Waves
While sailing the ocean, your ship sinks in a vicious storm. You lose consciousness in the drowning waves, and eventually wake washed up on a large, rocky outcropping with a tall lighthouse built upon it. Around you, there is nothing else; only blue ocean as far as the eye can see. There are no shorelines in the distance, nor birds that would indicate any are just beyond the horizon.
As you approach the lighthouse on a small path winding up from the rocky shore, you see it has two giant, gold-plated doors intricately inlaid with the images of meditating figures. Souls are depicted leaving the meditators in shining rays of light, and rising up towards the sun. The handles on the doors are a lighter color, worn by years of passing hands.
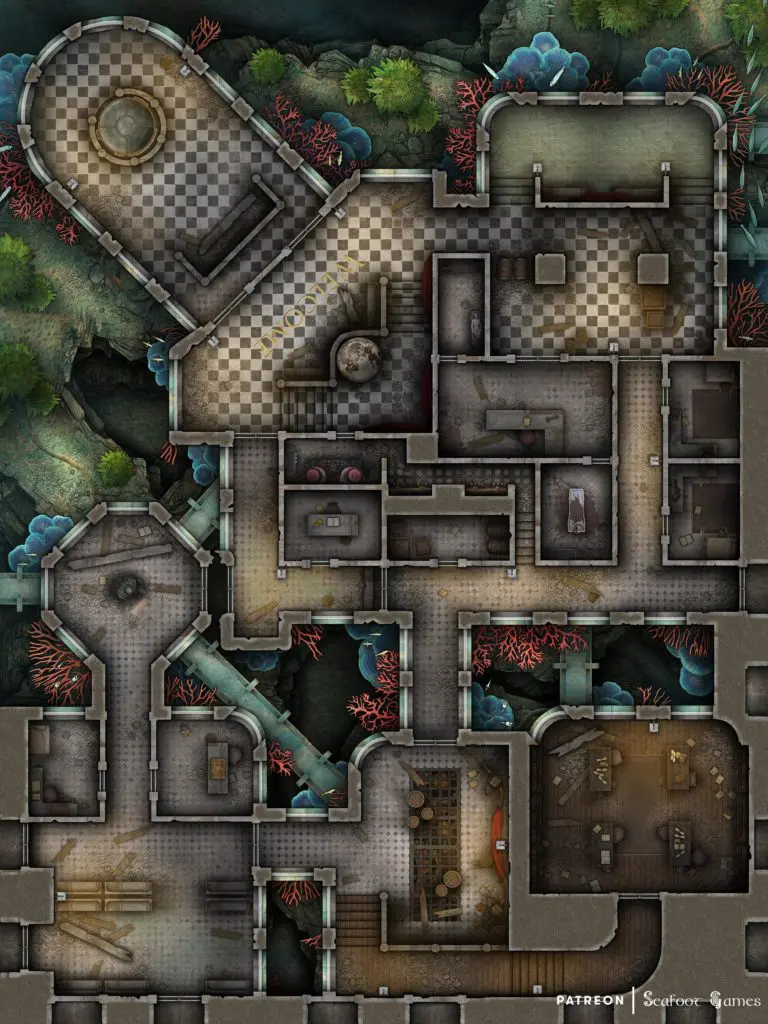
The doors are unlocked, and should you enter the lighthouse you find it’s lavishly decorated with sumptuous red velvet drapes, golden candelabras, and marble checker floors–though everything is covered in a thick layer of dust. There is a teleportation ring in front of you, set inside a circle of gold, with some kind of brass mechanical device to activate it. Next to it is the skeleton of a man, and beside him is an old leather-bound journal.
The last entry reads: I’ve finally made it up here, away from the savages, only to find the teleportation machine is missing a part! I’ve searched the entire island, and now have just two days’ worth of rations left. I hate being so close to escape, yet so far away from it. Still, I’d rather die up here, than return to what’s below. Yvonne, I will see you in the next life… I hope you waited for me. Forgive me for ever bringing us here.
There is a stairwell that leads up the lighthouse to a story above, as well as a basement lower down. The railing is made of intricately carved mahogany, and the walls are lined with gilded paintings depicting famous historical figures known for coming close to perfection. The top story is a room open to the elements, with a large, burning green flame–seemingly of magical origin–in a golden dish to guide vessels from the sea. Surrounding the edges of the platform are brass plant containers, with whatever once grew in them long-since withered and dead.
The lower basement is a simple room, with a bathysphere waiting with an open door; bobbing gently in a pool of water that leads down below the lighthouse. Bronze statues of men and women, once polished to a high gleam, surround the edges of the circular room. The figures are beautiful, depicting the height of strength, grace, magical talent, intellect, and other traits. All of them gaze towards the bathysphere.
Should you go inside the bathysphere, the door seals with a crank, and a lever sends it sinking beneath the water into the dark, inky depths. The glass sides of the bathysphere allow a breathtaking view of a sprawling complex, built on the ocean floor, as it follows a rail inside one of the buildings and surfaces inside. You step out, and immediately the smell of mildew, salt, seaweed, and rust overpowers your senses. What were once beautiful checkered marble floors are covered with rubble, and there is the constant sound of running water where it splashes in pools on the ground from leaks.
Large windows of thick glass reveal the ocean vista outside, and you can see large schools of fish swimming between buildings. The glass is very old, and covered in green algae, as well as cracked in places. Next to the windows are rotting red velvet curtains, torn and stained. This building was once as lavish as the lighthouse above, but it has long ago fallen into disrepair.
Strange noises echo down from rooms further in, like clattering metal or crazed laughter. People–or things–are alive down here with you. As you move deeper into the complex, you find yourself in a room with a globe of the world, the gold embossed letters “WELCOME” carved into the marble floor before you. A large, fancifully lettered poster on the wall behind the globe welcomes all who seek to shed the politics of the world above and instead perfect themselves; through enlightenment, one can ascend to a higher plain of existence; moving beyond frail mortality to something greater.
Then a group of three, hideously deformed people enter the room, searching as if they heard you make some kind of noise. They are pale from lack of sunlight, with stitches and scars covering their entire bodies, and some have extra limbs sewn on. The group’s leader, an emaciated woman, yowls when she sees you, pointing and yelling that “I knew a tarnished from the world above came down here! See! See how they walk among us, tainting our heaven with their imperfections! We must cleanse them!”. They attack, using sharpened pieces of metal and broken furniture, projectile weapons, as well as weak magical cantrips and what appear to be claws. Some even have tiny mouths on their backs or limbs, which they use to bite.
As you continue further in, you hear a man weeping. Should you go to investigate, you find what appears to be some type of medical facility where a man in a white, bloodstained robe is bent over the naked body of a woman. He is cutting it with a scalpel and sewing the body in places, making it hideously deformed, while sobbing and yelling at himself “Why won’t it work! He told me it would work!”. When he notices you, he immediately grows defensive, saying “Who are you? You can’t have her, she’s mine!” before attacking you with the scalpel and using ice cantrips. There is a note in the room outside, reading: My wife is imperfect, dragged down by the sins of her mortal coils. I need to change her, perfect her, so she can ascend with me. I will not leave her behind, no matter the cost! HE will show me the way… I will follow in HIS footsteps…
After that, the note becomes illegible. Should you continue to search the underwater building for the part needed to operate the transporter, you encounter more groups of maddened, deformed people. It looks as though they have been performing various experiments on themselves in an attempt to achieve perfection, though the results are grotesque.
You enter a foyer with two statues holding up some type of banner, though it’s too old to read. There’s a heavy, metal engraved door leading out of the room, but it’s locked and too heavy to be forced open, leaving the only option to climb a wooden staircase which leads to the library. When you enter the library, you see a key among the books on the table, but before you can take it the shadowy figure of a young man in a black robe materializes behind you. He greets you in a sibilant voice, appearing as if partially transparent; phasing in and out of existence.
The figure introduces himself as Asmim, explaining that he founded this place, and was the first to ascend to a higher plane of existence; achieving true immortality. His wife was next to follow suit, but sadly the power corrupted her and she now doesn’t believe they should share their knowledge with their followers because, if they, too, ascend, they will be powerful enough to threaten them.
She is stronger than him, and keeps him trapped down here. She has clouded the minds of his followers, driving them mad so they cannot ascend as they deserve. He, on the other hand, seeks only to share, Asmim explains. If you help him defeat his wife and get to the surface, where he can teach all he has learned to others seeking perfection, he will impart the knowledge of ascension to you as well; and all the power that comes with it will be yours!
Before you can ask too many questions, Asmim looks around as if scared. He explains hurriedly that she is looking for him, and he must go–but he’ll find you again before you leave. He warns you earnestly not to trust her, as she has become ruthless in her deceptions, before he vanishes.
Once you have the key, if you unlock the doors and go inside you encounter a crazed, half-naked fat man. He is waddling around slapping his bald head, and muttering to himself. When he notices you, he yells in a nasally voice “No, you can’t have it! I hid it here, he told me to prevent the disbelieves like YOU from leaving! You must overcome your flesh! You must, you must, you must!” Should you try to get past him, his belly will rip open and reveal a small hoard of slimy tentacles, which he attacks with. They seem to be coated with some kind of poison.
After he is defeated, if you continue further in you find a statue holding the part you need to fix the teleporter in the lighthouse. Only, before you can leave, the shining white figure of a woman appears between you and the door that was previously locked. She introduces herself as Isolda, and explains that she knows her husband has asked you for help escaping. She asks how much you know about ascension, before explaining that it is merely the next step on a long and arduous journey which might–one day–lead to godhood.
Isolda explains that one can ascend through perfection and inner peace, or through the belief of one’s followers. Her husband did the latter. When he realized what he had done, instead of seeking to change his ways, he fell to temptation and decided he needed to keep the power for himself. To this end, he led his trusting followers astray, teaching them things which would ensure they could never find inner peace and ascend. He relied on their worship to stay strong, but they were slowly driven mad on the dark path he led them down, and they became less than human. After that, they began to kill one another.
By the time he realized the consequences of having less believers, Isolda had become his equal, and could use her strength to keep him here. She hopes that, by doing so, his strength will continue to wane and he will become human again. Because it is power that corrupted him, she hopes that when he is once again mortal, he will finally see reason and she can redeem him before it is too late.
Isolda says that if you help him leave, he will only go and find worshippers on the surface to grow his power. He seeks to become a true god, and will do anything necessary to achieve that end, no matter how many souls he tarnishes along the way. She asks that you only take the part you need to escape, and leave this place without helping him, so that the consequences of his actions may take their course.
Should you ask if Isolda will teach you how to ascend, she shakes her head sadly, saying that until her husband is mortal again it requires almost all her strength to just keep him here. When she is free of that burden, she will find you and impart the knowledge–but she cannot do it sooner.
If you offer to kill Asmim, Isolda pales and stutters “no”, saying she would never want that, he is her husband. She loves him, despite what power has done to him.
When you leave, Isolda’s light blinks out behind you and she is gone. Once you’re nearly back at the bathysphere in the welcome room, Asmim reappears between you and the exit. He asks if you have considered his offer, and if you refuse he admits he may have lied to you earlier, but he is so desperate to get out of this cage that he will do whatever is necessary to escape–including teaching you the true secret to ascension. He can teach you now, and you can both have followers in the world above. His method will grant you far more power than that drivel Isolda believes.
Should you still refuse, Asmim growls in fury and says “If you will not help me leave, you will stay here and worship me!” He then summons shadows which peel off the walls and attack, while he moves around the room incredibly fast and tries to grab you and throw you across the room. He also creates vortexes of darkness on the floor, which suck you in towards them and cause you to move slower the closer you get. His aim is not to kill you, but to break your will through torture until you surrender.
If you ask Isolda for help, she will refuse to attack her husband, but she will heal you a couple of times–until she is so weak that she cannot expend any more energy, lest Asmim escapes.
Once Asmim is defeated, all the magic he has cast disappears in a heartbeat, and he falls to the ground; no longer cloaked in shadows, only a simple, frail, mortal old man. Isolda floats down to cradle his weakened form, telling you “You should leave this place now, I must try to make him see the light again before it’s too late” as she cradles his dying form in her hands.
If you attempt to kill Asmim after he’s become mortal again, Isolda defends him; using her powers to grab you, and push you towards the bathysphere, yelling “Begone with you!” before locking you inside and sending you on your way.
Should you instead side with Asmim, Isolda fights you using sunlight attacks and magical fire. When defeated, she vanishes in a puff of sparkling light. Asmim thanks you–but unless you had him teach you how to ascend before you helped him, he disappears before he honors his word; leaving only echoing laughter behind.
GM’s Notes:
Isolda and Asmim shouldn’t be too powerful, more on the level of ghosts with some magical abilities. When Asmim is returned to mortality and dying, Isolda seeks to help him ascend the right way before he dies and his soul is taken beyond her reach by the gods.
If the players assist Isolda, should any fail a death save later on she will appear to them and help them ascend instead of dying. It will not give them too much extra power, giving them abilities similar to a ghost, as it is just the start of their journey.
Should players learn how to ascend from Asmim, it requires a substantial number of worshippers who are loyal to the point of blindness. Should players attempt the process, it will change their alignment to evil–but it will work.
If you enjoyed this Ruins of the Eternal City Free DnD Battlemap & Adventure, Luke and I released the Hardcore GM’s bundle of 520+ large, 40×30″ DnD battlemaps (double the size of those in our famous Quarantine Bundle) with 255 adventures for $39. It’s a great deal on some of our most beautiful maps and adventures! I’m sure there’s content in it you’d have so much fun running for your friends, from large cities to underwater seascapes. Paying $39, rather than full price per map ($3 – $4.50 each), saves you over 98%! Take a look at all the extra content here.
Otherwise, I also recommend our latest bundle of system agnostic campaign sourcebooks, filled with battlemaps, locations, NPCs, loot, AND adventures! Luke and I love them so much, they have some of our favorite adventures in quite often grimdark or Lovecraftian horror settings. If you’re not sure about it, download our favorite campaign sourcebook for FREE—it’s about a super whacky location that will have your players roaring with laughter. That is, if their sense of humor is anything like ours 😉
Temple of the Forgotten Ones Free DnD Battlemap & Adventure:
Dark Side Effects
You receive a letter from Professor Klaus, the man responsible for resurrecting the inhabitants of Nevermore. It is stamped with a black wax seal engraved with an owl–the symbol of his family. Inside, the letter requests your company for an urgent matter that he needs your help investigating, with the promise of fair payment.
Should you go to the man’s small house near his laboratory, he welcomes you inside distractedly before inviting you to take a seat on one of the sumptuous leather couches. The room is dark, and filled with strange, half-burned items and paintings which survived the initial destruction of Nevermore.
Once settled, Klaus offers a pot of thick, shockingly sweet, tarry coffee before saying “I appreciate that you came to hear me out, especially after you’ve already risked yourself to save my town once. I would appreciate it further if you were to keep this conversation between us, regardless of if you accept my offer or not. You see, I am beginning to suspect something is terribly wrong with those I resurrected.
“Some–but not all–of the oldest among those I brought back are experiencing memory loss, missing time, and anyone else observing them describe their behaviour as that of… mindless undead. I don’t know what could be causing this phenomenon, but it’s getting worse. Because of this, I need you to acquire scrolls regarding the goddess, Everbreath. The problem is, the temple I discovered her teachings in initially has become overrun by cultists who have misunderstood her ways. They are violent, and willing to sacrifice innocents to bring back those they love.
“I need you to go to that temple, and bring me five books from the library there. They are bound in purple leather, and I need them at any cost. Those books are the only ones I haven’t read, for they deal with the goddess’s… darker teachings. However, if there are answers to be had, I suspect that is where they may be found.”
Should you enquire about the pay, the distracted-looking Klaus starts, before apologising and offering “I am the only one who knows how to access the treasure beneath the Lost and Found store. I have been using it to fund my endeavours, however I am willing to entrust the small hoard to you if it keeps my town alive and well. Will that serve?”
If you come to an agreement, Klaus nods and hands you over a map that leads to the temple, advising you not to regret the deaths of any therein. “They are ruthless and evil,” he warns, “and if you let a single one survive, they will merely sacrifice more innocents to resurrect their brethren later on.”
The journey to the temple takes two weeks via horseback, and you find the building carved into a huge cliff in a remote forest. There is a male and female acolyte standing outside, one wearing gray robes and the other black. As you approach, they hold out their hands and tell you to stop, saying that they do not recognise you, nor are you expected.
Should you explain why you’re there, the acolytes listen quietly before exchanging a few hand signals with each other. Then one nods, and invites you to follow them into the temple, while the other runs on ahead to talk to the other cultists inside. A perceptive adventurer might sense nefarious motives, but should you follow the acolyte in, he leads you past other cultists who watch with raised eyebrows as you’re taken deeper into the temple.
The acolyte leads you into a guard room containing three of their brethren, plus the acolyte who ran ahead. The three strangers block the entrance behind you, as the two acolytes meet to unlock the door of a cell; holding it open and advising you, in no uncertain terms, to get inside. Should you protest, they spit that “We know of your Professor Klaus, and he does not understand our goddess, Everbreath. As a result, she has delivered you to us as worthy payment for eternal life. We don’t advise you resist.”
Should you fight back, the cultists attack with prayers which drain your life, or daggers and bows which have been tipped in some kind of mild sedative.
If you kill one of the acolytes, the other wearing black robes will scream and say a prayer to their goddess. As they do this, one of their arms unravels like a ribbon blown into the wind and evaporates in black mist, leaving nothing but a bloody stump. However, as you watch, the acolyte you killed is resurrected–not as an undead, as the inhabitants of Nevermore are, but as living, breathing flesh; their wounds healed.
The guards at the back of the room are wearing similar gray or black robes, and should you kill any of them, those wearing black robes will sacrifice limbs, or say prayers with seemingly no price, to resurrect their fallen brethren.
Once the guards and acolytes are all finally dead, you continue to move through the temple, fighting similar cultists in black or grey robes. When you finally find the library, the five books Klaus is looking for feel warm to the touch and are bound by thin, gold chains. They are the same strange burgundy as Klaus’s eyes, not the purple he described.
When you emerge from the library, you hear crying and pleading from a large room down some stairs, as well as chanting. Should you go see what’s happening, you find the rest of the grey-robed cultists in a large room, firmly leading some peasant prisoners out of small chambers they were previously locked inside, and towards an altar overseen by three statues. Black robed cultists are standing at the sides of the room, while supervising the proceedings is a man in a burgundy robe, who watches with cold eyes the same color as Klaus’s.
If you interrupt whatever it is they’re doing, the burgundy-robed cultist holds up his hand to stop the proceedings, and says in a deep and echoing voice “You who have killed so many of our own; I am Grand Master Malfus. I will let you leave this temple safely, including with those books you have stolen, under the agreement that you allow us to bring back those you have sent to the next worlds.”
Should you ask if that involves sacrificing the terrified peasants, Malfus nods curtly, saying “What your Klaus refused to understand is that Everbreath is a goddess with three aspects. They are the Giver, the Taker, and the Gambler,” he gestures towards the statues before continuing. “Thus, there are many ways to resurrect the dead. One can sacrifice a life for a life to the Giver, pay the Taker with something precious–a limb, someone dear to you (though you’ll never know who she’ll take), years from your life, a part of your destiny… Or one can make a bet with the Gambler.
“If you win, the Gambler will grant you what you desire. But if you lose, it is said that she’ll take your soul to trade with the other gods for her own, fickle ends. You could end up in the hells, or worse–a war between gods. The tricky Gambler has even been known to grant her losers what they desire, while keeping their soul, if she is in a merciful mood–but this often leads to the losers not realising what they have lost until it is too late.
“Because of this, the way we are resurrecting the dead is the wisest, most merciful path. This way, the souls of those sacrificed can be judged by Death, and go to their afterlife. They are not payment for the Taker, or winnings for the Gambler.”
Should you point out that Klaus managed to harness the power of Everbreath without sacrificing, paying, or making deals, the man shakes his head and says “I doubt it, and I suspect so does he. More likely, he made a deal with the Gambler without realising it. That is why he needs the books dedicated to that aspect. Go, see if the man still has his soul. Moreover, see if anyone in the town he supposedly resurrected has their soul. I think you will find it… enlightening.”
If you ask how to tell if someone’s soul has been taken by the Gambler, Malfus grins and says that their eyes will look like his own.
Should you leave and let the cultists sacrifice the innocents, everyone you killed will be true-resurrected. However, they will keep their word, and let you leave in peace without holding grudges in the future.
If you instead fight and save the peasants, once the cultists are defeated Malfus surrenders and accepts death stoically. Before he is slain, he warns you that there is a sixth burgundy tome that was lost to time. If Klaus somehow finds it, he may be able to find a loophole in his deal with the Gambler–but in all his own years spent searching, he himself was never successful. Malfus remarks that he hopes Kalus succeeds where he failed.
When you return the books to Klaus, he sits and his face pales as he reads them. Then he says in a soft voice “It is as I feared. The souls of those experiencing mindlessness are slowly drifting away from their bodies. Left unchecked, they will be taken by the Gambler in payment. Everyone I resurrected must have made a bet with her on the other side–and those who lost are the ones experiencing these symptoms now.” Then he glances at his eyes in a tarnished mirror, before grimacing at his own reflection.
Should you explain what Malfus said before he died, Klaus stands, driven to action. He hands you a silver locket filled with pictures of a family, explaining that it belonged to the man who hid the treasure before the town burned down, and that wearing it will reveal the entrance to the treasure hidden beneath the Lost and Found store. Then he tells you that he must begin packing his things, as he must find the sixth book before it’s too late.
If you question his ability, he remarks that he was the one who discovered a forgotten temple to an obscure goddess, and if anyone will be able to find the sixth book, it will be him.
Before he leaves, he grasps your hand in both of his in a firm handshake, thanking you sincerely.
Clerics worshipping the Gambler were burgundy robes, while those who worship the Taker wear black, and those following the Giver, gray. Thus, only those in black robes can make personal sacrifices to bring back those your players defeat, and only those in grey robes can sacrifice prisoners for the same thing.
If your players don’t kill Malfus, Klaus will have heard of the sixth missing book and mention it and his journey to find it after giving them the locket to access their treasure.
If you enjoyed this fTemple of the Forgotten Ones Free DnD Battlemap & Adventure, Luke and I released the Hardcore GM’s bundle of 520+ large, 40×30″ DnD battlemaps (double the size of those in our famous Quarantine Bundle) with 255 adventures for $39. It’s a great deal on some of our most beautiful maps and adventures! I’m sure there’s content in it you’d have so much fun running for your friends, from large cities to underwater seascapes. Paying $39, rather than full price per map ($3 – $4.50 each), saves you over 98%! Take a look at all the extra content here.
Otherwise, I also recommend our latest bundle of system agnostic campaign sourcebooks, filled with battlemaps, locations, NPCs, loot, AND adventures! Luke and I love them so much, they have some of our favorite adventures in quite often grimdark or Lovecraftian horror settings. If you’re not sure about it, download our favorite campaign sourcebook for FREE—it’s about a super whacky location that will have your players roaring with laughter. That is, if their sense of humor is anything like ours 😉
While traveling along a stretch of highway in the countryside, you encounter a young man huddled against the cold. His clothes are little more than rags, and his hair and skin are matted with mud. He looks to be in a sorry state, and as soon as he sees you approaching, he draws your attention by raising one hand.
“Please, help me,” he begs as you draw near. “There’s a powerful witch living in the nearby swamp who’s been kidnapping people! I barely managed to escape with my life, but there are others being held there even now. You have to help them!”
Should you inquire further about what this witch can do, he tells you she can summon beasts from the swamp to do her bidding, and create clouds of poison that choke and wither her enemies.
If you decide to assist him, the young man is visibly relieved. “Thank you, kind stranger. I am called Meddi. Come, her home lies this way.” Meddi ambles along ahead of you, leading you away from the road and into the woodlands. Over the course of hours, the surroundings change from lush forest to murky marshlands.
Meddi beckons you on, certain of the path he is taking. Should you have expertise in tracking, you may be able to detect the recent prints of many large animals moving along this path. Meddi waves away your concerns though.
“They’re harmless enough until Agima puts a spell on them. That’s the witch’s name. She’s lived here for many years but never done anything like this before. She must have gone mad. We have to free the villagers from her clutches!”
You continue through the swamp until Meddi crouches low behind an old stump and points to some stone buildings ahead. Huge trees grow in the area, their branches clutching at the sky like great hands. They shade the swamp from the sun, leaving it a grim, bleak morass.
“There,” he whispers. “That’s where she lives. I escaped from the large building at the far end. That’s where she’s keeping the others.”
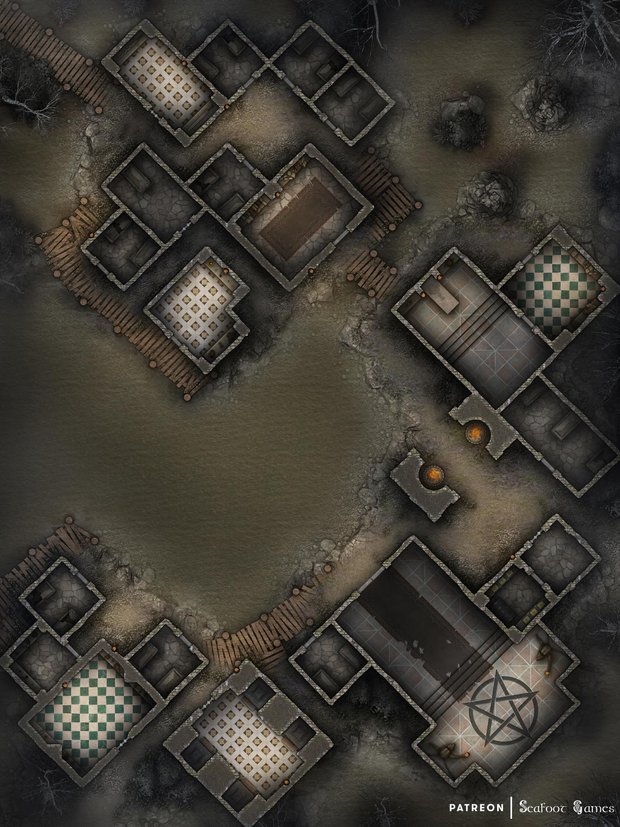
Should you proceed into Agima’s domain, you move forward across a rickety wooden bridge that leads over the dark waters of the swamp. The buildings stand on land barely above water level, with moss and mud visible on all of the walls.
If you have skill with traps, or just a knack for spotting them, you might notice a number of traps set along the path! If you fail to avoid them, they attempt to viciously slash you and may even have mild poisons on them. The interior of the buildings repels you with the stench of refuse and clumps of decaying vegetation. They clearly haven’t been used in a long time.
A short bridge spans a creek that connects to the larger body of water. If you’re perceptive, you might spot a creature lying in wait for you in the murky waters. Should you cross the bridge without being stealthy, a huge alligator lunges at you from the turgid waters!
Should you survive that, you can go around the corner and see the large building Meddi pointed to just ahead. An arch stands between you and it, and should you have a talent for magic, you might recognize some runes on the inside of the arch, carved into the stone.
If you blunder in, the runes glow and you feel a darkness assail your mind, trying to weaken you with images of despair! If you resist, or found a way around the arch, the large building stands before you. You may notice Meddi has followed you from a safe distance, and he gives you a tentative thumbs-up when you turn to look at him.
The doors to the large building are closed, and if you’re perceptive, you might spot another trap on them! If you fail to avoid it, the trap will drop rocks on you as you enter the building.
Once inside, you can see this place is well-tended, with no sign of the muck from the other buildings present. Strange tapestries line the wall, made of some kind of red ropes that look disturbingly like intestines! Moving forward carefully, there seem to be no more traps, no more beasts, yet no sign of Agima either. Behind you, Meddi stands in the doorway.
“You’re more cunning than I thought,” he remarks, all indications of his timid nature gone. He looks at you with a devious grin, even as his form changes to a vicious old woman who seems barely human, dressed in homespun garments that appear to be made out of the parts of people! “You’ve made it through my traps and even killed my pet ‘gator! You’ve been more trouble than it was worth to lure you here, but I’ll soon have your guts adorn my hall!”
Agima attacks with her foul magic as swamp zombies rise from the murky ground outside to assault you as well. Should you survive, you can check the nearby buildings to find that while she was lying about who she was, she hadn’t lied about kidnapping villagers, for there are a dozen people held prisoner here. Should you set them free, they thank you profusely and promise to reward you properly at their village after you leave. Searching Agima’s place reveals a stash of coins and gems she’d taken from her victims over the years.
GM’s Notes:
Start in the top left, moving through the first area of buildings with the traps in them. Agima attacks in the building with the pentagram in the bottom right, with other buildings in the bottom left housing the captive villagers. The swamp zombies are fodder to keep the player(s) busy while she hits them with spells.
If you enjoyed this Witch’s Swamp Necropolis Free 40×30 DnD Battlemap & Adventure, Luke and I released the Hardcore GM’s bundle of 520+ large, 40×30″ DnD battlemaps (double the size of those in our famous Quarantine Bundle) with 255 adventures for $39. It’s a great deal on some of our most beautiful maps and adventures! I’m sure there’s content in it you’d have so much fun running for your friends, from large cities to underwater seascapes. Paying $39, rather than full price per map ($3 – $4.50 each), saves you over 98%! Take a look at all the extra content here.
Otherwise, I also recommend our latest bundle of system agnostic campaign sourcebooks, filled with battlemaps, locations, NPCs, loot, AND adventures! Luke and I love them so much, they have some of our favorite adventures in quite often grimdark or Lovecraftian horror settings. If you’re not sure about it, download our favorite campaign sourcebook for FREE—it’s about a super whacky location that will have your players roaring with laughter. That is, if their sense of humor is anything like ours 😉
When visiting a small city in a remote area, you see a poster looking for mercenaries to investigate a string of murder-kidnappings in the surrounding villages. It advises you to contact the city guard to learn more.
Should you speak with them, the guards inform you that remote villages near the Forbidden Forest have been under attack by undead. The monsters have been killing and kidnapping innocent men, women, and children, before dragging their bodies back to their dark abode in the forest. The guards will pay you handsomely to go investigate and put a stop to it.
The journey to the attacked villages takes about a week from the city, and should you talk to any of the locals within them (though many have left to relocate, and others are packing their things to leave) they tell you that the nearby Forbidden Forest is an evil place, haunted by vengeful ghosts. Should you ask why they’re vengeful, the locals explain that it has always been so, ever since the village within the forest was burned down and its inhabitants massacred a couple of generations ago. They believe someone or something must have angered the spirits recently to invoke their wrath so, for until now they lived at an uneasy peace by not trespassing in the forest and the spirits wouldn’t bother them.
Should you follow any tracks left by the latest undead kidnapping, they lead out from the village and deep into the Forbidden Forest. The forest itself is dark and cold, with dying trees dripping sap from twisted limbs, and muddy ground that sucks your feet in as you walk. Your footprints fill with unnerving red water behind you. As you follow the tracks deeper into the forest, a mist begins to shroud everything, and it seems to move on its own accord.
Eventually the mist completely surrounds you, muffling sound and obscuring your surroundings. When it finally fades, you find yourself at the entrance of a small village with quaint two-story buildings, flower baskets on windows, and dark cobblestone streets. There is a large arch above the main road, with a fancifully painted “Welcome to Nevermore”. As you enter however, you see that everyone within it–the elderly, children, and even pets–are undead.
When the first man sees you, he yells to an undead boy “They’ve come for us, run, Timmy!”, sending the child running away to hide inside a house while the rest of the town begins screaming and fleeing in a panic.
Should you manage to calm any of the fleeing inhabitants down, they introduce you to their mayor, Wilbert. He is a thin old man with a stoop and a missing eye which now is home to a worm who inhabits the empty socket. When he meets you, he tips his hat at you, exposing a cracked skull beneath.
Wilbert invites you inside one of the buildings to his office, explaining that he alongside the other villagers were massacred in an invasion long ago, which is when their humble town was struck off the map. He cheerfully says that their “professy” is the one who found a way to bring them all back to life, and points through a window to a cliff above the village; explaining that he lives in the building at the top of it.
Wilbert’s cheerful manner sobers, and he says that unfortunately the first few the professy brought back weren’t… quite right. He’s been trying to fix the bad batch ever since, and recently brought them up to his manor for more experiments towards that end, but they took him captive instead! Now the bad batch have been going out beyond the mists that protect the town, and bringing back more dead then reanimating them as evil using the professy’s technology!
Wilbert begs you to stop them before other living folks such as yourself come here and kill the inhabitants of Nevermore in retribution, for good this time. He says he doesn’t know what they can offer you as thanks, but is sure the villagers could pool together their goods as some form of payment if you help them put an end to these misdeeds.
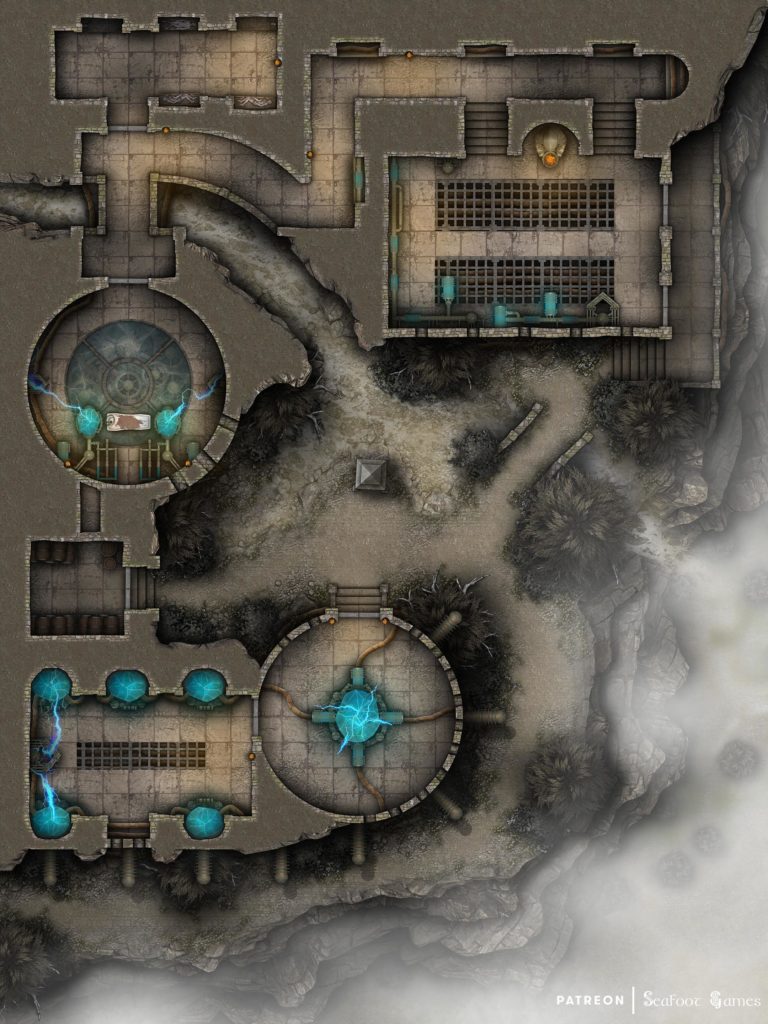
When you travel up to the professor’s lab, the undead within it are mostly mindless, and victims from the recent raids of nearby villages. Those amidst the bad batch lead the smaller groups of mindless undead, and are as cognizant as the friendly undead down in Nevermore. They are surprised to see you–a living stranger–and sneer contemptuously that they’ll fix you once you’re reanimated.
Once you’ve fought your way through the laboratories, you find the professor bound and gagged in a circular room with cogs ticking beneath a clear floor. He is a man in his forties who is very much alive, wearing frosted white spectacles and a worn dark suit. Guarding him is the leader of the bad batch; a towering brute of an undead half-orc, who has been performing extra experiments on himself to perfect his form. He has increased his size, and grafted on extra limbs from other bodies so he looks more monster than man.
The hulk of a beast observes coldly that you’ve done well to make it this far, and offers you a deal. He says that if you join him, he will make you perfect; remove all the weakness of the living, so that you feel no more pain, no more hunger or thirst, and never age. In return, you can help him bring this gift to everyone else, as he and his friends have been doing. Imagine never having to watch a loved one die again, and knowing that if they do, you could bring them back as easily as fixing a broken vase. Of course, to be perfected, you would need to die first. He can make it fast.
Should you refuse, he growls at you to “suit yourself” before flicking on the lightening machine in the corner of the room; sending out blue bolts of electricity shooting across the ground. He then grabs the professor and climbs up the wall onto the ceiling using his extra limbs, waiting for the lightning to kill you.
Once the lightning machine is disabled he growls angrily and jumps down, attempting to tear you apart with his many, bare hands.
After you’ve defeated the last of the bad batch and freed the professor, the man stands up and dusts off his clothes. He thanks you sincerely for rescuing him, saying that he didn’t expect any others among the living to have compassion and understanding to his work here, and the plight of Nevermore.
His face grows sad as he looks down at the body of his captor, and he sighs, saying that it is tragic he couldn’t figure out how to fix them. They were good people, before the massacre. But he supposes it couldn’t be helped, and he is glad that their misdeeds will stop drawing attention to their humble village which is better off left forgotten.
As a reward for your help, he invites you to return to their village whenever you wish. If ever you are in need, they will treat your wounds or give you a place to hide. In addition, he takes off his frosted white spectacles and hands them to you, explaining that they grant their wearer the ability to see into the ethereal realm, as well as see and speak to ghosts. When used, they appear crystal clear to the wearer and don’t obscure their vision.
If you go back down to the village, the professor will accompany you. Once there, mayor Wilbert is incredibly grateful that you helped Nevermore, and sheepishly presents a reward of hobbled-together heirlooms or shiny trinkets, apologizing that they haven’t had much outside trade for… well, quite a few years now.
This adventure was made for our Nevermore Adventurer’s Guide. If you’d like to know more about the location and NPCs (as well as a greater campaign), consider buying the guide individually or grab it as part of our great-value $39 guide bundle!
If you enjoyed this Reanimator’s Clifftop Laboratory Free DnD Battlemap & Adventure, Luke and I also released the Hardcore GM’s bundle of 520+ large, 40×30″ DnD battlemaps (double the size of those in our famous Quarantine Bundle) with 255 adventures for $39. It’s a great deal on some of our most beautiful maps and adventures! I’m sure there’s content in it you’d have so much fun running for your friends, from large cities to underwater seascapes. Paying $39, rather than full price per map ($3 – $4.50 each), saves you over 98%! Take a look at all the extra content here.
Otherwise, I also recommend our latest bundle of system agnostic campaign sourcebooks, filled with battlemaps, locations, NPCs, loot, AND adventures! Luke and I love them so much, they have some of our favorite adventures in quite often grimdark or Lovecraftian horror settings. If you’re not sure about it, download our favorite campaign sourcebook for FREE—it’s about a super whacky location that will have your players roaring with laughter. That is, if their sense of humor is anything like ours 😉
The Plague of Justice Free DnD Battlemap with Adventure
The Plague of Justice
While walking the streets of a dwarven city you notice a elderly man have a coughing fit before falling down on the ground. Everyone moves away from him, none coming to his aid. If you approach him to try and help him, some of the bystanders warn you away, claiming that there’s a sickness spreading in the city and to steer clear of the elderly man.
Regardless of if you help or not a couple minutes later several dwarves show up with a stretcher wearing apothecary masks. Two of them put the old man on the stretcher as the third man reassures the crowd that the city’s best alchemists are working on a treatment for this new sickness, and not to worry.
If you question the apothecaries, they’ll say they don’t have time to go into details but if you want more information or are looking to help, you should go visit the barracks of the Silver Fist who are in charge of dealing with the sickness. They’ve even set up a quarantine camp adjacent to the barracks to keep the infected from roaming the tunnels while a cure is sought.
When you get to the barracks and explain why you’re there, a dwarven man escorts you into a large chamber where three other dwarves are standing around a table having a conversation. They’re all wearing some form of chain mail armor with tabards of the Silver Fist. They motion you over, with the high paladin called Gudrun explaining that the sickness started spreading a few weeks ago. As best they can attain, the sickness may have come from the old catacombs as the first infected was a gravekeeper. He was one of a small group of individuals that are trained from youth to maintain the catacombs and care for the dead.
This is of course where the first problem began, the catacombs are a sacred place and only those dwarves trained to be gravekeepers may enter. It is foretold that any dwarf born of the city who enters the catacombs without this training and before his time may have his soul put to rest just like the dead that already reside there.
Unfortunately this first infected gravekeeper is now dead, while all the others have gone mysteriously missing and the sickness continues to spread. The apocotheries of the city are hard at work looking for a cure, but the sickness is mutating too fast for them to quickly find a solution without a sample of the original non-mutated disease.
Gudrun continues that without any of the gravekeepers available he was about to risk sending some of the Silver Fist acolytes into the catacombs as he could wait no longer, however with your arrival you have given him a second option. Gudrun looks you in the eyes sternly and asks if you’d be willing to enter the catacombs and look for what may have caused this sickness, as well as retrieve a sample with a small hand-held device he can provide. The city would be ever in your gratitude and the Silver Fist itself would be willing to have a special weapon crafted just for you.
You find the entrance to the catacombs at the end of an abandoned district of the city, a set of stairs carved into the stone that leads you deeper into the mountain and under the main portion of the city. Deeper in, corridors split off creating a maze-like structure. After traveling the corridors for several minutes you find your way to a large bronze door engraved with the silhouettes of dwarven ancestors, and on the other side you can hear muffled arguing.
When you open the door you find five dwarven individuals who are covered in rags, with vile weeping sores, and deformed bones jutting from their bodies. Somehow however, they seem to be doing just fine. They look confused seeing you, before immediately attacking while incoherently yelling about some type of justice.
Past the deformed dwarves is another bronze door that bars your way. When opened, it reveals a large chamber covered in ichor and fleshy tendrils. The air is full of buzzing as swarms of small insects fly around, and another deformed dwarf wearing a damaged suit of full plate and wielding a scythe is standing upon a raised platform.
When you enter, the dwarf turns to face you claiming nothing will stop justice from being done to those who have, for so long, avoided it. If you question him about who he is and what he means, he’ll explain that his name is Daroc and he was once a gravekeeper but was kidnapped by a wealthy doctor called Rogar who experimented on him with horrible diseases.
Daroc continues that when it was clear Dr. Rogar was not getting the results he wanted, he tossed him into the catacombs to die. Only he did not die, rather he became something new.
Because of this, Dr. Rogar must pay for his crimes and will suffer as he did with the disease he was infected with.
If you explain that the diseases he’s released are killing many dwarves in the city. He calmly explains that they’re collateral damage and when Dr. Rogar has been made to pay, he will personally bury each one of the fallen dwarves in the catacombs so that they may rest in peace.
If you ask about the other gravekeepers, Daroc explains that his brothers and sisters were easily swayed to join him, all but the one–who escaped, releasing the sickness too soon into the city. However, the sickness is ready in full now and the time of justice is close at hand.
He’s solemn at the fact you killed his deformed gravekeeper brothers and sisters, but also suggests that you may be swayed to join him, caressing a bony protrusion on his wrist that is slowly dripping some type of contagion. He, after all, will need a lot of help burying the bodies of the fallen after he is done.
If you attack Daroc, he fights back with his scythe as well as commands several different swarms of lifesucking flying insects to attack you.
After he’s dead, the chamber shakes as the fleshy strands within retract and start to wither and die before turning into black ash which quickly dissipates. When you return to the Silver Fist, Gudrun explains that it’s a miracle and that the sick just suddenly recovered. He’s keeping them in isolation for the next week to be certain but they aren’t showing any symptoms of the sickness.
If you explain what happened in the catacombs he’ll be shocked, explaining that he’ll look into Dr. Rogar and his dealings. He also holds to his agreement about having special weapon crafted for you.
If you enjoyed this The Plague of Justice Free DnD Battlemap with Adventure, Luke and I released the Hardcore GM’s bundle of 520+ large, 40×30″ DnD battlemaps (double the size of those in our famous Quarantine Bundle) with 255 adventures for $39. It’s a great deal on some of our most beautiful maps and adventures! I’m sure there’s content in it you’d have so much fun running for your friends, from large cities to underwater seascapes. Paying $39, rather than full price per map ($3 – $4.50 each), saves you over 98%! Take a look at all the extra content here.
Otherwise, I also recommend our latest bundle of system agnostic campaign sourcebooks, filled with battlemaps, locations, NPCs, loot, AND adventures! Luke and I love them so much, they have some of our favorite adventures in quite often grimdark or Lovecraftian horror settings. If you’re not sure about it, download our favorite campaign sourcebook for FREE—it’s about a super whacky location that will have your players roaring with laughter. That is, if their sense of humor is anything like ours 😉
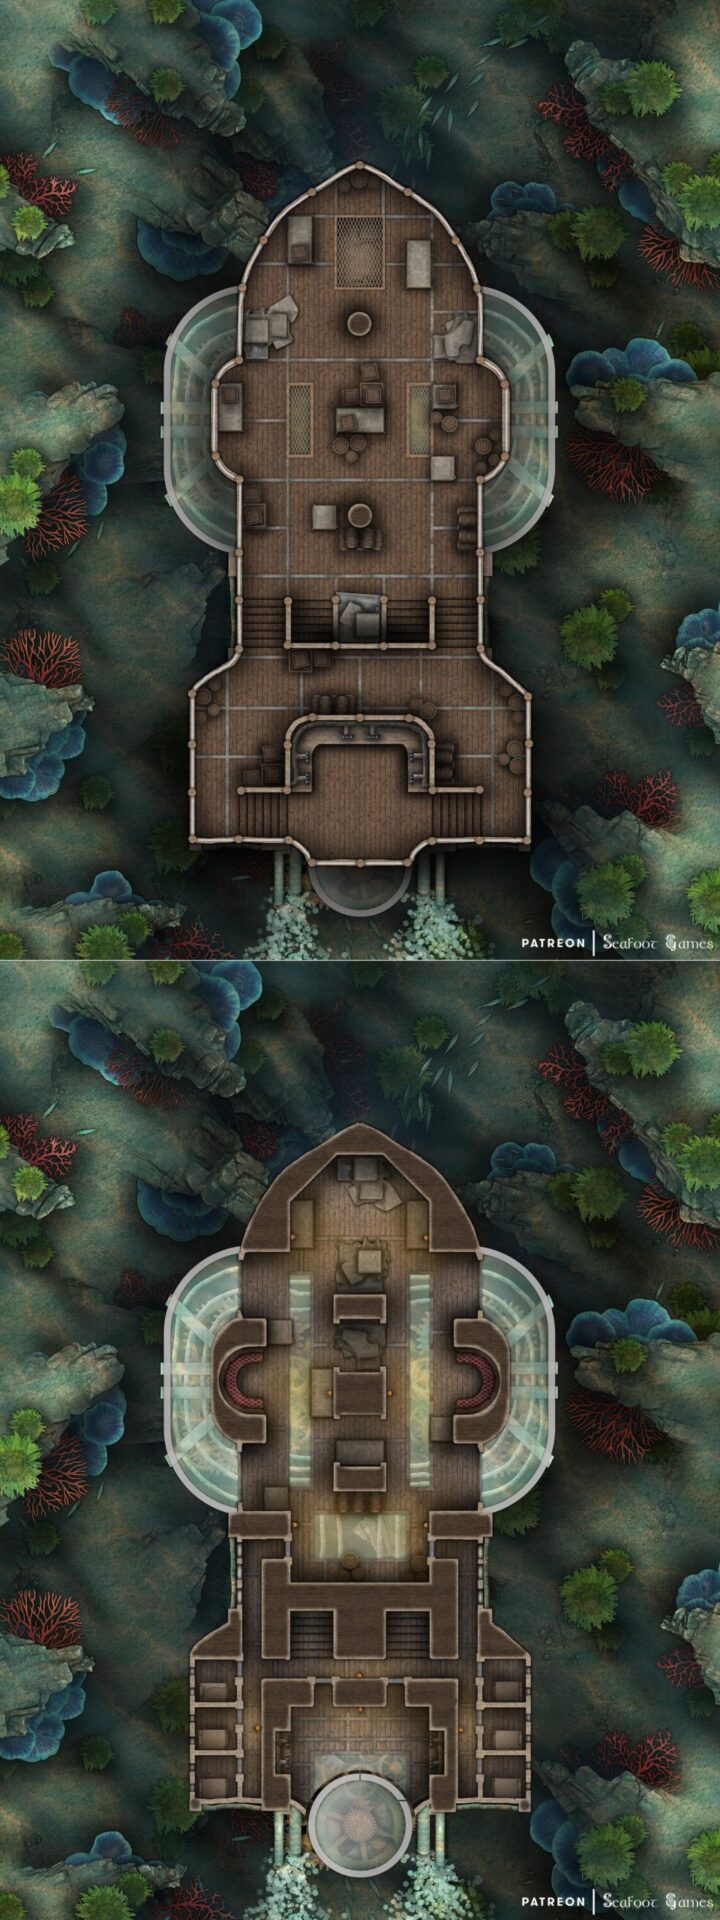
Gnomish Submarine Free Multi-Level DnD Battlemap with Adventure
They Wait Below
While at a port, you see a large group of dwarves hauling a strange looking ship up out of the water using a giant crane. The ship is unlike any you’ve ever seen, being fully-enclosed with a large sphere of glass built into its hull, which makes up at least a 3rd of it. The strange vessel appears damaged however, and if you ask any of the bystanding dwarves about it, the dwarf you’re speaking to shakes his head and says that they’ve invented a new type of vessel–one which can travel under the water, not above it. Only thing is, none of the ones they’ve sent out have returned. Just this one.
When the submarine floated to the surface a few knots out from the docks, the dwarf explains, just one member of the crew was left on it. Everyone else was just… gone. And the survivor who sailed it back was stark, raving mad. They couldn’t get a word of sense out of him. They’re taking the submarine in for repairs, but they’re going to need to send her back out again when she’s fixed to figure out what happened and try to reclaim the missing vessels–otherwise his years of hard work and family’s inheritance will have been wasted for nothing. He can’t allow that to happen. If they can just figure out what in the bloody hells is going on, his invention will do the world a lot of good.
If you ask him what he means, he explains that he’s the dwarf who designed the vessels, and it’s his business which is about to fail. He then catches himself, and introduces himself as Svet, shaking your hand. He seems to look at you properly for the first time, and observes that you’re a mercenary, before asking if you might be willing to go down with his men once the vessel’s repaired, to keep them safe in case things go amiss. He doesn’t have terribly much gold left after he sunk it all into this new venture, but he says he has enough to pay you well for your efforts.
Should you agree, he thanks you, before saying to meet him back here several days hence to head out. In the meantime, he suggests you speak with the survivor of the last venture, in case he’s recovered enough to talk some sense. His name is Val, and he’s being cared for at the local church.
When you get to the church and ask after Val, the nuns there lead you to a locked room. Inside it is the dwarf, sitting in a bed curled in a ball, rocking back and forth and mumbling to himself in a language you don’t know and no-one else seems to know, either. The sound of it gives you shivers on your skin, and feels… wrong. His hands are both bound in bandages, and there are strange symbols written on the walls in blood. They make you feel dizzy looking at them.
Val refuses to acknowledge your presence, and looks through you. Just as you give up to leave, he looks you straight in the eye and warns you that the darkness is alive. Should you ask what he means, he goes back into his dazed state and begins speaking the weird language again.
Once you set out on the submarine, despite the repairs you can make out strange sentences in an unknown language written in blood on the walls similar to what were in Val’s room. It’s stained the timber and, despite all their attempts to clean them off, the words couldn’t be removed.
As the ship descends with you and the dwarven crew, following the path of the submarines which went missing, the sea grows dark around you. After several hours travelling deeper and deeper into the darkest depths of the sea, you begin to hear loud groaning noises from outside the submarine, as if large creatures are swimming by–but if you try to look out from the glass interior you can’t see anything.
Shortly afterwards, the lights on the vessel start flickering off and on again. The few dwarves in your section (the rest are elsewhere on the submarine) start getting nervous, while some among them become paranoid and claim they’re hearing something whispering–can’t you hear it?
You catch movement out of the corner of your eye beyond the glass, and can see dark shapes moving off in the distance in the water. Soon after one of the dwarves yells in fear, claiming they saw a face outside the ship.
At this point, the flickering lights go out completely, and the submarine stops moving. Nothing wants to work if you try to engage the magic again. There is a noise at the back of the ship, as of something entering through the airlock. But if you move through the still-dark submarine to inspect it, some of the dwarves who were meant to be stationed nearby there have gone missing. You also find some bloodstains, drag marks, as well as a couple of bodies which have been mauled to death brutally, with claws and bite wounds that look like some kind of animal.
You hear screams from elsewhere in the submarine, and if you rush towards them you find a monstrous fish-man standing over the bodies. It has large, bulbous eyes, scaly skin, a terribly toothy maw, as well as poisonous spines all over it. It attacks using its teeth and claws, until it’s injured, at which point it shoots spines at you from its hands while attempting to flee into the air vents.
There are five of the creatures on the ship in total. They kidnapping or murdering those who are too difficult to drag out into the dark abyss.
When you kill the last monster, as it dies it says something in that strange, terrible language the mad dwarf Val was raving.
Once all the monsters are dead, the lights flicker back on and the ship’s engine begins whirring again. In front of the submarine, scattered across the sea floor, are all the other submarine wrecks. Amidst them you see the shadows of creatures the size of dwarves…
GM’s Notes:
R’lyehian is the language Val speaks, and it’s also what’s written on the walls of the submarine. The monsters your players encounter are Deep Ones.
Whoever hears the dying words of the last Deep One begins getting unsettling dreams every night, which involve darkness and great, malevolent tentacles in primordial muck. The dreams slowly grow more and more disturbing the longer they plague their victim; eventually a voice within the visions beckons the dreamer to “come to me”.
Once the lights are on again in the ship, your players might notice that there are fresh symbols on the walls, which some of the dwarves who claimed to hear whispering appear to have written in their own blood.
If you enjoyed this Gnomish Submarine Free Multi-Level DnD Battlemap with Adventure, Luke and I released the Hardcore GM’s bundle of 520+ large, 40×30″ DnD battlemaps (double the size of those in our famous Quarantine Bundle) with 255 adventures for $39. It’s a great deal on some of our most beautiful maps and adventures! I’m sure there’s content in it you’d have so much fun running for your friends, from large cities to underwater seascapes. Paying $39, rather than full price per map ($3 – $4.50 each), saves you over 98%! Take a look at all the extra content here.
Otherwise, I also recommend our latest bundle of system agnostic campaign sourcebooks, filled with battlemaps, locations, NPCs, loot, AND adventures! Luke and I love them so much, they have some of our favorite adventures in quite often grimdark or Lovecraftian horror settings. If you’re not sure about it, download our favorite campaign sourcebook for FREE—it’s about a super whacky location that will have your players roaring with laughter. That is, if their sense of humor is anything like ours 😉
While sailing the seas, the ship you booked passage on docks at a large, mediterranean island to resupply. The captain recommends you go and explore the city as the resupply could take a few days and the island’s known for great food in taverns that are built into the sheer stone cliffs, as well as warm beaches to relax on, frequented by beautiful women who work at very fine brothels. There is even a renowned library, if you are so inclined.
As you leave the docks, a woman wearing a purple cloak in gold trim runs up to you. She has a few scrolls tied to her waist, as well as a satchel of books. Her eyes are purple, and she has long, black curly hair. The woman, panting, introduces herself as Ariadne, and says that you look like a warrior. She says she desperately needs your help, explaining that her husband has been sent into the island’s labyrinth to be eaten by a monster and she needs you to save him.
If you ask what she means, she gets a pained look on her face and explains hurriedly that the city sends its worst criminals to die at the hands of a terrible monster living in an underground labyrinth. Her husband was about to uncover the corruption of the royalty in this city, and before he could show his evidence he was kidnapped in the middle of the night and accused of treason.
Few of the locals believed her claims of his innocence, and those who did said they could do nothing against it. He was sent into the labyrinth earlier today, and she has no-one else to turn to for help. She has bars of gold and jewels–the fortune of her household–which she will pay you gladly if you save him!
If you ask what the monster in the labyrinth is, she explains that he is called Minotauros. He’s a being with the head and strength of a bull, but the cunning of a man. He was a ferocious seafaring conqueror, long ago, who’s atrocities pleased a dark god. They say he made the seas red with blood from the islands and coasts he raided, and as a gift from that god he was transformed into the immortal monster he is now.
Minotauros was unstoppable, until a powerful cleric met him in battle on this very island, and cursed him. Now, he is condemned to forever wander a labyrinth the cleric’s god made, and never find his way out; killing and devouring any who stray inside.
If you ask how Ariadne thinks you can save her husband, she says she’s been reading as much as she can about the labyrinth and Minotauros since her husband was abducted, and pulls out one of the scrolls from her belt as she speaks. She unravels it; revealing an illustration of a stone statue of a bull’s head, with hollow marks in the floor in front of it. Ariadne points at it with shaking hands, explaining that from what she’s read, the marks in the ground are for four magical keys. They are hidden throughout the labyrinth, and if you collect them all you should be able to open up some kind of rear passage to escape.
If you point out that none have survived the labyrinth, and ask where the information comes from, Ariadne pales and stammers, saying that perhaps someone got out once, long ago, using these keys, which is why they wrote about them. Or perhaps it was notes left by the cleric who locked Minotauros away.
Should you ask about bringing a spool of rope in behind you, so that you may find your way out the way you came in instead of relying on the keys, Ariadne shakes her head angrily, saying the labyrinth doesn’t work like that–but she doesn’t have time to explain or answer any more questions, her husband could already be dead and you need to hurry if you’re going to save him in time!
The journey to the labyrinth takes a few hours on foot from the city, up steep and winding pathways to the high hills at the top of the island. While walking, Ariadne describes her husband to you, saying he is a large man with burly muscles, short curly black hair, and a black beard and moustache. She doesn’t know if she guards stripped him of his clothes, but he is likely wearing the purple clothes of their household and has a signet ring with a seagull on it. His name is Thesius, she tells you.
When you arrive at the labyrinth, it is a huge structure, with a large stone façade as its exterior. It’s built into the cliff, and unguarded. If you ask about that, Ariadne explains quickly that when the prisoners are delivered they are guarded by a large retinue of warriors from the palace until they’re lost inside. However, you can tell she’s hiding something–but she won’t elaborate if you ask her, instead insisting that you need to hurry.
You can see a couple of metal doors, engraved with a bull’s head and the curving corridors of a labyrinth in the metal, in-between stone columns. When you place your hands on them, your hands begin to pass through–and you can’t pull them out again. You find yourself being slowly sucked through, no matter how hard you try to pull away, and the experience is excruciating. If you give in and step through quickly, the experience will be easier.
Once inside the labyrinth, the air is oddly warm, and humid. Sweat begins to cling to your skin, and you can hear the sounds of dripping water from elsewhere in the labyrinth. It smells putrid, like rotting meat and offal, and there are bloodstains on the ground and walls. It looks like rudimentary barriers have been set up, long ago, in various places.
There are echoing screams, and terrible ripping and snapping noises–as of breaking bones and tearing flesh–further in. If you turn around, there is only a solid stone wall behind you; there are no signs of the door you touched to enter, and there is no way out.
While traversing the labyrinth looking for the keys, Minotauros will smell your scent. He is hunting you, and every now and then you can hear him getting closer, on the other side of a wall, or around a corner; breathing heavy breaths like an angry bull, hoofs thudding on the floor loudly.
You eventually come across Ariadne’s husband Thesius in one of the rooms with the keys. He is covered in blood and one of his arms is hanging limply by his side. He is surprised to see you, as you weren’t with the original group and you haven’t been stripped of weapons–as he says this, you can see he’s wielding a modified stake he must have ripped off one of the sharpened timber barricades throughout the labyrinth.
He will be relieved to hear that his wife sent you, and glad to know that she’s ok. If you explain the keys to him, he will say that he passed another similar object as the one in the room but didn’t take it because he didn’t know what it was. He can guide you back to that key.
When you’ve collected all the keys and are about to put them into the keyholes, Minotauros comes through the entrance into the room behind you, preparing to attack. His body is covered in a thick layer of black fur, on an even thicker hide. While his shape is vaguely human, his muscles are far larger than they should be, and there is a bull-ring in his nose.
Two curved horns tipped with steel and blood arch in front of his bovine face, and his eyes glow red with rage; steaming breath pouring forth from his flared nostrils. He prepares to attack.
Once the keys are in place, Minotauros collapses to his knees, saying in a deep, huffing voice “finally, peace…” before collapsing into ash. Behind the bulls-head statue, two doors will open to the outside world.
If you go through them, you will be in front of the doors you used to enter the labyrinth, only this time they are swung ajar behind you.
Ariadne is out there, pacing frantically back and forth, crying silently to herself. She spins around when she hears you exiting, then gasps “you did it!” while running to her husband. If his arm hasn’t been healed, she begins tearing strips of cloth from her dress and using them to bind the wound, crying about how relieved she is to see him while she does. When she is done, she kisses him intensely and strokes his hair, before saying that she better get him back to a healer in the town.
She gives you your reward before rushing him away, thanking you profusely and saying that thanks to your efforts they can root out the corruption in the royalty of their city–they will not have expected Thesius to survive, and will be unprepared for his return. If anything, his injuries further cement his claims!
GM’s Notes:
If the players kill Minotauros, he will regenerate somewhere else in the labyrinth and resume hunting them down. It is part of his curse, he can never die in the labyrinth. However, when the labyrinth is unlocked, the curse ends; finally releasing him from his torture.
Should your players remain on the island for a couple more days, the royalty will be overthrown by Thesius, who will institute a republic. He will try find your players again, to thank them for what they did one last time, and show them the fruits of his efforts, before they leave.
If you’d enjoy way more maps like this free Minotaur’s Maze TTRPG battlemap, Luke and I have just released our newest bundle of 420 large, 40×30″ battlemaps (double the size of those in the Quarantine Bundle) for $59.99. It’s your chance to have a great deal on some of our most beautiful maps! We guarantee that is something here for every GM—no matter what setting you prefer, from large cities to underwater seascapes.
Paying just $59.99 rather than full price saves you over 97%! Take a look at all the extra maps you can download with one click here.
Your birthday’s coming up and you have no friends. Do you: A. Invite a bunch of random strangers to your party. B. You never wanted a party anyway and get drunk alone. C. Literally make friends. That is to say, reanimate the dead.
Let me know in the comments below! 😀 As always, keep scrolling for the one-shot adventure written for this Necromancer’s Underground Cavern Lair free DnD battlemap! ⬇
Necromancer’s Underground Cavern Lair Free DnD Battlemap with Adventure, plus the whacky one-shot adventure for it. VTT ready, come download!
Necromancer’s Underground Cavern Lair Free DnD Battlemap with Adventure
Making Friends
While buying goods at a market in a rural town, a local pastor will stop by your shoulder and ask if you might be an adventurer. If you say you are, he’ll ask you for a private word about some troubles their town has been having. If you humor him, he’ll take you aside discreetly for a stroll through some quieter, overgrown lanes between cottages. He’ll explain in a soft voice that a shadowy figure has been spotted in the graveyard at night, but no-one knows who it is. However, they’ve been seen digging up graves.
The pastor says this has disturbed those who have lost their loved ones’ remains, so he would like to know if you might be willing to follow this person back from the graveyard one night and figure out where they’re going. He explains that he has some ample donations which should pay for the job.
Should you agree, he’ll nod somberly and walk you to the village’s small graveyard, which has had a number of the graves disturbed. He says that the figure shows up every night, but usually around 2 or 3 AM. If you make sure you know where they’re taking the bodies before you deal with them–so the pastor might recover the remains–he and the townsfolk would be incredibly thankful.
If you go to the graveyard around that time, you will indeed find a robed figure digging up a body from one of the graves. Once they’ve broken the bones out of a casket, the figure will shove them into a bag and begin carrying them away with an odd, excited gait.
They’ll slink from the outskirts of the village, and into the surrounding rolling hills. Eventually, the figure will disappear down a steep, dry gully and down some stairs which lead even deeper, into some kind of underground cave system.
Should you attack the robed figure once they’re in the cave, you’ll find that they’re not a person at all–but rather, a reanimated skeleton with glowing green eyes! It will defend itself, and if you destroy it the bones will fall apart with a loud rattle. If you continue deeper into the cave system, you’ll come across more skeletons with the same eyes, but with pointed black cones tied to their heads.
When these other skeletons see you, they will become aggressive and attack. Further in are instruments playing themselves in merry tunes, as well as an altar with a skeleton waiting to be animated on it.
When you reach it, you’ll find an old man in a dark robe with another little cone on his head, working on reanimating the body with some magical artifacts. His sleeves are rolled up and he is humming merrily to himself, alongside the tune of the instruments.
When he sees you, however, the man will start with a yell, before asking accusingly who you are and what you’re doing here. Then he’ll look at you closer, observing the bone dust, and say “Oh no, you didn’t destroy my friends did you?! What the hell is wrong with you, they took me days to make!” If you point out that the skeletons attacked you, he’ll throw down his artifacts loudly and yell that of course they attacked you, you were trespassing–what did you expect would happen!
If you point out he shouldn’t be stealing bodies from the cemetery, he’ll scoff that they would have walked themselves back after he was done with them, if it wasn’t for you! Now he won’t be able to tell any of the bones apart, let alone return them all! And besides, everyone knows souls go to the heavens or hells–it’s not like they’re USING the bodies, the old man will huff.
Should you ask what on earth he’s doing here, the old man will open his arms wide and yell at you that this is his holiday home, and it’s his birthday! He was going to throw a party, and he doesn’t have any friends, so he has to MAKE them. He does this every year. But no, you had to come along and ruin it. Now the only way to make this right is for you to go back to the cemetery and bring him the bodies he needs. He’s even prepared the feast hall with illusions of food, and games, the old man will finish with a huff; crossing his arms.
GM’s Notes:
If your players go back to the village to dig up more graves, the wizard will be thankful and even, shyly, invite them to attend his birthday party. There they might learn he is actually a very illustrious and achieved researcher at the land’s most prominent University of Magic, and specializes in destroying undead–incase a lych king should ever rise again. He does, however, appear to have VERY bad people skills which might be why he has no friends.
If the party goes well, he might thank you sincerely for becoming his friends, and give you his card should you wish to socialize again in future.
Should your players get caught digging up the graves by the pastor, the man will be horrified. If they explain what’s happening and that they’ll bring the bodies back afterwards, plus the others, he’ll be utterly perplexed and stammer in confusion. If the pastor protests, he won’t have an argument against the fact that the souls aren’t using the bodies anymore and might just watch in helpless bewilderment as your players saunter off with the bodies.
If the party replaces ALL the bodies that the wizard and the players took afterwards, the pastor will still pay them the agreed upon sum–but he will still be confused and not entirely sure what happened, or why. He will feel slightly violated and request that the party and the wizard don’t come back to the town. The wizard, of course, will not respect the wishes of some small-town pastor and his illogical presumptions.
If you enjoyed Necromancer’s Underground Cavern Lair Free DnD Battlemap with Adventure, Luke and I released the Hardcore GM’s bundle of 520+ large, 40×30″ DnD battlemaps (double the size of those in our famous Quarantine Bundle) with 255 adventures for $39. It’s a great deal on some of our most beautiful maps and adventures! I’m sure there’s content in it you’d have so much fun running for your friends, from large cities to underwater seascapes. Paying $39, rather than full price per map ($3 – $4.50 each), saves you over 98%! Take a look at all the extra content here.
Otherwise, I also recommend our latest bundle of system agnostic campaign sourcebooks, filled with battlemaps, locations, NPCs, loot, AND adventures! Luke and I love them so much, they have some of our favorite adventures in quite often grimdark or Lovecraftian horror settings. If you’re not sure about it, download our favorite campaign sourcebook for FREE—it’s about a super whacky location that will have your players roaring with laughter. That is, if their sense of humor is anything like ours 😉