Category: Free Town and City DnD Battlemaps

Download these free town and city DnD battlemaps & be ready to play in minutes! Many come with system-agnostic adventures written just for them. Perfect for VTTs.

  • Fellspire Vampire Hunter’s Guild Free Triple-Level 40×30 DnD Battlemap & Adventure

    Fellspire Vampire Hunter’s Guild Free Triple-Level 40×30 DnD Battlemap & Adventure

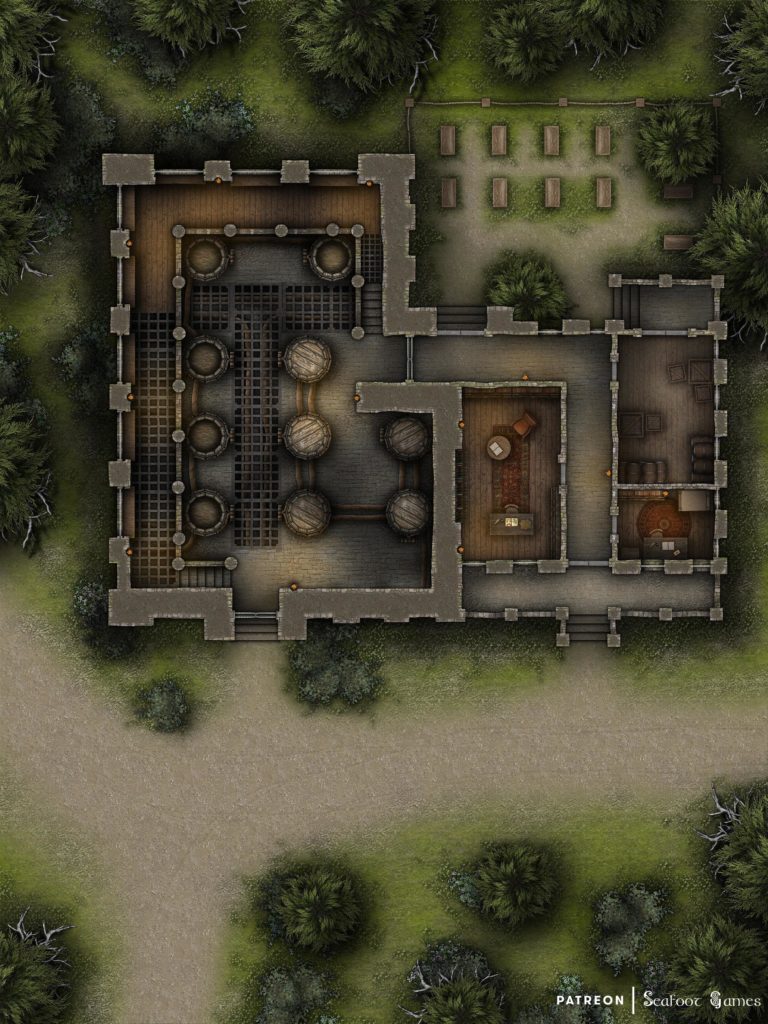
    Fellspire Vampire Hunter's Guild Free Multi-Level 40×30 DnD Battlemap & Adventure
    Download this Fellspire Vampire Hunter’s Guild free multi-level 40×30 DnD battlemap & adventure, featuring cleansing a corrupted vampire slayer guild who have been infiltrated by the very monsters they hunted. VTT ready!

    Fellspire Vampire Hunter’s Guild Free Triple-Level 40×30 DnD Battlemap & Adventure

    Resurrecting Sectatores Luiva

    After assisting Gento at the secret ball within the city of Fellspire, a few days to a week later you are contacted by an orphan bearing a letter. It is marked with the wax seal of Gento’s lesser noble house. The letter explains that he requires your urgent assistance, asking you to meet him at his family’s spire before dusk tonight. He can’t say more in the letter in case it becomes compromised, but the envelope includes a token that allows outsiders to access the higher spire walkways which are normally reserved for those of the higher castes.

    When you provide the token to any guards working at spire elevators or walkways, they give you a stern look and size you up before nodding and allowing you to ascend. Depending where you were in the city previously, it may take ten to fifteen minutes to arrive at Gento’s spire.

    The spire itself is quite small and looks like it’s seen better days, with roof shingles missing in places and walls overrun by dying brown ivy. The garden growing off either side of the main path into the spire has also gone to weeds, with thorny roses and thistles.

    The door to the spire is flanked by two small gargoyles which sit perched just above the entrance. A large brass dock knocker, shaped like a distorted face, is built into the thick ebony wood. After knocking, Gento cautiously opens the door. When he realizes it’s you he swiftly motions for you to come inside. The interior of the spire is in as bad a shape as the outside, with stacks of dusty books on every surface and cobwebs in all the corners.

    Gento apologizes for the spire’s state of disrepair, explaining that after his father and mother died in mysterious circumstances, his noble house’s finances fell into ruin when many of their trade partners decided to go elsewhere. He’s tried to do the best he can, but with little to no income and no one to help it just hasn’t been feasible to keep the spire in order.

    Leading you into another chamber, Gento sits you down at the one table you’ve seen which has been cleaned recently. He explains that he wishes this meeting was in better circumstances, but he desperately needs your help.

    Yesterday, one of his informants was detained by members of the Sectatores Luiva, the esteemed vampire hunter’s guild which originally cleansed Fellspire of its bloodthirsty masters, hundreds of years ago. The guild however isn’t what it seems these days, having been among some of the first institutions to be infiltrated and taken over by the vampire covens. He suspects that, after the affair at the secret ball where you killed that vampire and his thralls, the other blood drinkers may be quite keen to learn anything they can about us.

    Gento doesn’t doubt the detained informant’s loyalty to the cause, but the vampires will make him speak and when he does that will put everyone involved in danger–including yourselves.

    Gento continues that he was in the process of a more subtle plan to take over the Sectatores Luiva, starting with his informant who was a new pledge, but now that he’s been found out there is no other option. Gento needs you to cleanse the remaining members of the Sectatores Luiva in their tower across town. He assures you that those within the guild have all fallen to the sway of the vampires, either taking bribes to look the other way like he did before he redeemed himself, or becoming thralls themselves.

    If you suggest that those who have been bribed may be able to be reformed, Gento reluctantly agrees and suggests you just subdue those members until we can figure out what to do with them.

    If you agree to the mission, he gives you the location of the spire and wishes you good luck.

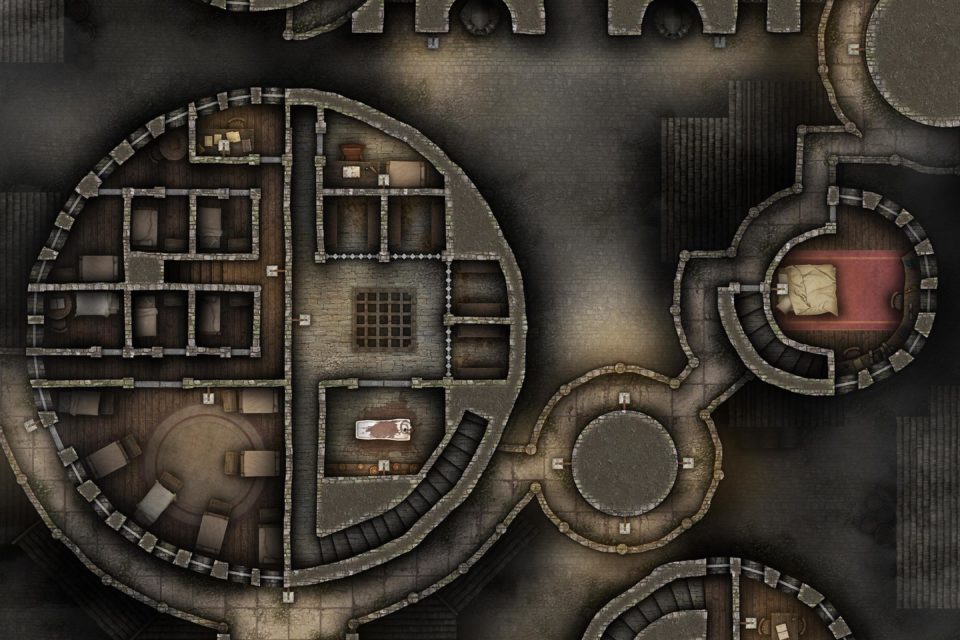
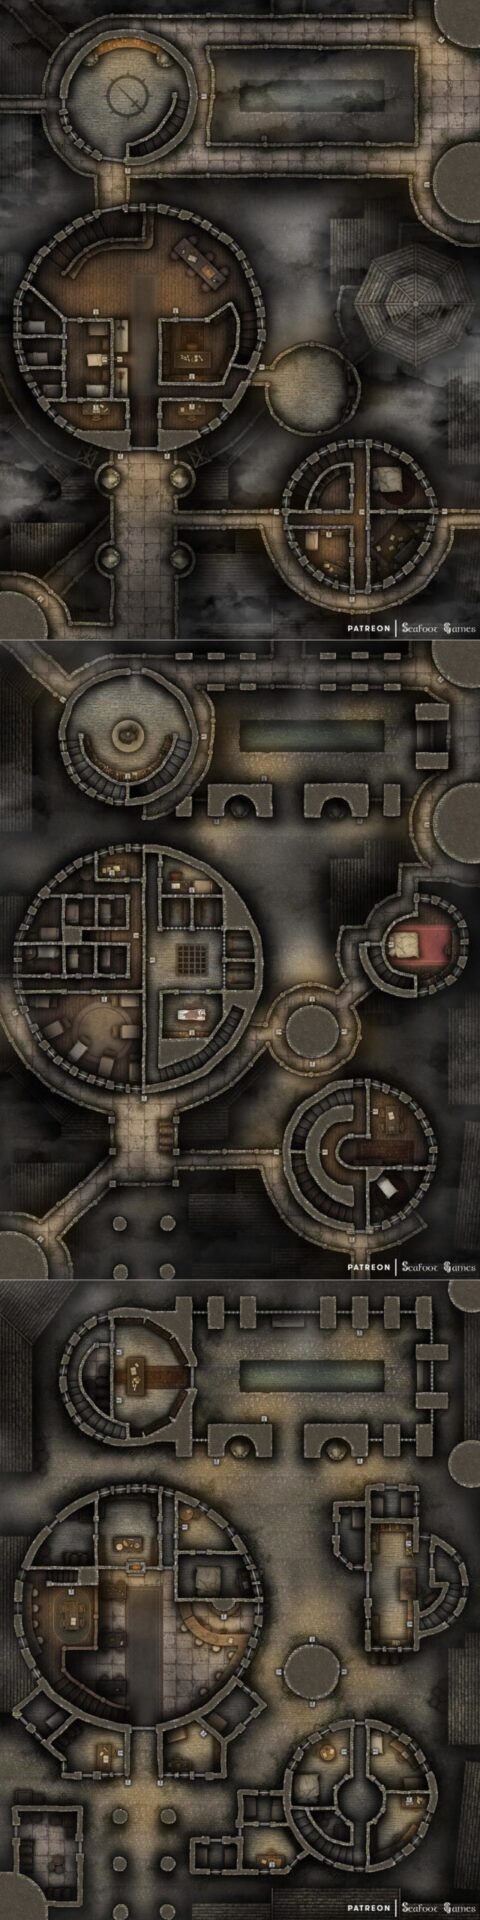
    When you arrive at the spire of the Sectatores Luiva, you find a small courtyard fenced with metal pikes featuring a long pond. Inside the interior of the tower you’re greeted by a man at a desk surrounded by bookshelves. If you ask to access higher levels of the tower he refuses, explaining that only members may go up there. If threatened however it becomes clear he is a simple clerk and a coward at that, immediately giving you permission to enter as long as his life is spared. If asked if he has taken bribes he lies and says he hasn’t, but is quick to change his mind when threatened again, making up excuses.

    Making your way up the tower’s floors, it is clear that the turncoats have been destroying or desecrating sacred artifacts, as well as any useful information on how to effectively slay vampires. Many old books have large chunks of pages missing, while there are so many empty places on bookcases that they now resemble grins with missing teeth.

    Continuing up the tower, you finally reach a walkway which brings you into the larger upper tower where the majority of the guild lies. Inside, you hear the voices of a handful of men and women chuckling while playing cards or some other gambling game. When they notice you, they’re quick to pull out daggers or other weapons.

    They demand to know why you’re here, and if not given an adequate excuse will attack swiftly. Multiple of these members are thralls, while others have simply been bribed. Either way, if you get in a fight with them they refuse to back down, as failing their masters would make them as good as dead anyway.

    When the group has been dealt with and you make your way down into the lower chamber where prisoners are held, you find a number of disheveled travelers being housed in the cells. When they notice you’re not members of the Sectatores Luiva, they quietly plead for your help–between the screams of agony coming from the other room.

    They explain that the Sectatores Luiva Exarch is currently torturing the informant you’re looking for, but if you’re quiet they suggest you go to the Exarch’s quarters down the hall, recover his key and release them without him knowing. They, including yourself, could leave alive!

    You don’t have much time to decide however, as the Exarch opens the doors to the torture chamber shortly after. He is wiping blood from an ebony stake, clearly used to torture the poor informant.

    Appearing to have been aware of your presence all along, the Exarch nonchalantly asks you if you’ve come to take the place of his less than useful underlings, whom you so rudely–but clearly efficiently–defeated. As he speaks, his attention remains focused on cleaning the stake.

    If you attack him, it becomes apparent that the Exarch is a fully fledged vampire. He fights back using the magical ebony stake and conjures up blood elementals from the grates beneath your feet.

    During the fight, he monologues between attacks about how all humans are scared of their mortality and deep down crave eternal life. It is simply because they are unworthy of it that they seek to keep others, like vampires, from immortality as well. He simply realized this and changed his ways. It’s not too late for you to change your mind and join the superior race, he muses as the fight escalates.

    After defeating the Vampire Exarch you can see the tortured informant motioning you to come closer. His breath is faint and his voice weak, but with his last breaths he says he didn’t break before passing away.

    When you return to Gento and report what went down he is quiet for a moment, saying that his informant had a stronger will than he believed possible. Taking a moment, he makes a motion with his hands, praising the god of light and laying a blessing upon his informant’s soul, before thanking you for cleansing the Sectatores Luiva of their evil.

    Though he doesn’t have much, as a show of appreciation Gento offers you some expensive wine that’s been in the cellar for a very long time while you discuss more of the details of the mission. When he hears that the Exarch was a full-fledged vampire, his face goes pale. He remarks that he had no idea, saying you are skilled indeed to have not only made it out alive, but also to have won the fight.

    His face then becomes contemplative and introspective, and he slowly remarks that since the Sectatores Luiva has now been cleansed, the spire needs new masters. Masters who are true to the cause, and willing to rise up and cleanse the city of the vampire threat before it’s too late and history repeats itself.

    He didn’t know who these vampire hunters might be, but now, after the strange way he  met you in the tavern that first time, and what happened at the ball, and now the events at the spire… He thinks you were sent from the god of light to save the city.

    Looking up to meet your gaze, Gento asks if you would be willing to step up and resurrect the Sectatores Luiva with him; taking on the mantle of feared vampire hunters,  and following in the footsteps of their initial, brave founders to be the light that cleanses the darkness.

    GM’s Notes:

    If your players want to join the Exarch, he chuckles and says that to prove their loyalty they must first finish off the informant using the ebony stake.

    This adventure was written for our Fellspire Adventurer’s Guide. If you’d like 5 more adventures and maps for this location, plus even more info and world building for the city, lootable items, NPCs, and more, check out the guide this was written for!

    If you enjoyed this Fellspire Vampire Hunter’s Guild Free Triple-Level 40×30 DnD Battlemap & Adventure, Luke and I released the Hardcore GM’s bundle of 520+ large, 40×30″ DnD battlemaps (double the size of those in our famous Quarantine Bundle) with 255 adventures for $39. It’s a great deal on some of our most beautiful maps and adventures! I’m sure there’s content in it you’d have so much fun running for your friends, from large cities to underwater seascapes. Paying $39, rather than full price per map ($3 – $4.50 each), saves you over 98%! Take a look at all the extra content here.  

    Otherwise, I also recommend our latest bundle of system agnostic campaign sourcebooks, filled with battlemaps, locations, NPCs, loot, AND adventures! Luke and I love them so much, they have some of our favorite adventures in quite often grimdark or Lovecraftian horror settings. If you’re not sure about it, download our favorite campaign sourcebook for FREE—it’s about a super whacky location that will have your players roaring with laughter. That is, if their sense of humor is anything like ours 😉 
  • Secret Cult Ballroom Free Multi-Level 40×30 DnD Battlemap & Adventure

    Secret Cult Ballroom Free Multi-Level 40×30 DnD Battlemap & Adventure

    Secret Cult Ballroom Free Multi-Level 40×30 DnD Battlemap & Adventure
    Download this Secret Cult Ballroom free multi-level 40×30 DnD battlemap & adventure, featuring a secret vampire cabal at a masquerade. VTT ready!

    Secret Cult Ballroom Free Multi-Level 40×30 DnD Battlemap & Adventure

    Specters of the Past

    You arrive in a city celebrating some kind of grand masked festival, with loud performers and acrobats on busy streets, lined with market stalls selling fragrant foods. Re-enactments are loudly performed for watching crowds, portraying a group of evil vampire overlords being slain by vampire hunters, and the city being reclaimed by the people it once oppressed.

    Drawn inside a tavern boasting extreme festival discounts, you’re approached by a tipsy, young nobleman who notes that you seem incredibly well armed, and, on top of that, move as if competent in handling yourself. He asks for your help, taking his mask off and introducing himself as Gento. He explains in a slightly slurred voice that he believes corruption has crept into the city. Officials are suddenly changing firm stances on policies, nobles are backing new and unusual ventures, and it seems like even academics are being affected–all to the end of taking the city backwards several generations, and removing the rights of its citizens.

    Gento suspects something awful is taking place. He’s tracked some of the corrupt individuals, and has information that they’ll be attending a secret gala later that night. He even has the password to enter. He cannot risk getting himself involved and doesn’t know who to trust, but as outsiders he can provide you with the masks and robes you need–as well as the password–to sneak into the event. He needs you to figure out what’s going on, and, if need be, put an end to it while all the vipers are in one nest.

    He says he can pay you well, offering you a small bag of diamonds from his pouch. Should you accept, he warns you not to eat or drink anything, and to trust no-one, before telling you the password “Rubrum Aurora” and giving you directions to the secret gala’s location.

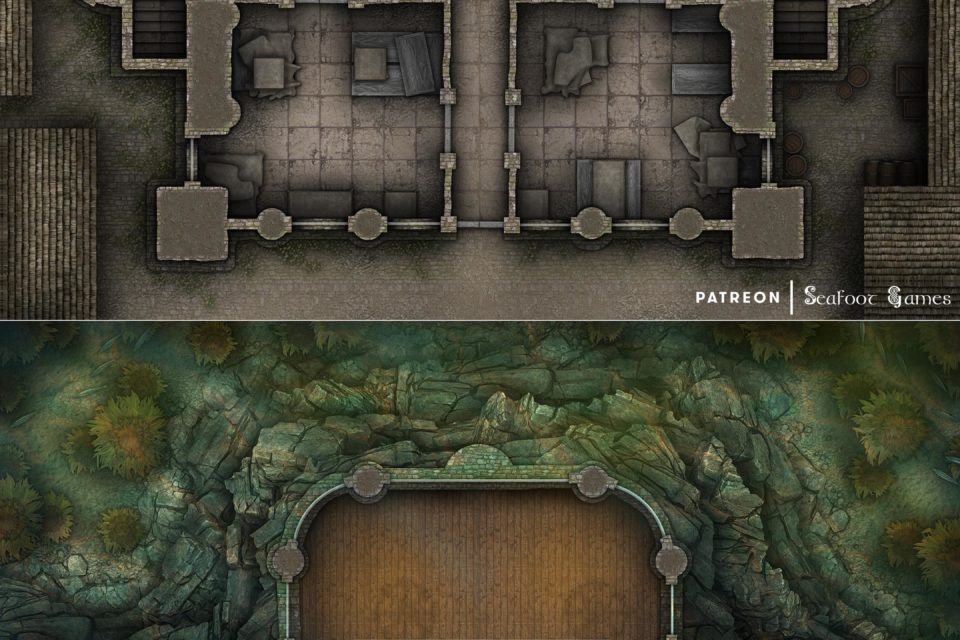
    When you arrive, you find yourself in the warehouse district of the town, far away from the riotous festivities. Should you enter the particularly plain building by the river’s edge, its unlocked doors waiting for guests, you are met by a group of men wearing long beaked masks and black robes. Once you give them the password, one among their number escorts you through the dusty warehouse to a lavish lower level. It is a hidden ballroom, with tables laden with delicacies and wines, and filled with the laughing murmurs of many wealthy guests. At the end is a timber stage, bordered by thick glass windows that provide a view under the river; fish swimming about lazily.

    Once you’ve been there for a few minutes to enjoy the food and drink, a graceful man emerges onto the stage. He is wearing a red robe with a golden roaring lion’s mask, and two beautiful naked women by his side who only wear partial lioness masks. In one hand he holds a glass of bright red liquid, and his arrival is greeted with loud cheers by the guests.

    After calming the crowd, he gives a charming speech about how the guests will have greater blessings bestowed upon them if they continue to aid the cause as they have. But to reap the even greater rewards of health and luxury, they must first prove themselves! The time has come for them to reap the fruit of everything they’ve been working towards, and the figure tells the crowd that they should rally their men and resources in preparation to retake the city tonight!

    While the red robed man speaks, two large figures in black robes enter, dragging an unmasked Gento up to the stage and dropping him at the speaker’s feet. Gento is beaten and very injured, and the speaker looks down upon him. The man says “One among us has betrayed us”, but Gento spits that he has changed his mind and will not betray the city. The man shakes his head at this, and gestures to another robed figure, who begins rushing over with an ornate dagger on a crimson pillow.

    If you attack the man in the red robe, you discover he is a vampire, and the women hanging off him are thralls. They fight back ferociously as the other guests begin leaving in a panic. Once the event’s hosts are defeated, if you question Gento he clears blood out of his mouth and says it is true, he was once among their number, but realized tonight that he couldn’t betray his people. When he saw you at the tavern, he thought you might be a sign from the gods, as you seemed strong enough to take down the vampire before it was too late. After your actions today, Gento vows to visit every church service from then on as thanks to the gods who sent you to save them.

    Should you ask about the city’s vampire hunting guild portrayed in the celebrations, the man shakes his head and says they were the first to be infiltrated by the vampires. He had no-one else to turn to, and is sorry he had to keep you in the dark.

    As your promised reward, he offers you not one but two pouches filled with diamonds, saying that they were the payment he received for betraying the people of the city. He apologizes, saying that the great service you’ve performed is priceless and he doesn’t know if anything can ever, truly, make up for it. However, he vows that he will spend the rest of his life working to atone for the mistakes he’s made, and if there is ever a way he can aid you in future, you need but ask.

    GM’s Notes:

    If your players do drink or eat anything, the food has been laced with vampire blood and they’ll feel a sense of friendship with the red robed vampire. Affected player characters have their stats boosted by the blood, but also a risk of addiction.

    The red robes the vampire was wearing provide shade around the wearer when exposed to sunlight, and his mask was cast of solid gold. As such, it is highly valuable. The ornate silver dagger is a vampiric blade which siphons the life of those it kills into a glowing ruby on its hilt.

    This adventure was written for our Fellspire Adventurer’s Guide. If you’d like 5 more adventures and maps for this location, plus even more info and world building for the city, lootable items, NPCs, and more, check out the guide this was written for!

    If you enjoyed this Secret Cult Ballroom Free Multi-Level 40×30 DnD Battlemap & Adventure, Luke and I released the Hardcore GM’s bundle of 520+ large, 40×30″ DnD battlemaps (double the size of those in our famous Quarantine Bundle) with 255 adventures for $39. It’s a great deal on some of our most beautiful maps and adventures! I’m sure there’s content in it you’d have so much fun running for your friends, from large cities to underwater seascapes. Paying $39, rather than full price per map ($3 – $4.50 each), saves you over 98%! Take a look at all the extra content here.  

    Otherwise, I also recommend our latest bundle of system agnostic campaign sourcebooks, filled with battlemaps, locations, NPCs, loot, AND adventures! Luke and I love them so much, they have some of our favorite adventures in quite often grimdark or Lovecraftian horror settings. If you’re not sure about it, download our favorite campaign sourcebook for FREE—it’s about a super whacky location that will have your players roaring with laughter. That is, if their sense of humor is anything like ours 😉 
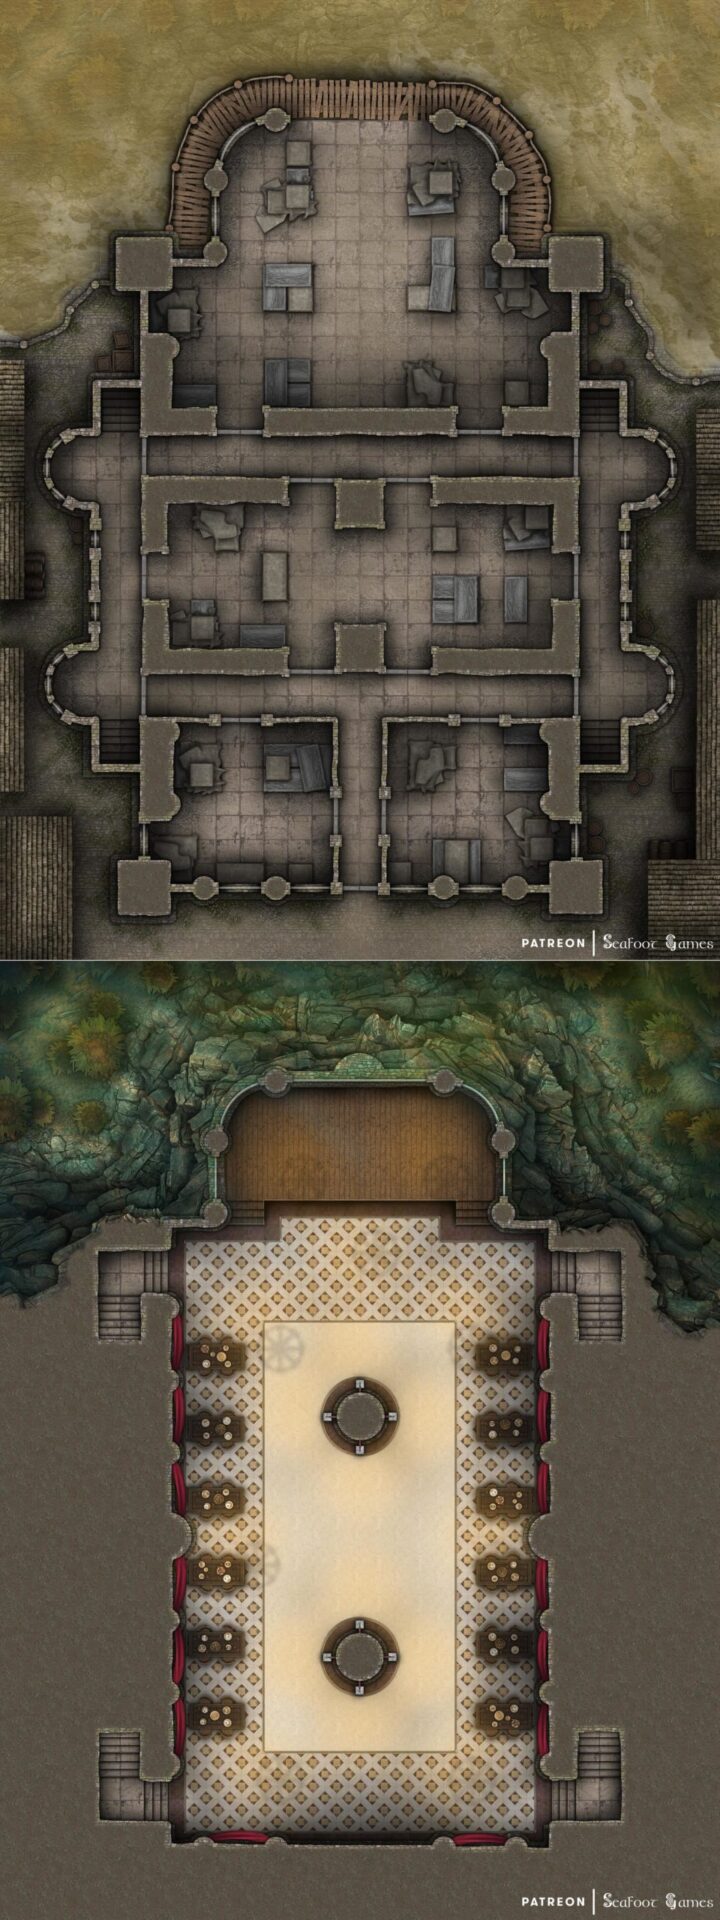
  • Undercity Drug Den Free DnD Battlemap & Adventure

    Undercity Drug Den Free DnD Battlemap & Adventure

    Undercity Drug Den Free DnD Battlemap & Adventure
    Download this Undercity Drug Den free DnD battlemap & adventure, featuring a lawless desert outpost rife with corruption. VTT ready!

    Undercity Drug Den Free DnD Battlemap & Adventure:

    Troubles with Azure

    While staying at a tavern in a desert town, you’re approached by a slender figure wearing a white cloaked robe over intricate wormscale armor. She sits down at your table, lowering her hood and tells you she has a job for you. If you ask why she thinks you’re looking for a job, she casually replies that no-one comes out to this hell hole for vacation. If you ask why she is asking you in particular, she explains that she doesn’t know you which means you’re not a local and you look to be well equipped, which is just what she needs for this particular job.

    If you agree to listen to her proposal, she introduces herself as Valla and asks if you’ve been acquainted with the narcotic “azure” since visiting the village? She continues that it’s quite a prominent part of everyday living here, most folk use it as an enjoyable relaxant after a hard day’s work. Mostly safe for ingestion after it’s refined, it gives off a pleasant high, with the added side-effect of heightening the magical abilities of those who are so predisposed.

    Valla takes a moment to look around to see if she’s being watched before continuing that recently however, those who have normally taken azure only casually have become sick from withdrawals when they’ve stopped taking it. This is a completely new side-effect, and a dangerous one at that. 

    Valla further explains that she is a member of the worm hunter’s guild and a portion of her brothers and sisters have become fully addicted to the stuff. A couple of them tried to make it through the withdrawals, however, after one of them died none have tried to do the same.

    Azure makes it hard to do their jobs, she continues, explaining that being a worm hunter puts you in danger every day and one slip up could mean not only your death but that of your entire sandskiff crew. With so many of the guild out of commission due to their addiction, the guild has been in a bad place. Without an antidote to the addiction or an influx of new members, the guild might go out of business for good, which would have a bad knock on effect for the rest of the town as well.

    Valla has managed to track down the original source of the tainted azure to a drugden on the outskirts of town. She wants you to go there and see what you can find out, including finding an antidote if possible, and proof of any wrongdoings so that those responsible can be put to justice. 

    Valla also explains that she and the worm hunter’s guild can’t be seen to be involved in whatever you end up getting into, as the politics in the town are complicated. Thus, if anything goes wrong she’ll have to deny that she knows you. If you agree, she gives you what information she has and sends you on your way.

    When you arrive at the drugden you find a set of sandstone stairs leading down into the entrance of an underground parlor, where half a dozen shady men are playing cards and laughing. When the men notice you, one of them stands up and says “The boss didn’t tell us anyone else was coming today. Per’aps you’ve lost your way…”before motioning for you to leave while his other hand slowly moves toward his sheathed scimitar. 

    You may be able to convince the thug that you are indeed expected, but otherwise the thug and his friends will fight until they’re bloodied before calling for parlay and letting you through. After you’ve defeated them, they’ll flee the building with intent of leaving town before they’ve been found to have failed at their duty.

    Passing through a set of wooden doors, you find yourself in the parlor proper. Dozens of emaciated men and women gaze at you from shabby wooden seating arrangements, where they lie dazed with smoking pipes; clearly high on azure.

    A bartender in the central hall seems to be the only one not on the drug, and if asked where the owner of the establishment is, he nods towards the doors at the back of the hall saying Tratel is in at the moment. Opening the door, you find Tratel; a tall, slender man in a black vest and crimson shirt. He is sitting behind a desk writing notes into a leather-bound ledger. The man stops upon seeing you enter, and asks who the hell you are as he’s not expecting anyone.

    If you threaten Tratel, demanding for answers about the tainted azure, he denies any part in it but if you’re perceptive you may be able to see that he is lying–including about having a potential antidote. If you demand the antidote, he refuses to give it to you, goading you to either kill him or leave as sweat rolls down his brow.

    Once attacked, the man draws a rapier from under the desk and activates a magic sigil which brings some of the books on the shelves lining his office to life. The books take the form of small flying paper imps and attack. 

    When bloodied, Tratel surrenders; promising the antidote should you let him live. If you do, he retrieves the key to the chests which lie behind the desk. They contain vials of the antidote to the tainted azure. 

    Tratel further explains that he was only doing what he was told by the Big Man, but now that he’s given up the antidote to you he’s as good as dead. With some quick thinking Tratel comes up with a new deal, offering to testify to the mayor, in conjunction with his ledger that the Big Man was responsible for the tainted azure–but in return, he wants to be smuggled out of the town safely afterwards.

    Taking Tratel to the mayor’s office, you’re met by two guards at the door and a stern looking older clerk inside who informs that the mayor is busy today but he will be able to see your case–including Tratel’s testimony–tomorrow morning, advising you return then. In the meantime, Tratel will be kept in a solitary unit within the guardhouse for his safety. Tratel looks nervous at this but agrees to go with one of the guards at the door to the guardhouse nearby nevertheless.

    In the meantime, if you return to Valla with the antidote, she’ll be thankful, paying you the agreed upon sum and asking if you managed to find any evidence of wrongdoing. If you explain that you managed to get the drug dealer Tratel to agree to testify against the Big Man, she’ll be happy to see that he might finally get his comeuppance; explaining that the Big Man has been involved in many unsavory activities around the town but always seems to get away with it!

    In the morning when you arrive back at the mayor’s office you’re invited into his backroom by the clerk, where the mayor is reclined in a leather chair next to a tanned obese man wearing lavish jewels, smoking a cigar. After presenting the ledger, the mayor looks over it skeptically for a few minutes before explaining that this only shows that the Big Man was supplying azure to Tratel, not that he was tainting it himself.

    If you ask where Tratel is, explaining that he was the key piece in this and he would testify that the Big Man was responsible, the obese man speaks up. He says “It truly is a tragedy, but Tratel hung himself in his cell last night… it seems his conscience caught up with him for his crimes against the innocent citizens of this town, as it was simply too much for him to bear”. 

    He continues saying that you need not worry however, as he managed to track down the location where Tratel was hiding the rest of the antidote, and he’s currently having it distributed to the people of Sandworm Mesa via his other workers. The obese man then looks to the mayor, putting a hand to his heart and saying he’s sorry that an underling of his managed to cause such issue and that it wouldn’t happen again. The mayor nods and says “See that it does not”, before letting the obese man leave.

    GM’s Notes: 

    This adventure was written for our Sandworm Mesa Adventurer’s Guide. If you’d like more information about the location, NPCs, and loot that can be found here, please go check it out!

    If your players instead kill Tratel, they may take the ledger to either Valla or the mayor’s office. Valla will insist the ledger is taken to the mayor in the hopes of some repercussion for the Big Man. 

    In either case, the Big Man will be waiting in the Mayor’s office having gotten word of Tratel’s death, and will claim to have no knowledge of his misdoings; saying he provides a 100% organic and safe drug and that it was indeed Tratel that was wholly responsible. He will thank your players for dealing with him, as the Big Man had no idea Tratel would do such a heinous thing and still promises the mayor that nothing like this will happen again…

    If you enjoyed this Undercity Drug Den Free DnD Battlemap & Adventure, Luke and I released the Hardcore GM’s bundle of 520+ large, 40×30″ DnD battlemaps (double the size of those in our famous Quarantine Bundle) with 255 adventures for $39. It’s a great deal on some of our most beautiful maps and adventures! I’m sure there’s content in it you’d have so much fun running for your friends, from large cities to underwater seascapes. Paying $39, rather than full price per map ($3 – $4.50 each), saves you over 98%! Take a look at all the extra content here.  

    Otherwise, I also recommend our latest bundle of system agnostic campaign sourcebooks, filled with battlemaps, locations, NPCs, loot, AND adventures! Luke and I love them so much, they have some of our favorite adventures in quite often grimdark or Lovecraftian horror settings. If you’re not sure about it, download our favorite campaign sourcebook for FREE—it’s about a super whacky location that will have your players roaring with laughter. That is, if their sense of humor is anything like ours 😉 
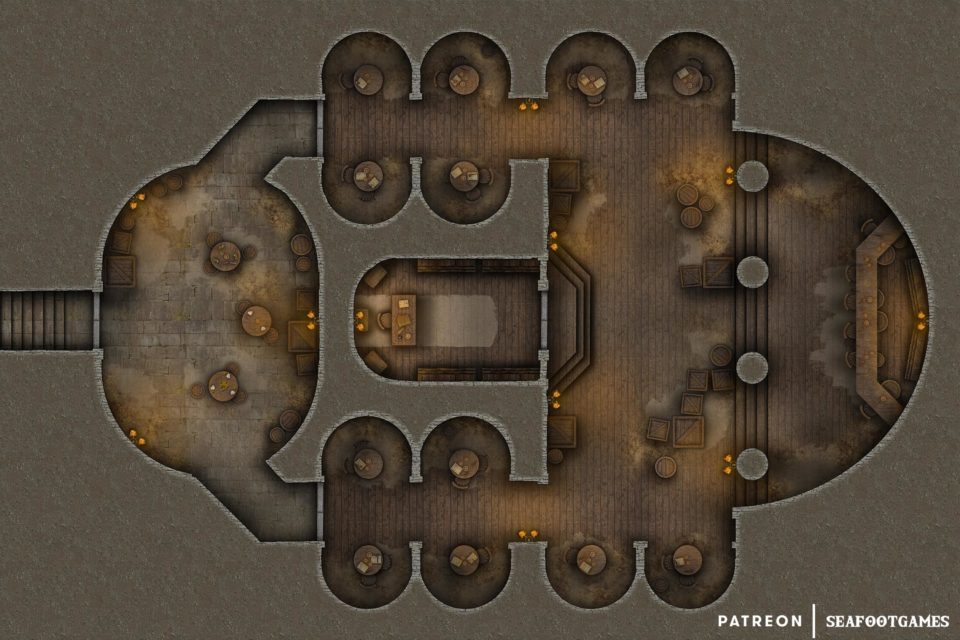
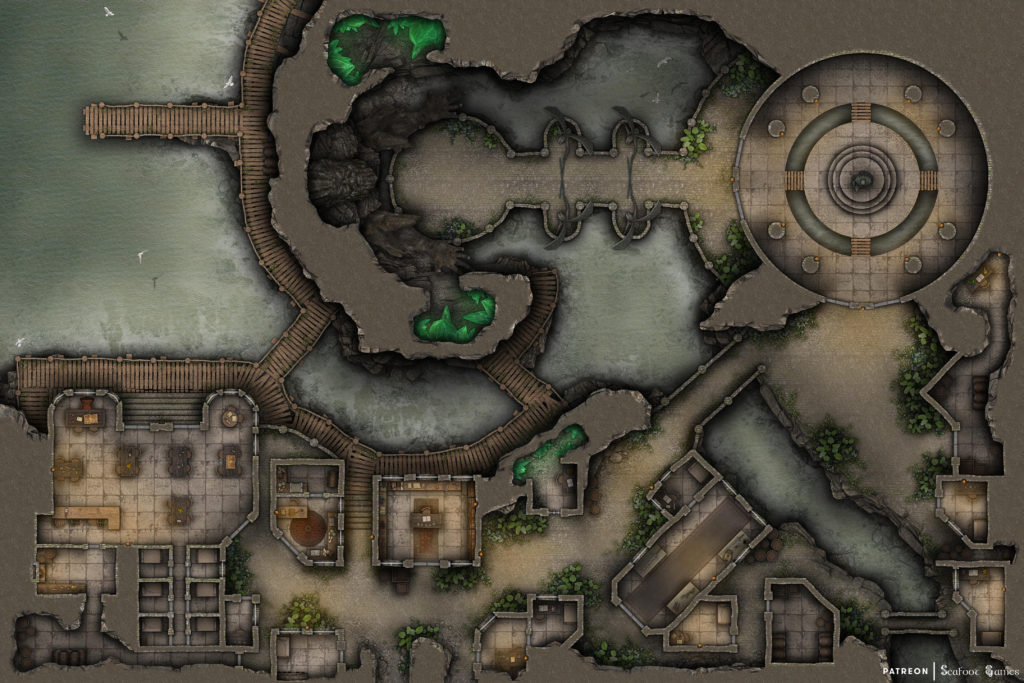
  • Town of Stormswake Free 60×40 DnD Battlemap & Adventure

    Town of Stormswake Free 60×40 DnD Battlemap & Adventure

    Town of Stormswake Free 60x40 DnD Battlemap & Adventure
    Download this Town of Stormswake Free 60×40 DnD Battlemap & Adventure, plus its system-agnostic adventure featuring monsters from the sea. VTT ready!

    Town of Stormswake Free 60×40 DnD Battlemap & Adventure

    It Came from the Sea

    While traveling near the coast, a strong wind gusts over the land and heavy clouds form in the afternoon sky, portending a thorough drenching should you continue on your way. Fortunately, the nearby town of Stormswake offers a chance for rest and shelter.

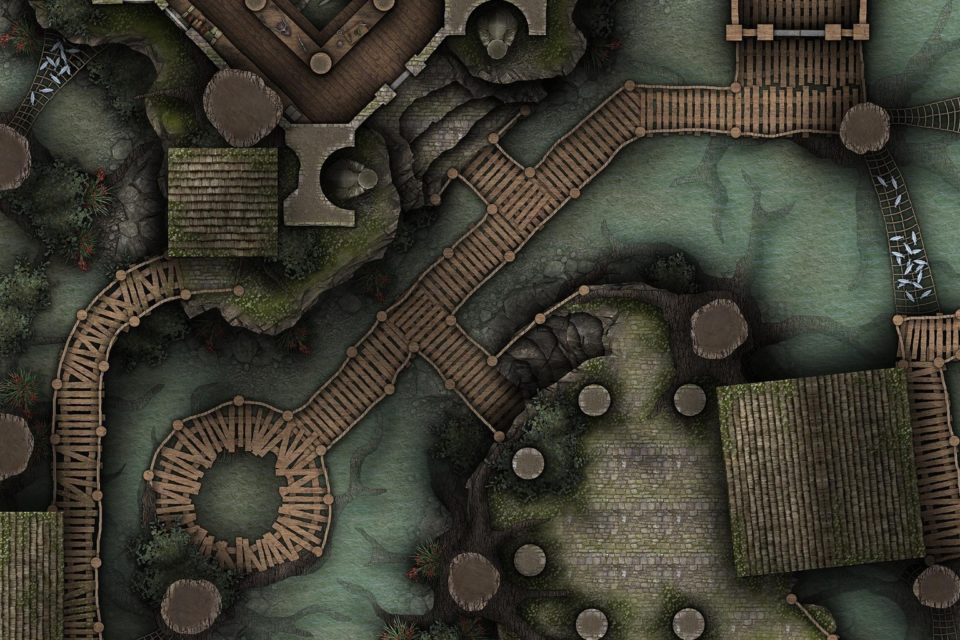
    Rain belts down across the water as you approach the entrance to the town, which is built into the side of coastal cliffs. A path made from wood is secured into the cliff face, leading around the corner to the town itself. A traveler’s inn sits on the edge of the water on a wooden pier, inviting you with the promise of a warm meal and a hot fireplace with which to dry yourself.

    Not long after you enter the inn, it becomes obvious there is tension in the air. Locals grumble to their neighbors beneath their breath, others clutch at their mugs of ale with grim expressions on their weathered features. Should you inquire with the innkeeper about this, he glances around to make sure nobody is within earshot, before leaning in closely to speak in hushed tones.

    “You’ve picked a bad night to stop by,” he says. “Two years ago, Stormswake was invaded by shambling monsters from the sea, but they were turned back by our priestess, Olaive. She’d only been here for a week, and was untested in battle, but she rose to the occasion and summoned great magics to help repel the hoard.

    “You may wonder what that has to do with tonight? Well, the leader of that hoard cried that they would return in exactly one year to finish what they’d started, and that night, my friends, is tonight! People have been mulling over if it was a bluff or not. Some have left, but most stayed, either because they didn’t believe it, or they want to protect their homes.

    “So, you’ve a choice, travelers; stay and maybe fight a hoard of sea monsters, or leave while you still can.” He goes about his work, leaving you to make the choice. Should you choose to remain, it may occur to you to ask about Olaive, and perhaps speak with her.

    The innkeeper points the way further along the boardwalk, and then across a bridge within the cliff that takes you to a circular chamber where she resides. “But be warned,” he warns! “She has no patience for fools who waste her time.”

    With these words of wisdom, you may choose to head to the temple to speak with her. Along the way, you see locals preparing themselves to fight, donning heavy leather armor, sharpening short swords and preparing simple wooden shields to hold back the monsters that could assail the town at any time.

    In the temple, Olaive greets you but cautions that this is not a good time. “Doubtless you have heard of our plight. You should have left while you can, but if you intend to stay, we certainly could use the aid. I am preparing a spell that may repel them, as it did last time, though something tells me it may not be effective. Do what you can to aid the town, while I finish my preparations in the grove just beyond the temple here.”

    The symbol of an ancient sea god hangs in the temple, though it is far older than any you have yet seen in your travels. It has barnacles, dried seaweed and shells of deep-sea creatures placed into a circular, shield-like device made from shipwrecked wood. Should you ask any of the other people in town, or her assistants in the temple about this device, they will tell you Olaive brought it with her upon her arrival.

    Soon, a warning shout is heard! Creatures covered in seaweed, barnacles and octopus-like tentacles lumber from the depths, seeking to climb onto the boardwalk and attack anyone who gets in their way!

    Should you join in the defense, you can fight off some of the hoard, but for each that falls, another takes its place. It seems Olaive’s spell might be the only hope for the town.

    If you pull back to the grove, you see she is already in the midst of casting, but it doesn’t seem to be having any effect. Indeed, an insightful person might surmise that the spell is, in fact, drawing the creatures closer!

    Sensing she’s been discovered, Olaive sneers and says she was sent here by powers beyond your understanding. “I mean to bring this town, this affront to the sea gods crashing down and its people to become as food to the creatures of the depths!” Her human appearance melts away to reveal a humanoid sea creature with large eyes and spiked fins!

    She is a formidable foe, and you have no help from the townsfolk battling to stave off the invasion, but should you figure out that the wooden holy symbol on the wall of her temple is the source of her power, you can smash it to break the spell and drive back the horrid sea monsters!

    With her plans foiled, Olaive (if she survived) will leap into the waters and dive away, protected by the power of the sea gods with the hope of returning to complete her work someday.

    GM’s Notes:

    The assault will start near the inn, and gradually move forward through the town streets towards the bridge that connects to the temple. There are plenty of choke points for defenders to hold them back, but figuring out that Olaive is the one summoning them, and then fighting her to defeat will break the spell. After that, the sea monsters will disperse back to where they came from.

    When Olaive arrived the first time to Stormswake and was casting her spell, she wasn’t powerful enough to complete it. Thus, the spell ended; sending the creatures back to the depths, and earning her the naive love of the townsfolk.

    If you enjoyed tTown of Stormswake Free 60×40 DnD Battlemap & Adventure, Luke and I released the Hardcore GM’s bundle of 520+ large, 40×30″ DnD battlemaps (double the size of those in our famous Quarantine Bundle) with 255 adventures for $39. It’s a great deal on some of our most beautiful maps and adventures! I’m sure there’s content in it you’d have so much fun running for your friends, from large cities to underwater seascapes. Paying $39, rather than full price per map ($3 – $4.50 each), saves you over 98%! Take a look at all the extra content here.  

    Otherwise, I also recommend our latest bundle of system agnostic campaign sourcebooks, filled with battlemaps, locations, NPCs, loot, AND adventures! Luke and I love them so much, they have some of our favorite adventures in quite often grimdark or Lovecraftian horror settings. If you’re not sure about it, download our favorite campaign sourcebook for FREE—it’s about a super whacky location that will have your players roaring with laughter. That is, if their sense of humor is anything like ours 😉 
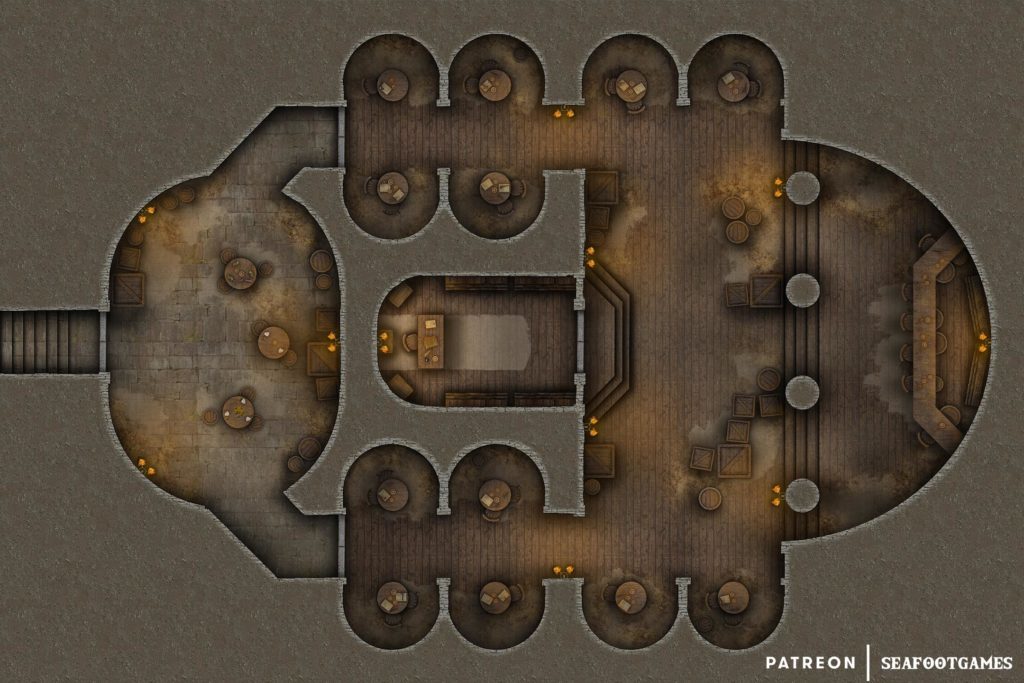
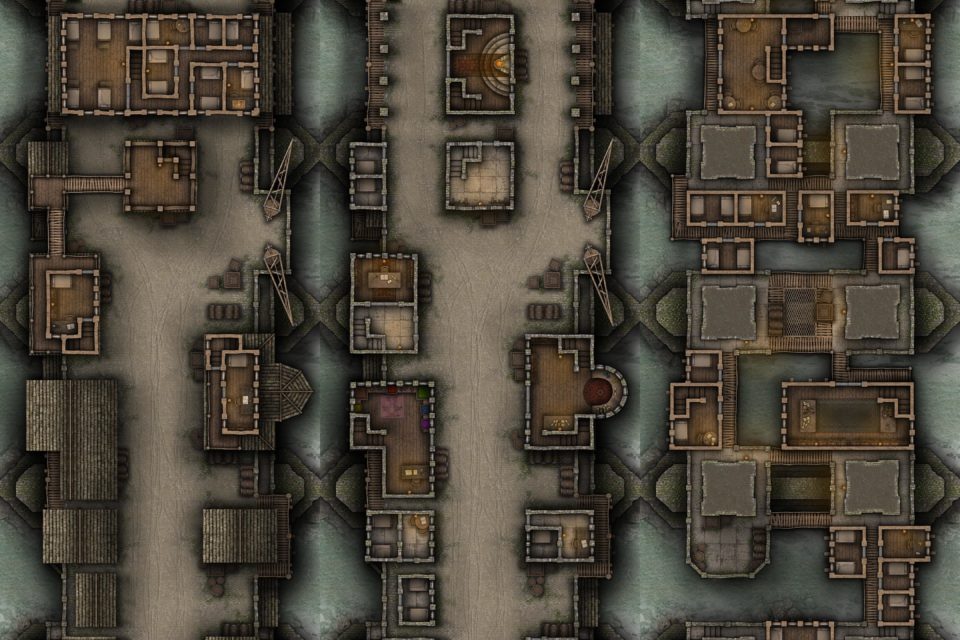
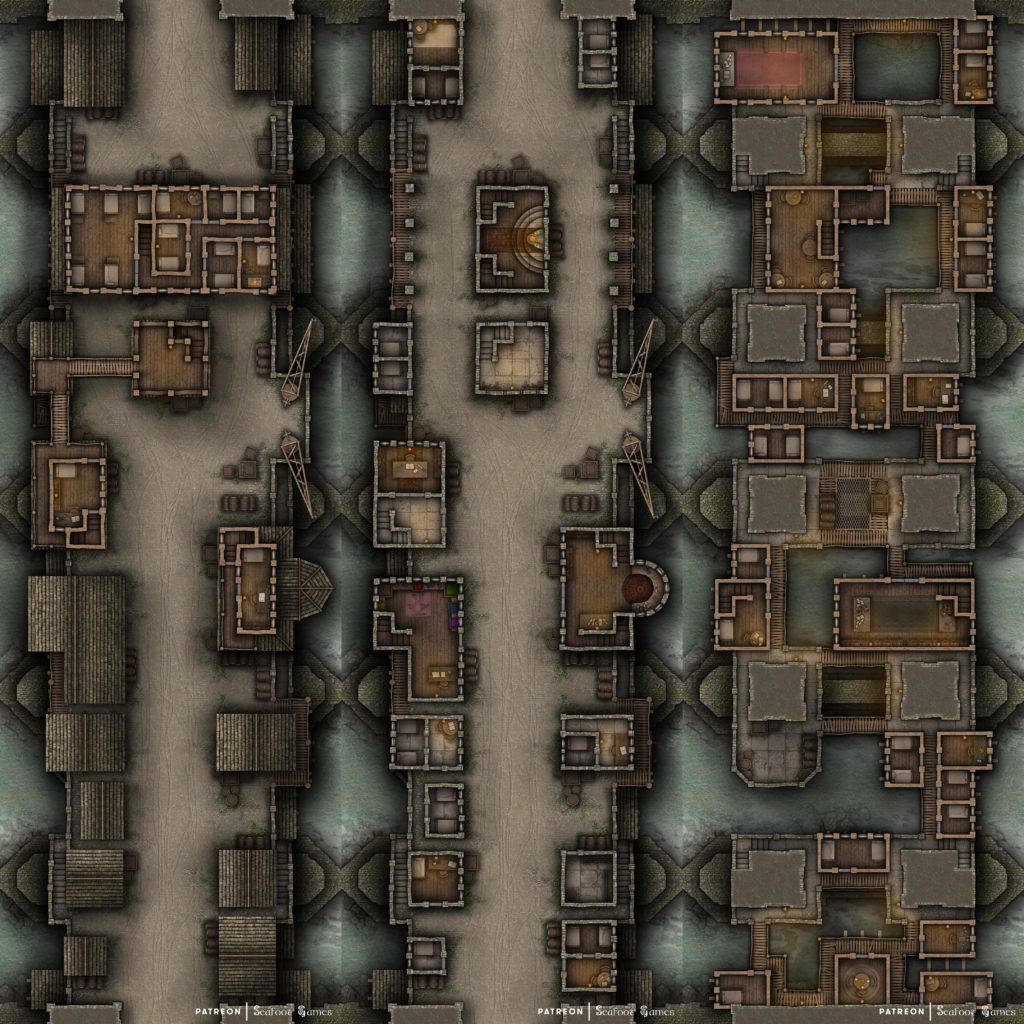
  • A Noble Conspiracy Free Multi-Level DnD City Bridge Battlemap with Adventure

    A Noble Conspiracy Free Multi-Level DnD City Bridge Battlemap with Adventure

    A Noble Conspiracy Free Multi-Level DnD City Bridge Battlemap with Adventure, challenge your players with untangling noble politics!
    A Noble Conspiracy Free Multi-Level DnD City Bridge Battlemap with Adventure, challenge your players with untangling noble politics!

    Free Multi-Level DnD City Bridge Battlemap with Adventure

    A Noble Conspiracy

    While staying in a city tavern you’re approached by a figure wearing a dark cloak and cowl. The figure greets you kindly in the voice of a young woman and asks if she may have a seat before taking out a chair and sitting down before you.

    Unveiling the cowl the figure reveals herself to be a young lady with braided brown hair and silver hair clasps which run down its length. She introduces herself as Morgan Richards and explains that she has a proposal for you. She continues that she is the daughter of Lord Richards and heir to House Richards. However, recently her house was thrown off the council and had their rights as a house removed when evidence of impropriety by House Richards was found.

    She believes this evidence was planted by House Hastings as a way to remove them from the council, and thus finally push forward their agenda of war. House Richards has long opposed House Hasting’s push for continued war with the neighboring lands and it was only House Richard’s deciding vote that was keeping the council from declaring all-out war.

    If the vote now passes, enforced conscription of the people of the city will begin, as well as forced labor in the mines for the manufacture of weapons and armor in preparation for the war. Morgan exclaims that she cannot let this happen.

    She has learned from a disgruntled former servant of House Hastings the location of a man called Slade. He was responsible for planting the evidence used against House Richards. Morgan rolls out a map of the city and points to one of the great bridges, explaining that the man has a base of operations in the underbridge slums and she needs you to apprehend him alive and bring him back to House Richards so he can be questioned by the council.

    If you succeed, House Richards would be reinstated and there would be dire consequences for House Hastings should it come out they were plotting the destruction of another House. If you ask why her House doesn’t just apprehend the man, she explains her House can’t be seen doing anything suspicious as they’re already dealing with severe blow back.

    She emphasizes that no matter what happens, you must get this man out alive and to the council. For, without his testimony, House Hastings will surely have the city in their iron grip and that will end badly for the citizens. For this duty, House Richard’s is willing to offer a handsome reward.

    When you arrive at the bridge slums you find many people living in squalor upon rickety wooden houses suspended above the river. Some beg coin from you, while others slink away into the shadows. You make your way to the location on the map and, just before you’re about to enter the home of the man you seek, you’re ambushed by several thugs.

    After the thugs are dealt with, you find the man inside playing cards. He doesn’t put up a fight, instead claiming he’s got friends in high places and that you’ll pay for messing with him. After leaving the underbridge slums and reaching the main thoroughfare on the bridge, you’re immediately stopped by a group of guards, including two warcasters draped in House Hastings garb.

    The guard’s demand you hand over Slade and when you don’t they attack you. Once dealt with, you have no further troubles getting Slade back to House Richards. Later that day, the council is convened for the questioning, which you’re invited to after being paid for your help.

    Slade is put into the center of the council chamber and a large golden light shines upon him. He is questioned about the charges and confesses in full to being responsible for the false information that led to the removal of House Richards, as well as being paid by House Hastings to do so.

    At this Lord Stavros Hastings, the leader of House Hastings, coughs with mock surprise before exclaiming that his House would never do something so heinous! Lord Stavros’s aid then steps forward and claims full responsibility for the plot, doing so behind his Lord’s back because he thought it was for the best of the city.

    Lord Stavros rises quickly and slaps his aid across the face, before demanding that he be taken away and for the full might of justice to be put upon him for his attempt to manipulate the law.

    The guards come and take the aid and Slade to a back room while the council rules that House Richards be reinstated. They also continue that, because Lord Stavros was not involved in the plot, House Hastings will not be punished.

    As the council members retire you can see Lord Stavros eying you off with a smirk. It seems you may have made a new and very dangerous enemy this day.

    If you enjoyed A Noble Conspiracy Free Multi-Level DnD City Bridge Battlemap with Adventure, Luke and I released the Hardcore GM’s bundle of 520+ large, 40×30″ DnD battlemaps (double the size of those in our famous Quarantine Bundle) with 255 adventures for $39. It’s a great deal on some of our most beautiful maps and adventures! I’m sure there’s content in it you’d have so much fun running for your friends, from large cities to underwater seascapes. Paying $39, rather than full price per map ($3 – $4.50 each), saves you over 98%! Take a look at all the extra content here.  

    Otherwise, I also recommend our latest bundle of system agnostic campaign sourcebooks, filled with battlemaps, locations, NPCs, loot, AND adventures! Luke and I love them so much, they have some of our favorite adventures in quite often grimdark or Lovecraftian horror settings. If you’re not sure about it, download our favorite campaign sourcebook for FREE—it’s about a super whacky location that will have your players roaring with laughter. That is, if their sense of humor is anything like ours 😉 
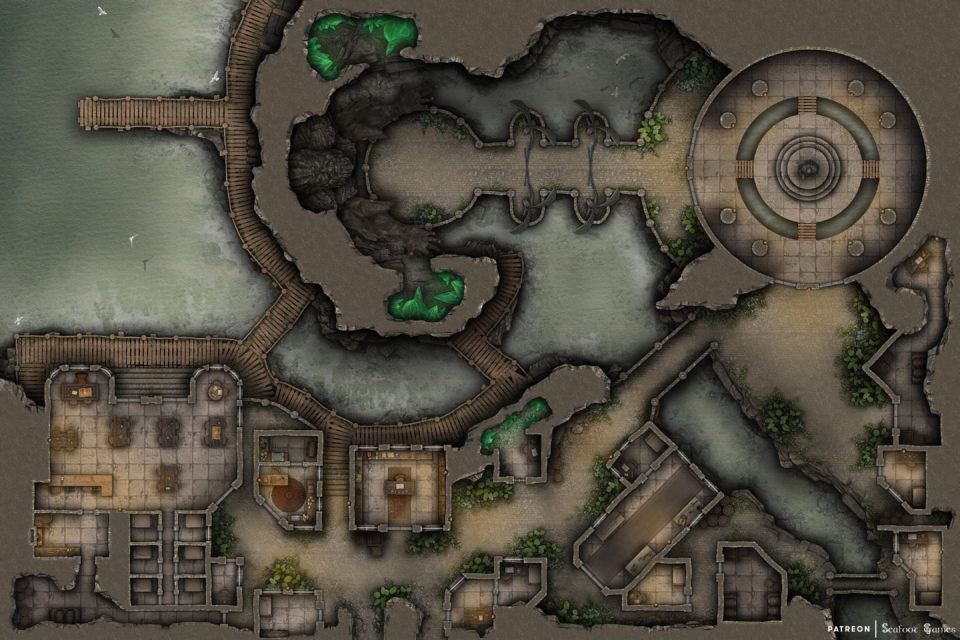
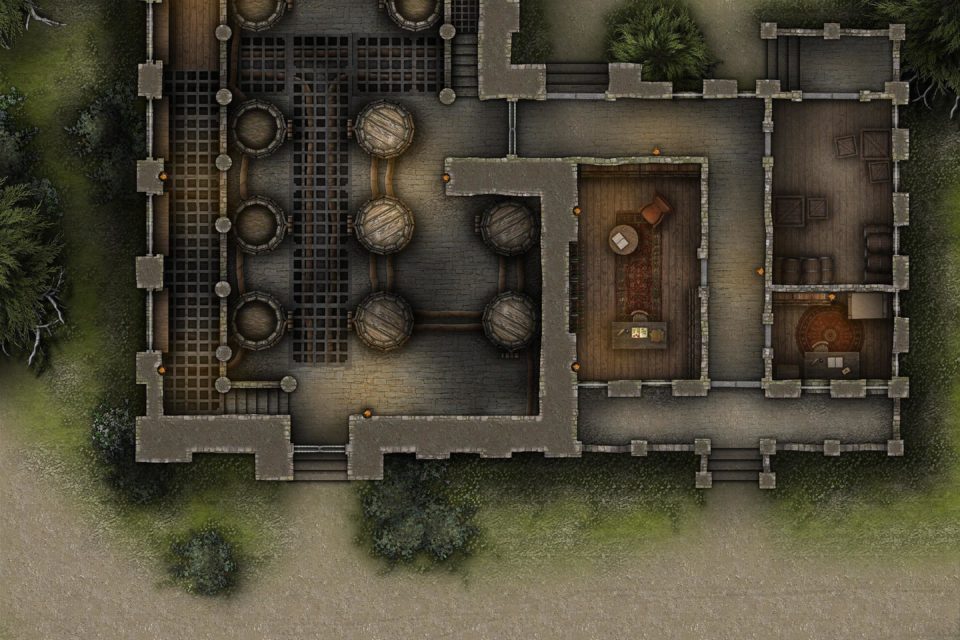
  • Free TTRPG Battlemap with Adventure –Fuzzington’s Brewery

    Free TTRPG Battlemap with Adventure –Fuzzington’s Brewery

    Free TTRPG Battlemap with Adventure –Fuzzington's Brewery

    Meadery-Sitting

    One day Meadmaster Fuzzington comes into the tavern asking if someone can carry a barrel of his finest ale to the nearby school of magic. He’ll pay well for the job.

    If you agree, the task goes uneventfully and the graduating students at the magic school are incredibly grateful to receive the alcohol.

    When you return to the meadery, however, Fuzzington is preparing his horse and cart to leave. There’s a barrel on the back with a particular healing brew, and he says he’s received a letter from a neighbouring town that a building has collapsed in a storm, injuring several of the locals. He’s going to take them this brew to help with the wounded, and should be gone for the night.

    He pays you the agreed upon sum for your earlier task, before asking if you’ll stay here and guard his meadery until he gets back sometime tomorrow. If you do this, he’ll give you a barrel of his special brew.

    Should you agree, he thanks you sincerely before handing you a small notebook from his belt, saying it’s got all the instructions you need to keep the place running.

    Later that day however, once Fuzzington has left, bandits break into the meadery. They somehow know that Fuzzington’s away, and are looking for Fuzzington’s secret mead recipes and notes. They plan to sell them and becoming rich. Their leader is a woman with fiery red hair and grey eyes.

    They are surprised to see you, having not expected anyone to be inside. But, rather than fighting, the woman introduce herself as Myrtal the Red Fox, and tries to strike a deal. She wants Fuzzington’s secret recipes and notes, and if you give it to her and her mates they’ll split their profits with you after they sell it to the highest bidder!

    Should you refuse, they attack, saying that they gave you a chance. Once you’re winning, they surrender and beg for their lives. However, if you show them mercy, Myrtal attempts to backstab you as she doesn’t want her followers to see her as weak–only cunning.

    When Fuzzington finally returns, if you tell him what happened he is horrified, saying that when he got to the town it turns out there was no emergency, and no house had even fallen. He suspects the bandits who broke in might have been responsible for the letter.

    If you kept his recipe safe, he is thankful you were there to safeguard his meadery. If you say you couldn’t protect it and the bandits got the recipes, Fuzzington laughs heartily, and explains that the group of bandits aren’t the first to have come seeking his secret recipes.

    He says that the book he gave you had real notes about some of the things that could have gone wrong, but the recipes inside it were all silly and fake. He thinks that whoever tries to make them will be sorely disappointed.

    As thanks for your efforts, he gives you a barrel of his normal mead along with the promised healing mead.

    GM’s Notes:

    Grab our free adventurer’s guide for the location to run this adventure in here. It details everything you need to know about Craobh Agus’tur, plus Measmaster Fuzzington (though there’s more on him below!) 🙂

    Next is a roll chart for other random things which can happen while your players are safeguarding the meadery.

    1: The mead grows watery mouths and facial expressions like a bear, coming alive. The now-animated vats squeal in high-pitched cries. In Fuzzington’s notes, he instructs that when this happens they need to be sung to so they go “back to sleep”.

    2: The bees in the hive begin striking, saying that they’re not getting paid enough. They demand The Pendant of Argoyle, which is located in the village near the herbalist’s. When you get there, you find the Pendant of Argoyle is a purple bell flower. Once you give it to the bees, they look at it in happiness and awe saying “so beautiful!”

    3: Gnomes knock on the door, claiming that Fuzzington agreed that they could test their vat-stirring invention when it was finished. They’re ahead of schedule, but they insist it’s ok for them to come inside and test it. They grow offended if you tell them to wait until Fuzzington returns, or otherwise leave, but if you let them in their machine will destroy the barrel it is tested on. They were also lying about having Fuzzington’s permission, but were confident the invention would work and gain his approval–they just needed to demonstrate it!

    4: Inspector comes in complaining about a customer who grew ill after drinking the mead, but the inspector is really sent by Fuzzington’s competition to inspect the vats and sneak real poisons in.

    5: Magical mites start overrunning the beehives. Fuzzington’s instructions write that should this happen, you need to use up a magical scroll to banish them. Problem is, it’s amongst 2 scrolls which all do different things. One is a scroll of enlarge person, the second is burning hands.

    Meadmaster Fuzzington

    At first glance, this individual appears to be a brown bear, albeit one dressed in a large apron and wearing spectacles that have seen better days. He is, in reality, a sapient and articulate fellow who, in spite of his huge, imposing form, is beloved by the townsfolk and is the proprietor of Meadmaster Fuzzington’s Meadery, the fanciest place in town.

    When he isn’t hosting functions or weddings at his magnificent and highly successful establishment, Fuzzington is a professional apiarist who cares for his bees, who in turn provide the honey he uses to make the finest mead in the region. 

    His personality is as sweet as the mead he brews, and he has a reputation for helping adventurers and travelers in need. But troublemakers who mistake his easy-going nature for weakness soon find themselves being literally tossed from his establishment in short order.

    Easily the most popular person in town, Fuzzington is thought of as something of a leader in the community, and it is a poorly kept secret that he’s actually running the place, even though he holds no official position. Repeated attempts to get him into any sort of official job are repeatedly rebuffed, as the brewer has no love for the tedium and weight of responsibility that comes with high office.

    Still, when times are tough, there is no-one better to count upon than this quiet and unassuming bear-man.

    If you’d enjoy way more TTRPG battlemaps with adventures like this free one, Luke and I have just released our newest bundle of 420 large, 40×30″ battlemaps (double the size of those in the Quarantine Bundle) for $59.99. It’s your chance to have a great deal on some of our most beautiful maps! We guarantee that is something here for every GM—no matter what setting you prefer, from large cities to underwater seascapes.

    Paying just $59.99 rather than full price saves you over 97%! Take a look at all the extra maps you can download with one click here

  • Free TTRPG Battlemap with Adventure – Skyship Slums of Aeraveska

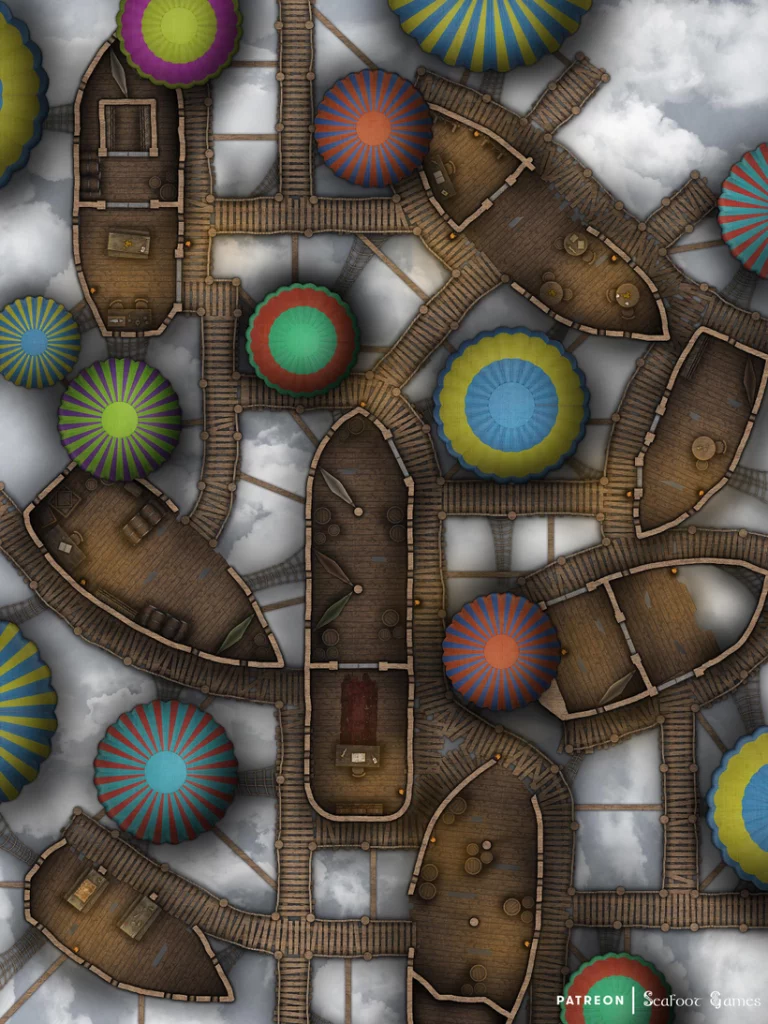
    Free TTRPG Battlemap with Adventure – Skyship Slums of Aeraveska

    Free TTRPG map the Skyship Slums of Aeraveska

    Explosive Conspiracy

    One day while visiting the floating sky city of Aeraveska, you are given a letter by a messenger dove with a shimmering bronze seal on it. It is marked by the Mechanist’s Guild, and the letter comes from none other than Alkari Corvus; the guild’s Grand Artificer. 
     
    The letter writes that the artificer suspects there is a terrible conspiracy going on, one which he cannot trust to many of the locals–and those he does trust, would be recognised instantly whilst trying to uncover the truth. Alkari writes that he’s heard word of your good deeds in the city, and wishes you to meet with him and discuss preventing a possible disaster.
     
    Should you go to meet with Alkari, you’ll find him in the Mechanist’s Guild. It is one of the oldest buildings in the city, though covered by rust like most other things here. But there is a sense of faded glory about the place, with its high columns and vaulted ceilings.
     
    If you enter you’ll be greeted by the receptionist, who has curly black hair and dark skin. She is wearing a copper-colored dress decorated with small, shiny bronze cogs, and shimmering bronze lipstick. Upon seeing the letter, she’ll smile warmly and give you directions for how to find Alkari.
     
    His office is at the top of one of the towers, overlooking the surrounding city and sky. When you knock, Alkari will open the door using a complicated rope-mechanism he can peck from his desk. He looks reminiscent of a raven, with smooth, black feathers and a belt along his waist with an assortment of gadgets. A small set of goggles rest on his forehead.
     
    Alkari thanks you for considering his offer, and gestures with a “hand” tipped wing (much like a raven’s foot) for you to sit down in a couple of chairs draped with thick moss. They appear to be welded together from different cogs and scrap pieces of metal, but polished to a high shine, though there are some patches of rust in the depressions.
     
    Once you are comfortable, Alkari will explain in a solemn voice that he has heard wind of terrible rumors. Rumors that there is a conspiracy amongst one of Aeraveska’s lowest slums to blow up the arcane generator which holds the city aloft! You must go there at once, Alkari pleads, and investigate these claims. If they are real, you must do what you can to stop what he fears is a growing rebellion from the malcontents on the city’s lower levels.
     
    He’ll then pull a small, rolled up map tied with a red ribbon out from one of his desk’s draws. Then he’ll hand it over to you, saying that it shows the locations where most of the rumors of violent discontent have been reported. He’ll also offer you a small pouch of gold doves; some of the city’s original currency, which are highly valued. 
     
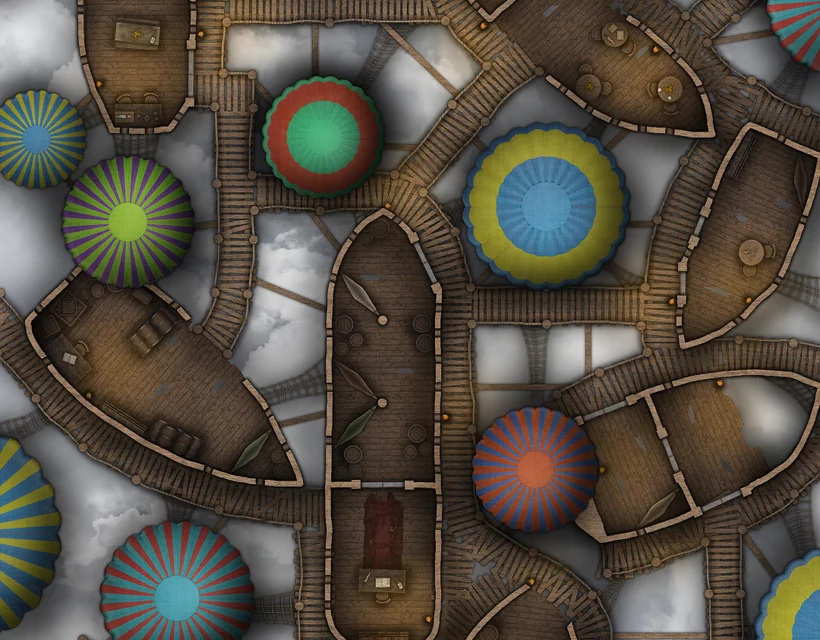
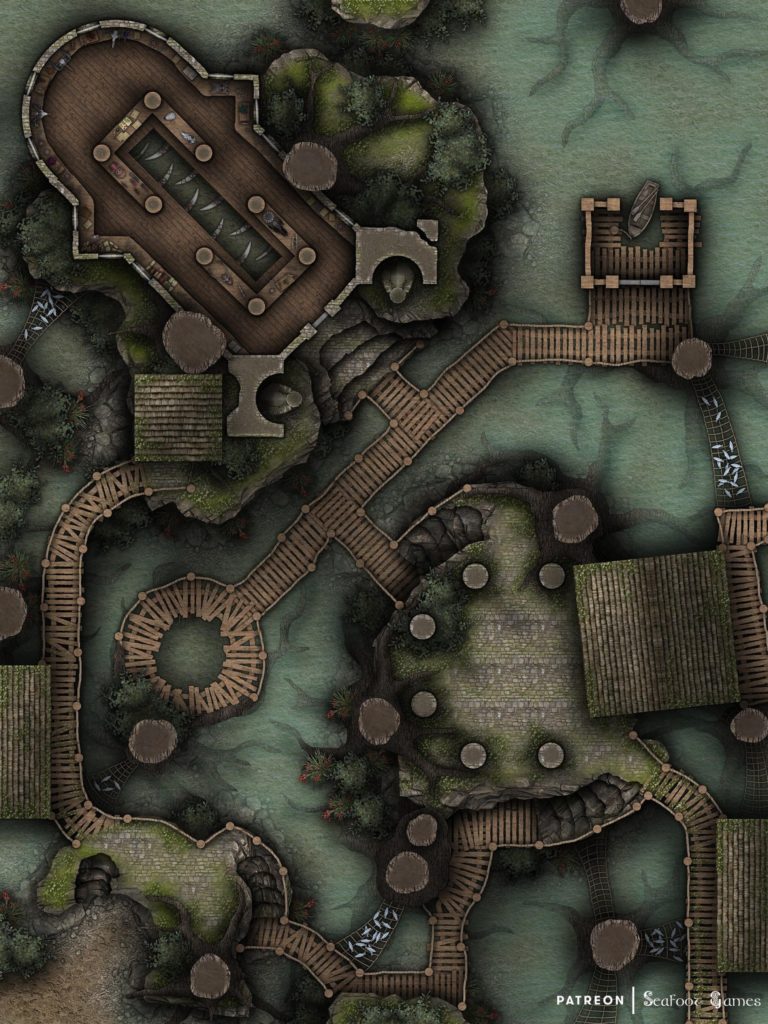
    Should you go to the area, you’ll find it is among the very lowest of the city’s slums. The whole area is made of retired timber skyships, which have been nailed together with more planks of wood. The use of such a short-lived material so close to the long-drop below tells tales about the slum’s desperation. A few patched hot-air balloons have been jerry-rigged to add extra lift to heavier parts of the structure, too.

    On top of that, these slums have some of the foulest fumes wafting amongst them; exhaust from the arcane generator that holds the city aloft far, far above. Litter that can’t blow away in the often-strong winds cover the walkways. The sides of ships the locals have made homes in are broken in places, or heavily carved out with graffiti. And the often-scarred residents here wear stained, ragged clothes, often with torn strips of cloth over their nose and mouths.
     
    Because of this, the locals will notice you right away. Many of them regard you with dour looks, while others might try to jump you for your valuables. If you try to ask anyone about the conspiracy, however, they’ll coldly say they don’t know what you’re talking about before excusing themselves.
     
    Should this happen, you will be jumped by a group a few minutes later–once the individual you questioned has had time to run off to tell their contacts that a stranger’s been asking around regarding their plans. If you manage to defeat the group, the other locals will begin attacking you also. They may be poor, and many of them even drug-addled, but they’re a close-knit community with nothing much to lose.
     
    Once the fight reaches a certain size or hits a certain number of casualties, the leader will emerge and try to reason with you. She’ll come out of one of the rooms, with her hands up in the air as a gesture of peace. She is wearing red, worn-through fingerless gloves, and a bandana tying up thick locks of auburn hair. Holy stockings cover lean legs, while a dress that has been patched far too many times drapes her wiry frame.
     
    Her ears are adorned with steel or carved wood earrings, and she has a belt covered with different tools along her waist–predominantly knives. She’ll introduce herself as Kathorne, and say that she seeks an end to this violence for her people. Then she’ll say that you came here asking about their plans, so as a peace offering she’ll explain them to you. Then you can decide for yourself what you wish to do with that knowledge. Fair?
     
    If you listen, she’ll explain with a relieved sigh that yes, they have been planning to blow up the arcane generator which holds up the city–but it’s not as bad as it sounds! They have a mechanist friend who works for the guild, and he told them there are safety measures in place so the city won’t just crash. It’ll drift to the ground.
     
    She continues to explain that her people have been forced to live in these slums due to the overpopulated city’s stagnant economy. There are too few jobs and too many people–we can’t work even if we want to! On top of that, it costs money to get down to the land below, so most of us can’t just leave. There are so many people in the slums, all over Aeraveska, breathing in the toxic fumes from the arcane generator. Most don’t make it beyond 30! All her people want is to leave and start a new life somewhere else, somewhere far away from this dying city.
     
    If you are swayed by her reasoning, she’ll breathe a sigh of relief and thank you, before sending a group out to rig the final explosives and set them off, now that the Mechanist’s Guild is cluing on to them. Before the crowd disperses, she’ll tell you where you can find her in her hovel should you need to.
     
    About an hour later the explosion will destroy the arcane generator. The bones of the city will shudder terribly, and it will slant as it begins a steep slide through the sky, crashing down towards the earth at terrifying speeds. The emergency systems will engage, slowing the descent somewhat magically, as well as sending a barrage of parachutes up behind the doomed city.
     
    Upon impact with the earth below, some of the old and rusted buildings will crumble and collapse. 10% of Aeraveska’s population will die.
     
    If you go to find Kathorne afterwards, her house is among those that collapsed. Should you make your way into the ruins, you’ll find her crushed body, as well as a journal. In the journal Kathorne wrote that she knew the fail-safe wasn’t fully functioning due to the city being so old and in such a decrepit state, but she believed the risk was worth it for her people.
     
    Should you refuse to aid Kathorne in her plan instead, unless you can find a peaceful resolution (such as paying for their passage off the city), her and her people will put up a vicious fight.
     
    Once you tell Alkari about what has occurred however, he’ll puff up all his feathers in distress. Then he’ll remark how horrified he was that they wanted to rely on the failsafe systems, which were created at the city’s founding and might be just as unreliable as much of the old, run-down city. It could have ended in many, many deaths–without even regarding where Aeraveska would land. Shaking his head some more, Alkari will solemnly pay you even more of the golden doves as thanks for making the right choice against what could have been a convincing argument. Thanks to you, he emphasizes, many lives were saved, along with our great city.
     
    As you leave, he muses to himself thoughtfully that perhaps the Mechanist’s Guild can find some way to allow poor citizens to leave, if they wish.

    If you’d enjoy way more maps like this free Skyship Slums of Aeraveska D&D battlemap, Luke and I have just released our newest bundle of 420 large, 40×30″ battlemaps (double the size of those in the Quarantine Bundle) for $59.99. It’s your chance to have a great deal on some of our most beautiful maps! We guarantee that is something here for every GM—no matter what setting you prefer, from large cities to underwater seascapes.

    Paying just $59.99 rather than full price saves you over 97%! Take a look at all the extra maps you can download with one click here

  • Mangrove Swamp Fishing Village Free Battlemap & Adventure

    Mangrove Swamp Fishing Village Free Battlemap & Adventure

    Free TTRPG battlemap of Mangrove Swamp Fishing Village
    Grab this free TTRPG battlemap of Mangrove Swamp Fishing Village, plus the hilarious adventure prompt for it. VTT-ready, download now!

    Mangrove Swamp Fishing Village Free Battlemap & Adventure

    Quality Assurance Test

    There’s a poster in one of the cities for a wizard looking for adventurers to pick up an item for him, from a distant magic store. Should you go talk to the old wizard who put it up, you’ll find him at one of the universities of magic, in a very dusty wing of one of the towers which is positively filled with books.

    He’s got knobbly knees and hands which shake with palsy, but is surprisingly bald and clean shaven. He is also dressed in normal clothes, not a wizard’s robe. If you ask him about his unusual dress, he’ll wave his hand at you and chuckle that it’s more practical and less of a risk of catching on any moving experiments.

    The wizard will then invite you to sit down on the other side of his desk. Behind him is a shelf filled with lots of tiny, carved idols. They’re all the same; a kneeling squid-man with bat-like wings carved from red coral, but encased in different glass jars.

    He’ll introduce himself as Aruzahl, before explaining that he’s heard of a magic store in a distant village which he’s seeking to purchase an artifact from. He says the town is renowned for dredging the seas for sunken magical artifacts, and they supposedly sell all sorts of weird and wonderful ones. However, what he wants is specific. It’s a red mask that shouldn’t be too expensive. He’s happy to send you there with the gold to purchase it–consider it half payment in advance. You’ll receive the rest of your funds when you return, which will be quite handsome.

    Should you agree, he’ll give you the coin and directions to the village, before bidding you a safe trip.

    Once you arrive, you’ll find things aren’t right in the village. The locals are all cultists, with tentacles growing out of their backs, or writhing from the skin of their arms. Some even have multiple eyes!

    When they see you, they will attack, whilst rambling madly about the “deep ones” and the “Tatterdemalion King”. If you manage to survive the first attack, you’ll see that the locals have clustered in a ring at the heart of town, surrounding a woman–who is covered with not just tentacles, but eyes all over her skin as well–that is holding up a small, red idol of a kneeling tentacle-man with wings. Like the ones in the wizard’s study.

    If you destroy the idol, the people will begin to return to their senses, and the mutations will bubble away and dissolve into black liquid. They will be incredibly thankful, and if you explain that you came here to get the mask they’ll gladly give it to you as thanks for saving them from the cursed idol.

    When you return to Aruzahl, he’ll thank you for bringing him the mask and pay you the agreed upon sum. But, regardless of whether you tell him about the cultists or not, he’ll ask how the people in the town were doing and if there was anything unusual going on.

    If you tell him about the cultists, he’ll ask how many people in the town were affected, and if the madness seemed to increase with the number of tentacles, etc.

    Should you confront him about the artifact being the same as the ones on his shelf, he’ll harrumph and explain that he sent them a little test. A test which they failed–the idiots couldn’t even figure out the artifact was cursed. He won’t be buying their inferior, or possibly dangerous, magical goods in future because they clearly have no idea what they’re doing, he’ll explain. The test is something he does when he discovers any new magic shop, that’s why he has so many of the cursed artifacts.

    If you’d enjoy way more maps like this mangrove swamp fishing village free battlemap & adventure, Luke and I have just released our newest bundle of 420 large, 40×30″ battlemaps (double the size of those in the Quarantine Bundle) for $59.99. It’s your chance to have a great deal on some of our most beautiful maps! We guarantee that is something here for every GM—no matter what setting you prefer, from large cities to underwater seascapes.

    Paying just $59.99 rather than full price saves you over 97%! Take a look at all the extra maps you can download with one click here

  • Free TTRPG Battlemap – The Ringed City

    Free TTRPG Battlemap – The Ringed City

    Click image to download this free TTRPG battlemap of The Ringed City, then keep scrolling for the detailed adventure prompt written for it. 🙂

    Free TTRPG battlemap of The Ringed City

    There is a city that exists between the planes of existence, and it is—in a way—an amalgamation of all of them. In this city, portals to one plane or another pop up all over the place; in doorways, in teapots (but only on Sundays), and even on the undersides of shoes. The latter can make walking quite difficult.

    Regardless of this city’s problem with portals, within it is a district reserved entirely for hats. But, perhaps, not the hats that you’d expect. The hats in this district are alive, and they wear their hosts. They have little mouths, which they talk to each other with in posh accents (it is considered rude to use their host’s mouths).

    The hats are, in fact, known for being very formal and proper. They also don’t allow other species to enter their district, for they’re a rather exclusive lot.

    Now, while visiting this—rather unusual—city, you are approached by a red pointed wizard’s hat named Alavastrum, who wears a mousy old human with a grey beard. He runs a small and rather eclectic magic store outside of the District of Hats, and he’s employed you to recover a spy he sent to there who hasn’t returned. He’ll describe him to you, so you know how to recognize him. He also says that if the spy’s going to be anywhere, he should be in a particular plaza.

    If you ask Alavastrum about why he sent the spy, he’ll mumble almost incoherently, waving his host’s hands as he wanders about his store and saying that it’s top secret information that is highly confidential and he couldn’t possible tell you, no.

    Before you set off, the wizard hat will cast an illusion over you; giving you a hat to suit your personality that will appear to speak when you are speaking, whilst looking like your own mouth isn’t moving. Like this, Alavastrum explains, you will appear to be a hat and so allowed into their district.

    Once you get inside the district, you will find the spy in a small community hall unguarded; simply tied to a chair in the middle of the room. If you release him, once you emerge with the spy you will realize it was a trap, for there will be a rather large, ape-looking demon being worn by small bola hat on one side of its head. The bola hat will smack its host’s fists together, saying ‘gotcha, thought you’d come for your little spy!’.

    The bola hat is surrounded by guard hats, and they will all try to apprehend you. If you remove or kill any of the hats, their hosts—now free—will be incredibly confused and disoriented; further adding to the chaos of the encounter.

    If you get back to Alavastrum, the spy will rip off his illusory hat and tell the wizard that his suspicions were correct and his hatfriend was having an affair. Alavastum will sadden, slumping over his host’s head like he’s taken a punch to the band, saying ‘oh…’.

    Then a wide brimmed racing hat wearing a small woman will angrily arrive at the entrance to the magic store, accusing Alavastrum that she knew he was behind all this!

    Alavastrum will straighten and accuse her of cheating on him with the small bola hat. The racing hat will reply ‘I’m sorry, he may be half your size but he is twice the hat than you’ll ever be’.

    Alavastrum will agitatedly pay you, shoo away his hatfriend, shut the door to his store then go weep loudly somewhere within it.

    If you’d enjoy more maps like this free TTRPG battlemap of this The Ringed City, Luke and I are currently offering 520+ battlemaps for $39. It’s your chance to have a great deal on some of our most popular battlemaps! With over 520 total maps, we guarantee that is something here for every GM—no matter what genre or setting you prefer, from grimy dungeons to beautiful overgrown ruins.

    Paying just $39 rather than full price saves you over 96%! Take a look at all the extra maps you can download with one click here

  • Free TTRPG Battlemap – Eldritch Sky City Battlements

    Free TTRPG Battlemap – Eldritch Sky City Battlements

    Click image to download this free TTRPG battlemap of Eldritch Sky City Battlements, then keep scrolling for the detailed adventure prompt written for it.

    Free TTRPG battlemap of Eldritch Sky City Battlements

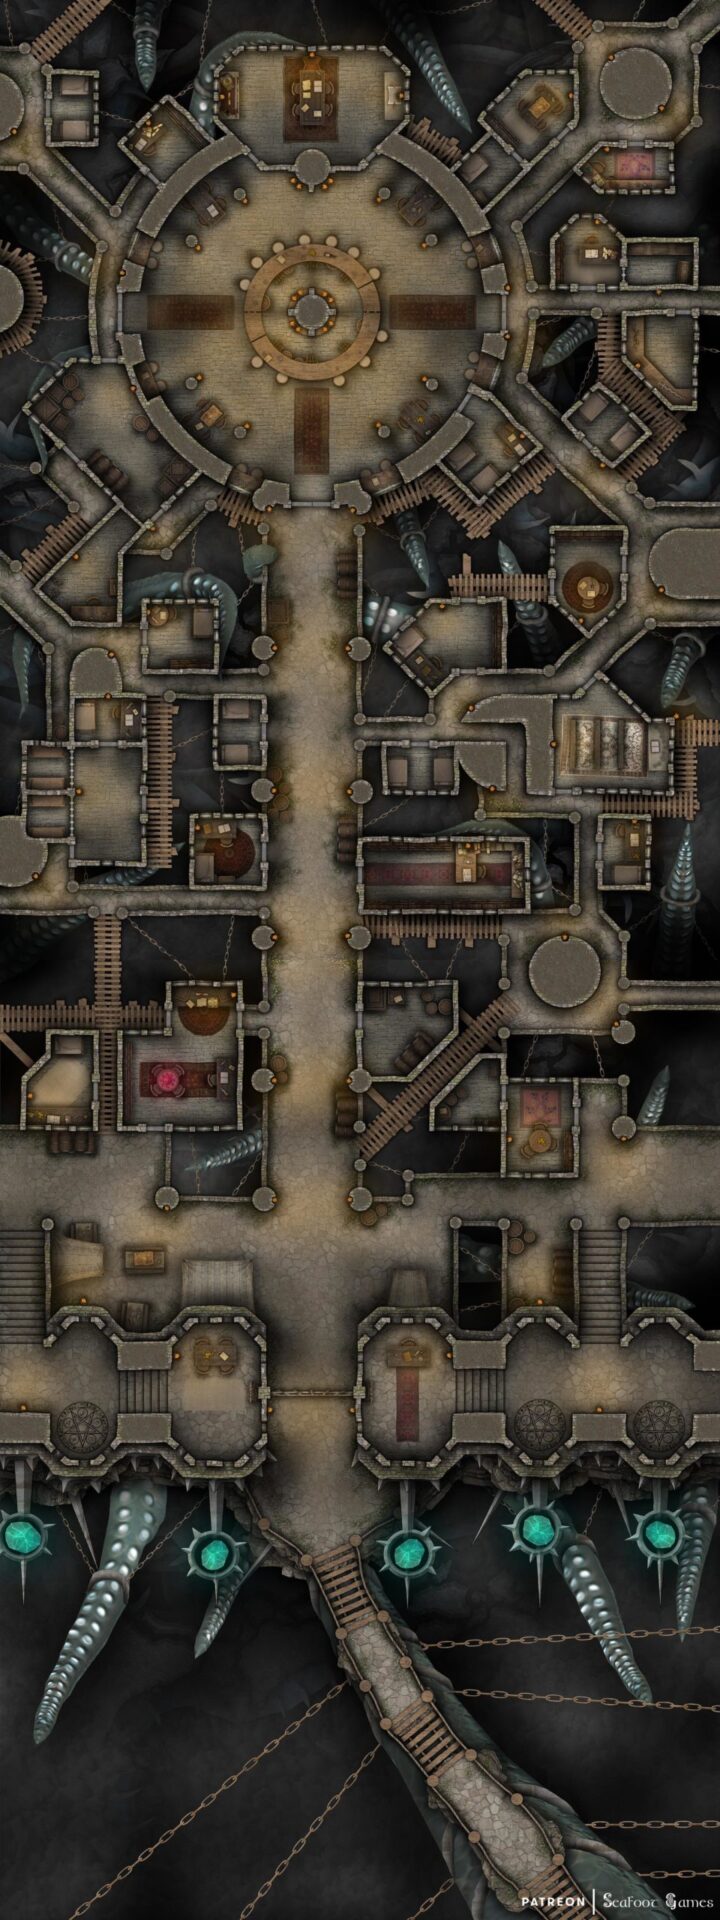
    You’re a guard for this city that was built to imprison and watch Gormos the Ancient One. Every day you stand at your post in the lookout towers, taking shifts with your fellow fighters. Beneath you the magically talented, elite warriors known as Keepers wander in and out of the city with important duties.

    The highest of their order are the Gem Masters, and each morning you watch as a group of them descend the vile tentacles of the eldritch horror known as Gormos, all the way down to his slippery, deformed body. There they check that magical crystals which were embedded within his flesh generations ago are still functioning; dampening the monstrosity’s powers and ensuring he cannot escape to consume the world.

    Only, today, the Gem Masters haven’t returned. Hours crawl by, slowly, and tensions rise. Your superior begins to look nervous, and you catch glimpses of her talking to several Keepers who hurry in and out from the fortifications in the hopes of updates.

    Just as talk of a planned Keeper expedition begins surfacing, one of the Gem Masters clambers over the edge of the floating city, collapsing on the stone path. He is covered in blood and bleeding from several deep gashes. “We are under attack!” the man yells hoarsely, just as giant, parasitic mites crawl over the lip of the city; climbing up from the surrounding tentacles.

    WHAT’S HAPPENING? The mites are parasites which feast and breed on Gormos’s swollen body. They burrow into his flesh, surviving off his blood and the mucus which coats his slimy skin. Usually, the Gem Masters kill what mites they can during their daily checks of the crystals, but today they were betrayed.

    The surviving Gem Master, named Z’oggath, killed his brethren, cutting down those who trusted him—though he claims his group were overwhelmed and killed by the parasites. Due to his betrayal, he has inherited the position of the lead Gem Master, and now declares that this tragedy happened due to the negligence of others from his order.

    He will attempt to use the turmoil he stirs up to overthrow the current leader of the Keeper Order. He has done this because he is mad—for living nearby the eldritch horror, listening to the constant whispers in the mind, causes all those to go mad, eventually. It is only a question of when.

    Usually, the madness shows by the victim’s eye colour changing to violet, however Z’oggath’s eyes are delayed in undergoing the change. It is the custom of the Keepers in this city to humanely execute those among them who begin showing signs of this madness, but this Gem Master has hidden it well. If he remains undetected and achieves his goals, he will blind himself as soon as his eyes begin to change, and disguise it as a horrible accident.

    Once he becomes leader of the Council of Keepers, he intends to spread his madness to the others, and convince them to free Gormos. For the horror’s whispers in his minds have told him that the monstrosity isn’t what their histories have told them, that they have been lied to, and must free Gormos to see what gifts he will bestow upon the world…

    GM’S NOTES:

    This adventure prompt is a prequel to the one written for Ruined City of Chained Horror, where Z’oggath’s plans have reached fruition and Gormos’s release is imminent.

    If you’d enjoy more maps like this free TTRPG battlemap of Eldritch Sky City Battlemaps, Luke and I are currently offering 520+ battlemaps for $39. It’s your chance to have a great deal on some of our most popular battlemaps! With over 520 total maps, we guarantee that is something here for every GM—no matter what genre or setting you prefer, from grimy dungeons to beautiful overgrown ruins.

    Paying just $39 rather than full price saves you over 96%! Take a look at all the extra maps you can download with one click here