Category: The Best Free DnD Battlemaps with System Agnostic Adventures

Download the best free DnD battlemaps with system agnostic one shot adventures! My realistic, grimdark fantasy battlemaps are high resolution and each one shot was written just for its map, should plug-in to any fantasy setting, and includes an easy-to-use hook to get your players started on the quest.

My best free DnD battlemaps with system agnostic adventures are ready to upload into VTTs like Roll20 (and are less than 5MB so should work on a free account), Foundry, or Fantasy Grounds and come as an ungridded 72ppi .JPEG file you can right click to download. The reason our VTT maps are ungridded is because the VTT software drops a grid over them when you play 🙂

If you’d love a printable version of any of my best free DnD battlemaps with adventures, my premium maps include files formatted for easy home printing in A4 .PDFs, as well as A1 or A0 poster files you can have professionally printed at stores like Staples or Office Depot. You can grab these in my great value battlemap bundles, as well as buy individual maps on DriveThruRPG. My premium maps also come formatted as 300ppi .JPEGs without watermarks for VTT use, and if they have a system-agnostic adventure written for them it’s included in an adventure .PDF document.

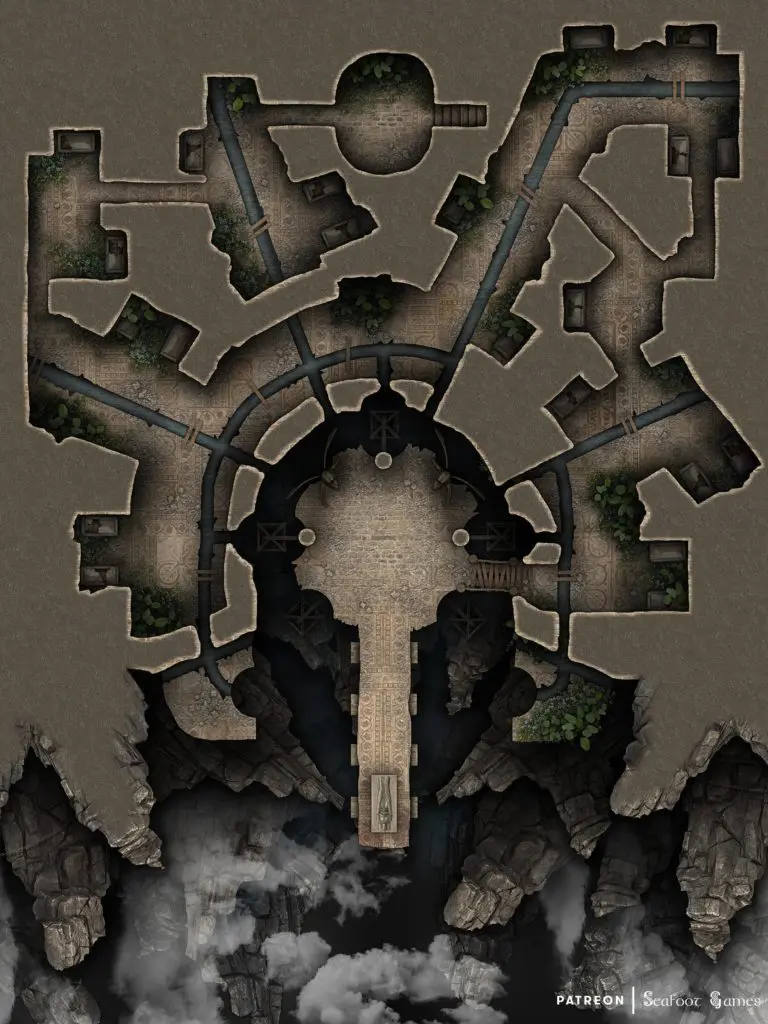
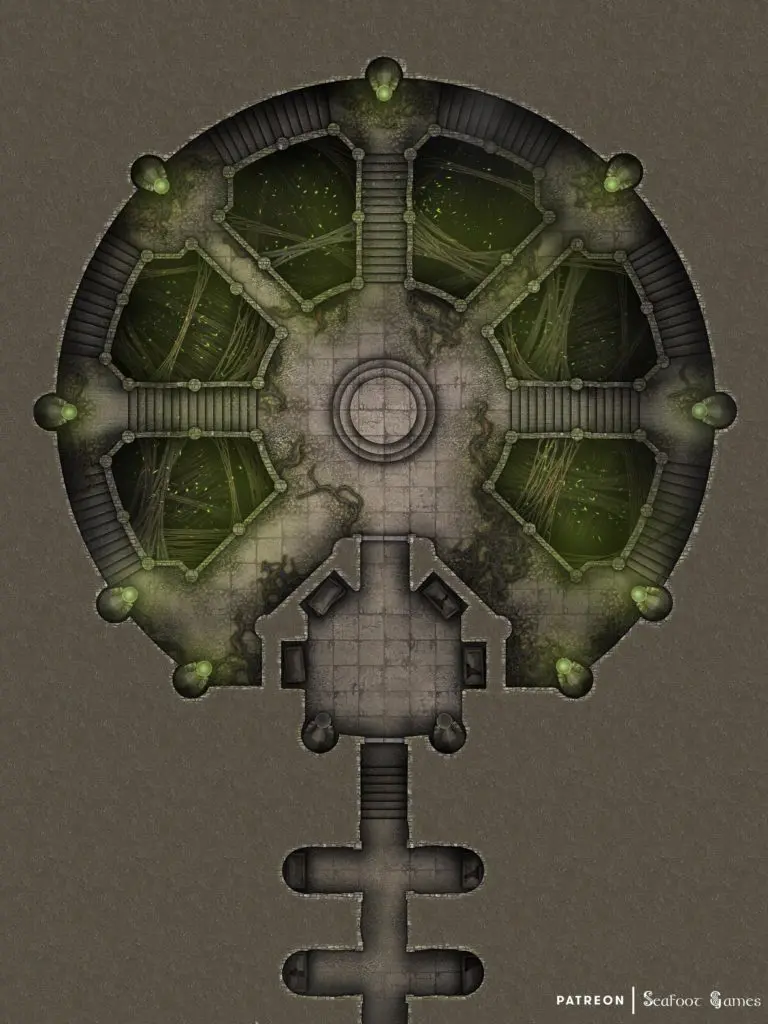
  • The Plague of Justice Free DnD Battlemap with Adventure

    The Plague of Justice Free DnD Battlemap with Adventure

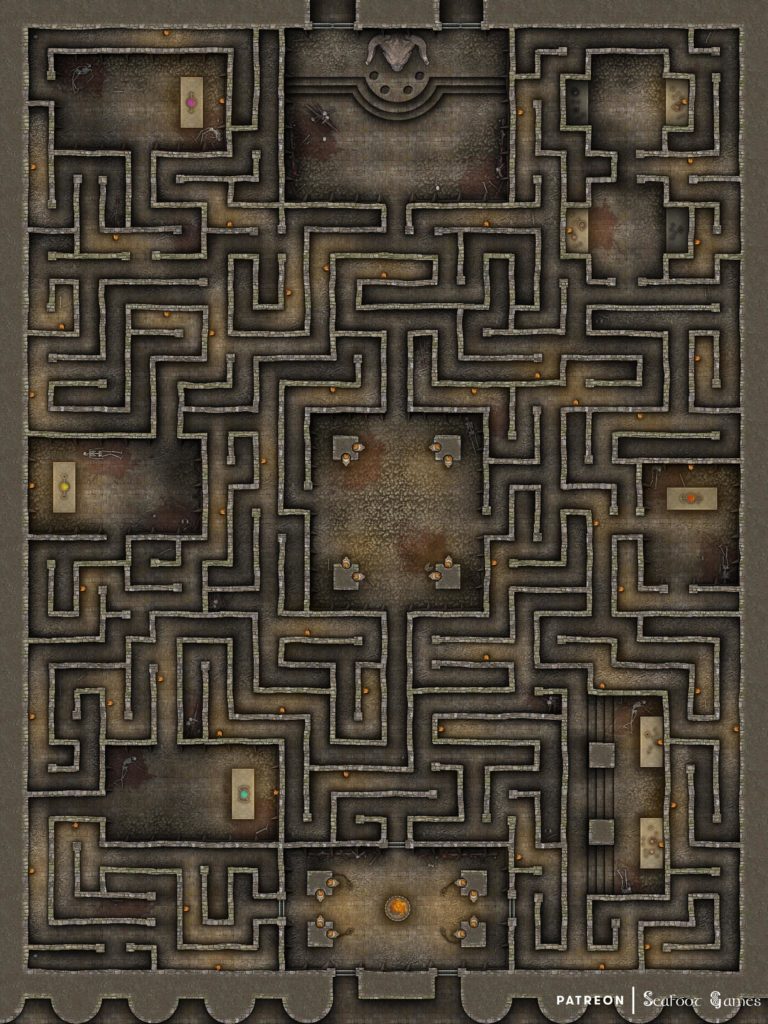
    The Plague of Justice Free DnD Battlemap with Adventure, about a prisoner who was experimented on seeking revenge. VTT ready!
    The Plague of Justice Free DnD Battlemap with Adventure, about a prisoner who was experimented on seeking revenge. VTT ready!

    The Plague of Justice Free DnD Battlemap with Adventure

    The Plague of Justice

    While walking the streets of a dwarven city you notice a elderly man have a coughing fit before falling down on the ground. Everyone moves away from him, none coming to his aid. If you approach him to try and help him, some of the bystanders warn you away, claiming that there’s a sickness spreading in the city and to steer clear of the elderly man.

    Regardless of if you help or not a couple minutes later several dwarves show up with a stretcher wearing apothecary masks. Two of them put the old man on the stretcher as the third man reassures the crowd that the city’s best alchemists are working on a treatment for this new sickness, and not to worry.

    If you question the apothecaries, they’ll say they don’t have time to go into details but if you want more information or are looking to help, you should go visit the barracks of the Silver Fist who are in charge of dealing with the sickness. They’ve even set up a quarantine camp adjacent to the barracks to keep the infected from roaming the tunnels while a cure is sought.

    When you get to the barracks and explain why you’re there, a dwarven man escorts you into a large chamber where three other dwarves are standing around a table having a conversation. They’re all wearing some form of chain mail armor with tabards of the Silver Fist. They motion you over, with the high paladin called Gudrun explaining that the sickness started spreading a few weeks ago. As best they can attain, the sickness may have come from the old catacombs as the first infected was a gravekeeper. He was one of a small group of individuals that are trained from youth to maintain the catacombs and care for the dead.

    This is of course where the first problem began, the catacombs are a sacred place and only those dwarves trained to be gravekeepers may enter. It is foretold that any dwarf born of the city who enters the catacombs without this training and before his time may have his soul put to rest just like the dead that already reside there.

    Unfortunately this first infected gravekeeper is now dead, while all the others have gone mysteriously missing and the sickness continues to spread. The apocotheries of the city are hard at work looking for a cure, but the sickness is mutating too fast for them to quickly find a solution without a sample of the original non-mutated disease.

    Gudrun continues that without any of the gravekeepers available he was about to risk sending some of the Silver Fist acolytes into the catacombs as he could wait no longer, however with your arrival you have given him a second option. Gudrun looks you in the eyes sternly and asks if you’d be willing to enter the catacombs and look for what may have caused this sickness, as well as retrieve a sample with a small hand-held device he can provide. The city would be ever in your gratitude and the Silver Fist itself would be willing to have a special weapon crafted just for you.

    You find the entrance to the catacombs at the end of an abandoned district of the city, a set of stairs carved into the stone that leads you deeper into the mountain and under the main portion of the city. Deeper in, corridors split off creating a maze-like structure. After traveling the corridors for several minutes you find your way to a large bronze door engraved with the silhouettes of dwarven ancestors, and on the other side you can hear muffled arguing.

    When you open the door you find five dwarven individuals who are covered in rags, with vile weeping sores, and deformed bones jutting from their bodies. Somehow however, they seem to be doing just fine. They look confused seeing you, before immediately attacking while incoherently yelling about some type of justice.

    Past the deformed dwarves is another bronze door that bars your way. When opened, it reveals a large chamber covered in ichor and fleshy tendrils. The air is full of buzzing as swarms of small insects fly around, and another deformed dwarf wearing a damaged suit of full plate and wielding a scythe is standing upon a raised platform.

    When you enter, the dwarf turns to face you claiming nothing will stop justice from being done to those who have, for so long, avoided it. If you question him about who he is and what he means, he’ll explain that his name is Daroc and he was once a gravekeeper but was kidnapped by a wealthy doctor called Rogar who experimented on him with horrible diseases.

    Daroc continues that when it was clear Dr. Rogar was not getting the results he wanted, he tossed him into the catacombs to die. Only he did not die, rather he became something new.

    Because of this, Dr. Rogar must pay for his crimes and will suffer as he did with the disease he was infected with.

    If you explain that the diseases he’s released are killing many dwarves in the city. He calmly explains that they’re collateral damage and when Dr. Rogar has been made to pay, he will personally bury each one of the fallen dwarves in the catacombs so that they may rest in peace.

    If you ask about the other gravekeepers, Daroc explains that his brothers and sisters were easily swayed to join him, all but the one–who escaped, releasing the sickness too soon into the city. However, the sickness is ready in full now and the time of justice is close at hand.

    He’s solemn at the fact you killed his deformed gravekeeper brothers and sisters, but also suggests that you may be swayed to join him, caressing a bony protrusion on his wrist that is slowly dripping some type of contagion. He, after all, will need a lot of help burying the bodies of the fallen after he is done.

    If you attack Daroc, he fights back with his scythe as well as commands several different swarms of lifesucking flying insects to attack you.

    After he’s dead, the chamber shakes as the fleshy strands within retract and start to wither and die before turning into black ash which quickly dissipates. When you return to the Silver Fist, Gudrun explains that it’s a miracle and that the sick just suddenly recovered. He’s keeping them in isolation for the next week to be certain but they aren’t showing any symptoms of the sickness.

    If you explain what happened in the catacombs he’ll be shocked, explaining that he’ll look into Dr. Rogar and his dealings. He also holds to his agreement about having special weapon crafted for you.

    If you enjoyed this The Plague of Justice Free DnD Battlemap with Adventure, Luke and I released the Hardcore GM’s bundle of 520+ large, 40×30″ DnD battlemaps (double the size of those in our famous Quarantine Bundle) with 255 adventures for $39. It’s a great deal on some of our most beautiful maps and adventures! I’m sure there’s content in it you’d have so much fun running for your friends, from large cities to underwater seascapes. Paying $39, rather than full price per map ($3 – $4.50 each), saves you over 98%! Take a look at all the extra content here.  

    Otherwise, I also recommend our latest bundle of system agnostic campaign sourcebooks, filled with battlemaps, locations, NPCs, loot, AND adventures! Luke and I love them so much, they have some of our favorite adventures in quite often grimdark or Lovecraftian horror settings. If you’re not sure about it, download our favorite campaign sourcebook for FREE—it’s about a super whacky location that will have your players roaring with laughter. That is, if their sense of humor is anything like ours 😉 
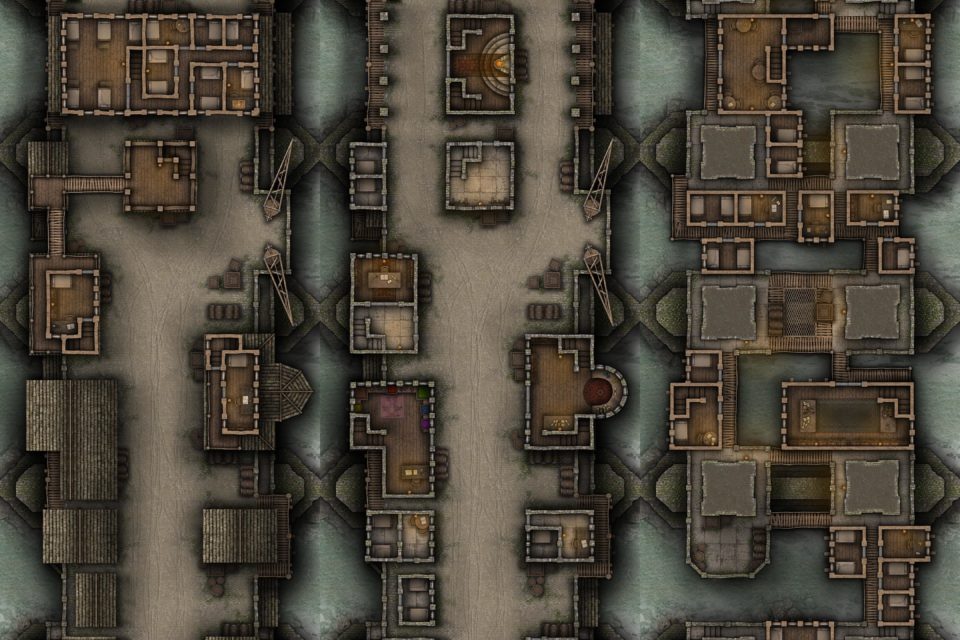
  • A Noble Conspiracy Free Multi-Level DnD City Bridge Battlemap with Adventure

    A Noble Conspiracy Free Multi-Level DnD City Bridge Battlemap with Adventure

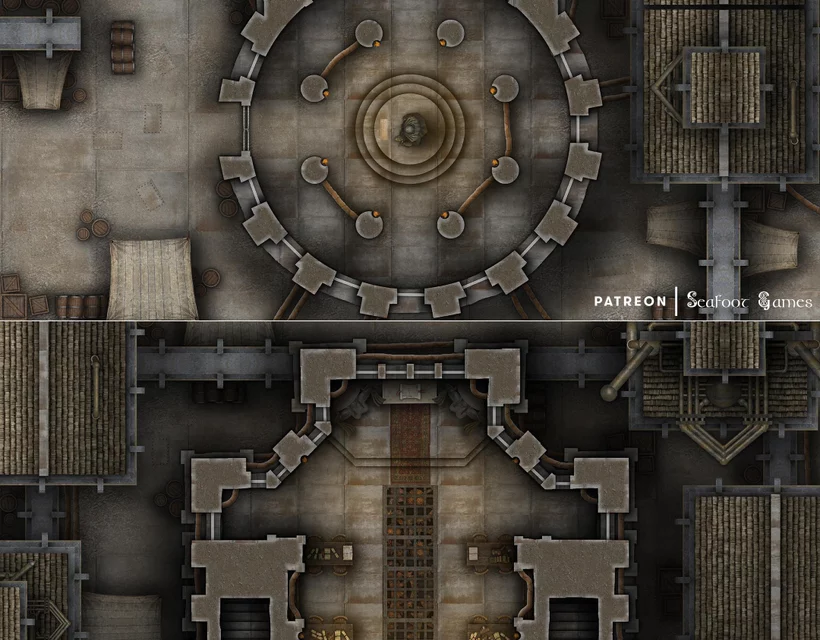
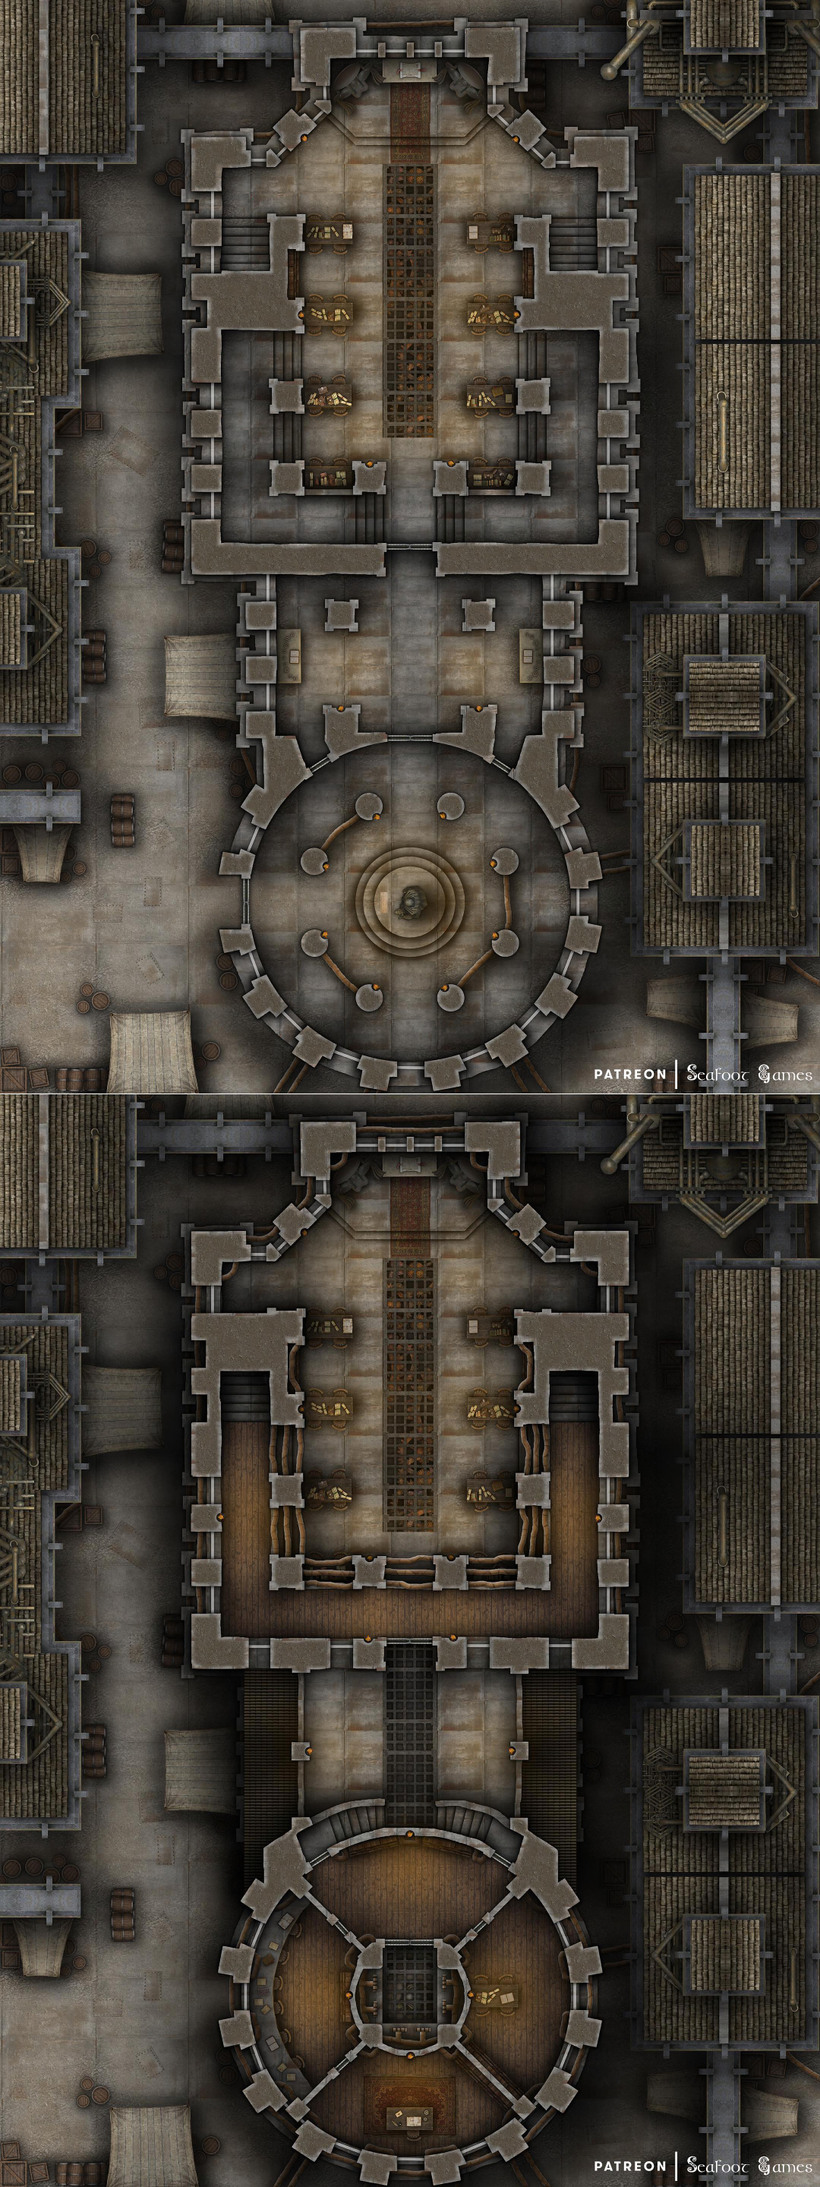
    A Noble Conspiracy Free Multi-Level DnD City Bridge Battlemap with Adventure, challenge your players with untangling noble politics!
    A Noble Conspiracy Free Multi-Level DnD City Bridge Battlemap with Adventure, challenge your players with untangling noble politics!

    Free Multi-Level DnD City Bridge Battlemap with Adventure

    A Noble Conspiracy

    While staying in a city tavern you’re approached by a figure wearing a dark cloak and cowl. The figure greets you kindly in the voice of a young woman and asks if she may have a seat before taking out a chair and sitting down before you.

    Unveiling the cowl the figure reveals herself to be a young lady with braided brown hair and silver hair clasps which run down its length. She introduces herself as Morgan Richards and explains that she has a proposal for you. She continues that she is the daughter of Lord Richards and heir to House Richards. However, recently her house was thrown off the council and had their rights as a house removed when evidence of impropriety by House Richards was found.

    She believes this evidence was planted by House Hastings as a way to remove them from the council, and thus finally push forward their agenda of war. House Richards has long opposed House Hasting’s push for continued war with the neighboring lands and it was only House Richard’s deciding vote that was keeping the council from declaring all-out war.

    If the vote now passes, enforced conscription of the people of the city will begin, as well as forced labor in the mines for the manufacture of weapons and armor in preparation for the war. Morgan exclaims that she cannot let this happen.

    She has learned from a disgruntled former servant of House Hastings the location of a man called Slade. He was responsible for planting the evidence used against House Richards. Morgan rolls out a map of the city and points to one of the great bridges, explaining that the man has a base of operations in the underbridge slums and she needs you to apprehend him alive and bring him back to House Richards so he can be questioned by the council.

    If you succeed, House Richards would be reinstated and there would be dire consequences for House Hastings should it come out they were plotting the destruction of another House. If you ask why her House doesn’t just apprehend the man, she explains her House can’t be seen doing anything suspicious as they’re already dealing with severe blow back.

    She emphasizes that no matter what happens, you must get this man out alive and to the council. For, without his testimony, House Hastings will surely have the city in their iron grip and that will end badly for the citizens. For this duty, House Richard’s is willing to offer a handsome reward.

    When you arrive at the bridge slums you find many people living in squalor upon rickety wooden houses suspended above the river. Some beg coin from you, while others slink away into the shadows. You make your way to the location on the map and, just before you’re about to enter the home of the man you seek, you’re ambushed by several thugs.

    After the thugs are dealt with, you find the man inside playing cards. He doesn’t put up a fight, instead claiming he’s got friends in high places and that you’ll pay for messing with him. After leaving the underbridge slums and reaching the main thoroughfare on the bridge, you’re immediately stopped by a group of guards, including two warcasters draped in House Hastings garb.

    The guard’s demand you hand over Slade and when you don’t they attack you. Once dealt with, you have no further troubles getting Slade back to House Richards. Later that day, the council is convened for the questioning, which you’re invited to after being paid for your help.

    Slade is put into the center of the council chamber and a large golden light shines upon him. He is questioned about the charges and confesses in full to being responsible for the false information that led to the removal of House Richards, as well as being paid by House Hastings to do so.

    At this Lord Stavros Hastings, the leader of House Hastings, coughs with mock surprise before exclaiming that his House would never do something so heinous! Lord Stavros’s aid then steps forward and claims full responsibility for the plot, doing so behind his Lord’s back because he thought it was for the best of the city.

    Lord Stavros rises quickly and slaps his aid across the face, before demanding that he be taken away and for the full might of justice to be put upon him for his attempt to manipulate the law.

    The guards come and take the aid and Slade to a back room while the council rules that House Richards be reinstated. They also continue that, because Lord Stavros was not involved in the plot, House Hastings will not be punished.

    As the council members retire you can see Lord Stavros eying you off with a smirk. It seems you may have made a new and very dangerous enemy this day.

    If you enjoyed A Noble Conspiracy Free Multi-Level DnD City Bridge Battlemap with Adventure, Luke and I released the Hardcore GM’s bundle of 520+ large, 40×30″ DnD battlemaps (double the size of those in our famous Quarantine Bundle) with 255 adventures for $39. It’s a great deal on some of our most beautiful maps and adventures! I’m sure there’s content in it you’d have so much fun running for your friends, from large cities to underwater seascapes. Paying $39, rather than full price per map ($3 – $4.50 each), saves you over 98%! Take a look at all the extra content here.  

    Otherwise, I also recommend our latest bundle of system agnostic campaign sourcebooks, filled with battlemaps, locations, NPCs, loot, AND adventures! Luke and I love them so much, they have some of our favorite adventures in quite often grimdark or Lovecraftian horror settings. If you’re not sure about it, download our favorite campaign sourcebook for FREE—it’s about a super whacky location that will have your players roaring with laughter. That is, if their sense of humor is anything like ours 😉 
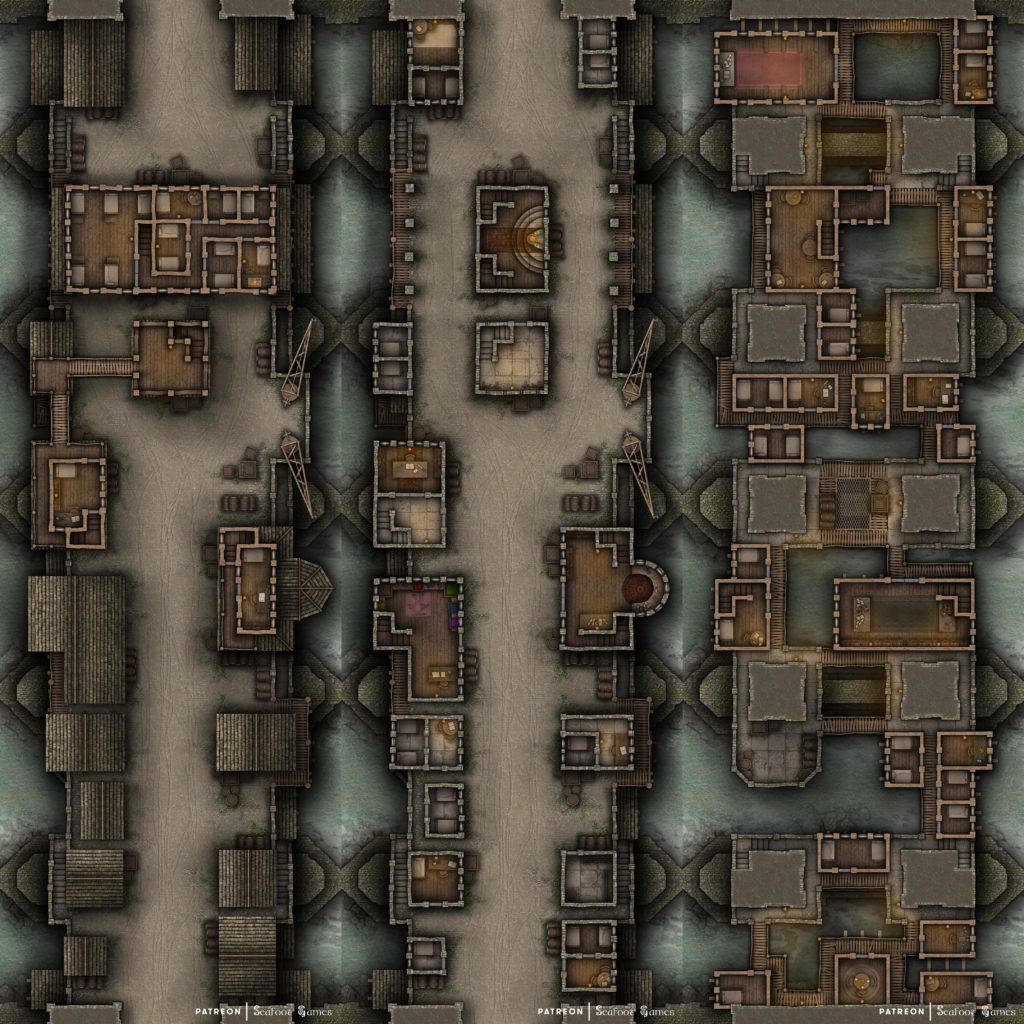
  • Orlian Coast Forest Free DnD Battlemap with System-Agnostic Adventure

    Orlian Coast Forest Free DnD Battlemap with System-Agnostic Adventure

    Orlian Coast Forest Free DnD Battlemap with System-Agnostic Adventure, making fun of pregnancy cravings (for all you DnD loving parents) ;)
    Orlian Coast Forest Free DnD Battlemap with System-Agnostic Adventure, making fun of pregnancy cravings (for all you DnD loving parents) 😉

    Orlian Coast Forest Free DnD Battlemap with System-Agnostic Adventure

    Pregnancy Cravings

    While walking through a village, you hear a woman’s loud crying coming from one of the houses. As you pass it, an exhausted, pale-faced looking man with dark circles under his eyes opens the door and steps out. His face lights up when he sees you, and he beckons you over hopefully, asking if you might be a mercenary. He explains that his wife is pregnant and that he desperately needs you to catch a rare kind of fish from a run in the nearby mountains, because it’s their spawning season and his wife craves it desperately, he finishes with a sigh.

    If you ask why he doesn’t just buy the fish, he explains none of the local merchants sell it at the moment, because the spawning season attracts owl bears. He begs you to help him, saying that his wife’s mood swings have been insane and between working to provide and coping with her demands he doesn’t know how much more he can take, pleading that he’ll pay you well for the risk if you please just get him the fish she wants.

    Should you agree, he sighs in relief and the tension clearly comes out of his muscles. He thanks you heartily, promising to buy you a stiff drink when this is all over because he could certainly use one himself, before describing the fish to you. After that his wife sobs from the house that she can’t put her shoes on because her belly’s too fat and she’ll never make it out to the garden, and the man hurriedly asks you to return here once you have the fish before excusing himself.

    The journey up to the fish run in the mountain takes about a day by foot, and when you arrive there are three owlbears hunting the large, oily fish while they frantically spawn in the river. The monsters are territorial, and if they notice you they attempt to defend their patch of the riverbank.

    Once the owlbears are dealt with and you have your fish, a nature spirit appears as the glowing form of a naked, horned woman and admonishes you for disrupting the natural balance. Due to the death of the owlbears, too many of the fish will spawn, and begin dying of starvation from overpopulation. They’ll strip the river of smaller fish and bugs which other life forms rely on, while herbivores that the owlbears usually hunt in this area will also increase and do irrevocable damage to the forest and underbrush.

    The nature spirit says that this must be put to right, and as the one responsible you must fix it. She then tells you how you can find a nature temple on a nearby mountain, and that once there, you must perform a rite so that the magic of the temple can rebalance the ecosystem. It involves donating a few drops of your blood as a show of apology and reverence to the nature gods.

    Should you go, the path to the temple is steep and treacherous along the mountain’s peak. The journey all up takes an extra couple of hours from your fishing trip, but once there you see it is a small ruin large enough for maybe a handful of people inside. Within it is an ancient statue of a nature god, with a stone bowl in their hands. If you cut yourself and preform the rite as the nature spirit suggested, the blood bubbles and clears into water with a lotus seed, which grows and blooms in front of you while you watch. The nature spirit appears then, and thanks you for setting things right, before vanishing in a puff of sparks.

    Once you return with the fish to the village, the man answers the door excitedly, but when you try to give the fish to the man his wife–behind him–disgustedly exclaims that she doesn’t want the fish anymore and dry heaves, urging you to get it away due to the smell. Her husband winces and apologizes, handing you the promised pay and explaining that her cravings seem to have shifted as happens a lot, but now she wants this rare type of mushroom that only grows in a distant cavern–

    As you walk away he begs you to wait, saying he needs your help surviving this insanity! His wife immediately begins berating him, saying compared to her he’s got it easy and she only wishes she could give him a taste of all the aches and pains she’s gone through!

    GM’s Notes:

    If your players don’t want to perform the rite for the nature spirit, the spirit grows insulted, and attempts to impart the seriousness of your players’ treaspasses in the spirit’s forest. Should your players still refuse, the spirit summons swarms of wasps, living thorns, and packs of wolves to attack them until defeated. When killed, their body explodes in sparks of light, and where the sparks land wildflowers grow and bloom.

    If you enjoyed Orlian Coast Forest Free DnD Battlemap with System-Agnostic Adventure, Luke and I released the Hardcore GM’s bundle of 520+ large, 40×30″ DnD battlemaps (double the size of those in our famous Quarantine Bundle) with 255 adventures for $39. It’s a great deal on some of our most beautiful maps and adventures! I’m sure there’s content in it you’d have so much fun running for your friends, from large cities to underwater seascapes. Paying $39, rather than full price per map ($3 – $4.50 each), saves you over 98%! Take a look at all the extra content here.  

    Otherwise, I also recommend our latest bundle of system agnostic campaign sourcebooks, filled with battlemaps, locations, NPCs, loot, AND adventures! Luke and I love them so much, they have some of our favorite adventures in quite often grimdark or Lovecraftian horror settings. If you’re not sure about it, download our favorite campaign sourcebook for FREE—it’s about a super whacky location that will have your players roaring with laughter. That is, if their sense of humor is anything like ours 😉 
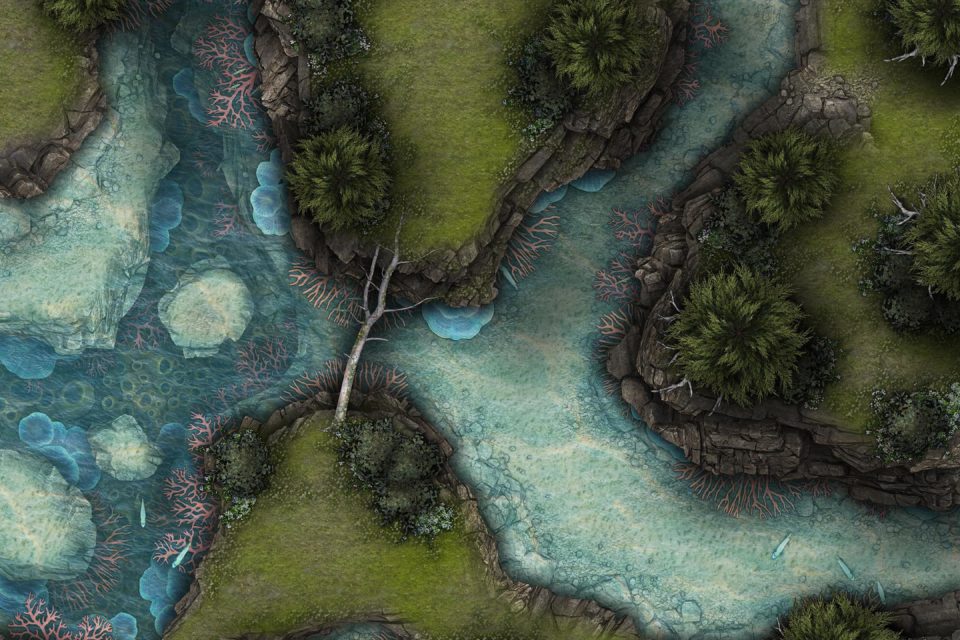
  • Ruins of Galak’Tol Dwarven Asteroid Internment Camp Free Multi-Level DnD Battlemap with System-Agnostic Adventure

    Ruins of Galak’Tol Dwarven Asteroid Internment Camp Free Multi-Level DnD Battlemap with System-Agnostic Adventure

    Ruins of Galak'Tol Dwarven Asteroid Internment Camp Free Multi-Level DnD Battlemap with System-Agnostic Adventure, scary & Alien-inspired!
    Ruins of Galak’Tol Dwarven Asteroid Internment Camp Free Multi-Level DnD Battlemap with System-Agnostic Adventure, scary & Alien-inspired!

    Ruins of Galak’Tol Dwarven Asteroid Internment Camp Free Multi-Level DnD Battlemap with System-Agnostic Adventure

    Aliens

    One day while at a space-port you see a notice looking for mercenaries to do a reconnaissance mission, and the pay is unusually high. Should you contact the man responsible, you find him in a large city, in an office for the King’s bureaucrats–but it has an unusually high number of guards. Once escorted inside, you find yourself speaking with the King’s Chief Warden. He is a hardened and to-the-point man, and explains that one of the King’s internment camps has gone dark, and that he hasn’t had contact with his people there for about a month despite his best efforts.

    He explains he doesn’t have enough men to spare to go investigate, which is why he needs mercenaries such as yourself to journey there and find out what’s happened. He suspects there may have been some kind of prison break, and advises it could be very dangerous, which is reflected in the pay.

    If you ask for more information, he tells you that the internment camp in question is a mine on a distant asteroid, and is filled with lawfully convicted men working there as penance for their crimes. While not treated luxuriously, they were neither undernourished or abused. It is unusual that they would risk a break under such conditions, but it is the most logical explanation for what has occurred.

    Should you accept the job, he gives you a map with directions to the internment camp, as well as a notice of being the Chief Warden’s representative should any of the camp’s guards still be alive. Usually, he says, the asteroid is guarded by a fleet of five marked vessels so that no one unauthorized can access it. In the event of a prison break, they should still be circling the exterior of the asteroid to ensure no one escapes. If the convicts are putting up a fight, his men might be hard pressed to send anyone his way with news.

    The sail to the asteroid takes a couple of weeks, and when you arrive the asteroid isn’t guarded by the fleet the Chief Warden told you about. In fact, no-one seems to be around. When you dock, you see all the ships docked as well–as if they were recalled from their blockade for some reason. Upon closer inspection, you can see that the ships are marked with strange weapons and what appear to be teeth marks.

    No-one is around, and things are very still. As you venture into the internment camp from the docks, you can see the buildings are very damaged. It appears there was some kind of fire that burned a lot of the internment camp, and if you inspect the area you can see the fire was lit from multiple sources. Inside the ruins are patches of sticky, green slime. It coats some of the walls, ceilings, and other surfaces, but only intermittently.

    If you head to the main barracks, you find a lot of it survived the fire. There are books within it, including a journal that the asteroid’s Warden kept. Should you read it, you learn that they were running out of ore in the mines, and so begun expanding to a new section using some explosives. There are no entries after that, over a month ago, and the journal doesn’t mention any hint of dissent among the convicts. In fact, its author remarks upon how well-behaved the prisoners were given their circumstances, saying he would reward them with additional rations.

    In these buildings, there are more of those strange weapon and teeth marks. There are also streaks of green poison–different from the slime–splattered along the floor and walls, though you’ve never seen anything like it. If you touch it, even a little bit sends screams of pain shooting from what came into contact with it.

    Further into the internment camp, you find more of the green slime. A terrible stench comes out of a room filled with it, and there are small, dead, black creatures like caterpillars with carapaces, large mandibles and stingers scattered about the floor. Above you are large, open eggs glued to the ceiling. Hanging amongst the eggs, however, are human bodies that have been cocooned in the slime. There are holes torn in their chests, as if something clawed its way out of them. It’s clear there wasn’t a prison break here, but rather, some kind of infestation.

    Should you leave and head back to your ship, you begin to get the sense that something is watching you. Occasionally you hear noises, as of scuttling in the ruins, or rocks sent skittering across the floor. It’s very different to the stark silence of when you arrived, but you can’t see anything when you look.

    Once you’re back inside your ship, it doesn’t start and if you investigate the engine you see it has the same claw and weapon marks as throughout the internment camp. Your ship’s been sabotaged, and now a crucial component has been damaged. However, the parts you need to fix it are common and the internment camp should have them somewhere–though you didn’t see them in the area you already explored.

    As you head back into the camp, the sense that you are being watched grows. Eventually you find the parts that you’re looking for in a storage area. But the room is full of slime and more eggs–some of them open, with carcasses on the floor. There are more cocoons on the ceiling, this time alive and moving, though their cries are muffled. If you free the cocooned people, their leader–a heavy-built man with a beard–introduces himself as the Warden and begs you to kill them because he’s seen what happens to the others and this infestation must not be allowed to leave the asteroid.

    He explains that they expanded the mining and woke something up, something that had been sleeping. There was only one of them initially, but in a manner of days they multiplied and completely overran the place.

    He says that they have a lot of explosives in this room, and pleads with you to set charges and destroy the asteroid so none of the creatures can escape to threaten the rest of the worlds. As he finishes saying this, he doubles over in pain and his chest bursts open. A small creature–different to the dead caterpillars on the floor–claws and bites its way out. Similar to a black, wingless wasp, it has vicious mandibles, many legs with strange claws at the end, and a shining stinger that curves under itself like some kind of reverse-scorpion.

    It attacks you, and when you draw blood it is the vibrant green of the poison you saw earlier. Once slain, the ground begins to shake and a huge, Queen wasp breaks through the ground. She has a very long thorax which drags behind her with many legs, and a tall, chitinous crown stemming from her head. Crawling up from underneath her are more of the juvenile creatures, larger than the one you just slew, but still much smaller than the queen.

    Once slain, if you place magical explosives over the base you find many more pockets of eggs, and cocoons. As you leave, you can remotely detonate the explosives using a device that came with them; leaving only powder adrift in space where the asteroid once was.

    However, in one of the stores of your ship, waits a small clutch of eggs covered in green slime…

    If you enjoyed this Ruins of Galak’Tol Dwarven Asteroid Internment Camp Free Multi-Level DnD Battlemap with System-Agnostic Adventure, Luke and I released the Hardcore GM’s bundle of 520+ large, 40×30″ DnD battlemaps (double the size of those in our famous Quarantine Bundle) with 255 adventures for $39. It’s a great deal on some of our most beautiful maps and adventures! I’m sure there’s content in it you’d have so much fun running for your friends, from large cities to underwater seascapes. Paying $39, rather than full price per map ($3 – $4.50 each), saves you over 98%! Take a look at all the extra content here.  

    Otherwise, I also recommend our latest bundle of system agnostic campaign sourcebooks, filled with battlemaps, locations, NPCs, loot, AND adventures! Luke and I love them so much, they have some of our favorite adventures in quite often grimdark or Lovecraftian horror settings. If you’re not sure about it, download our favorite campaign sourcebook for FREE—it’s about a super whacky location that will have your players roaring with laughter. That is, if their sense of humor is anything like ours 😉 
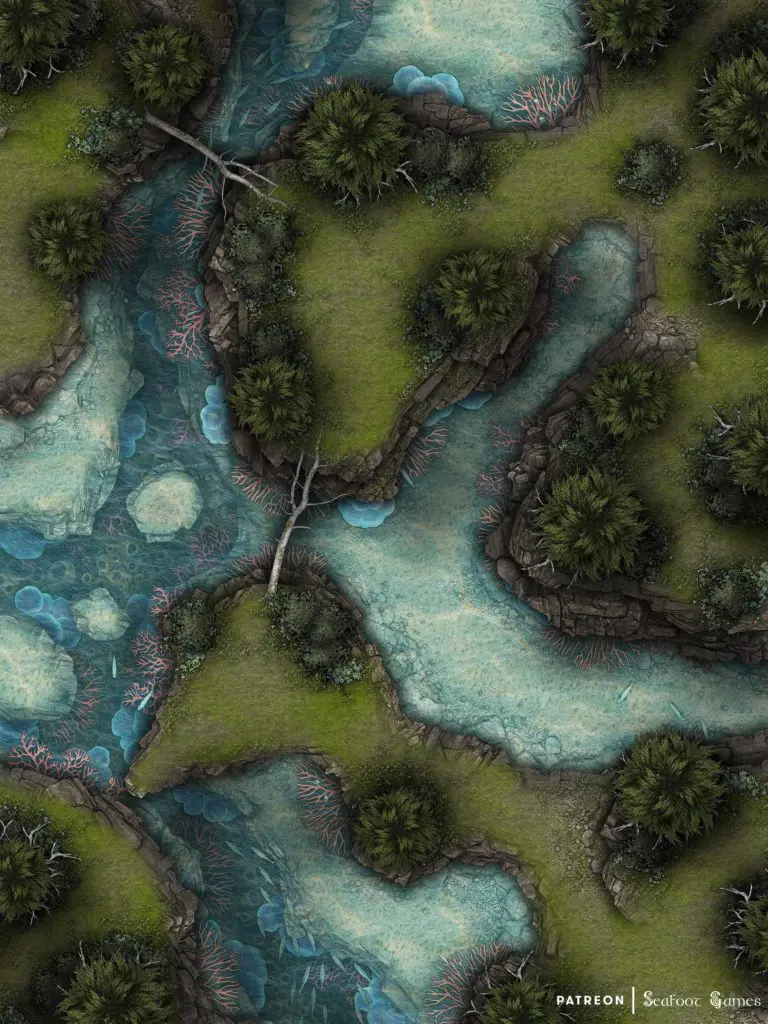
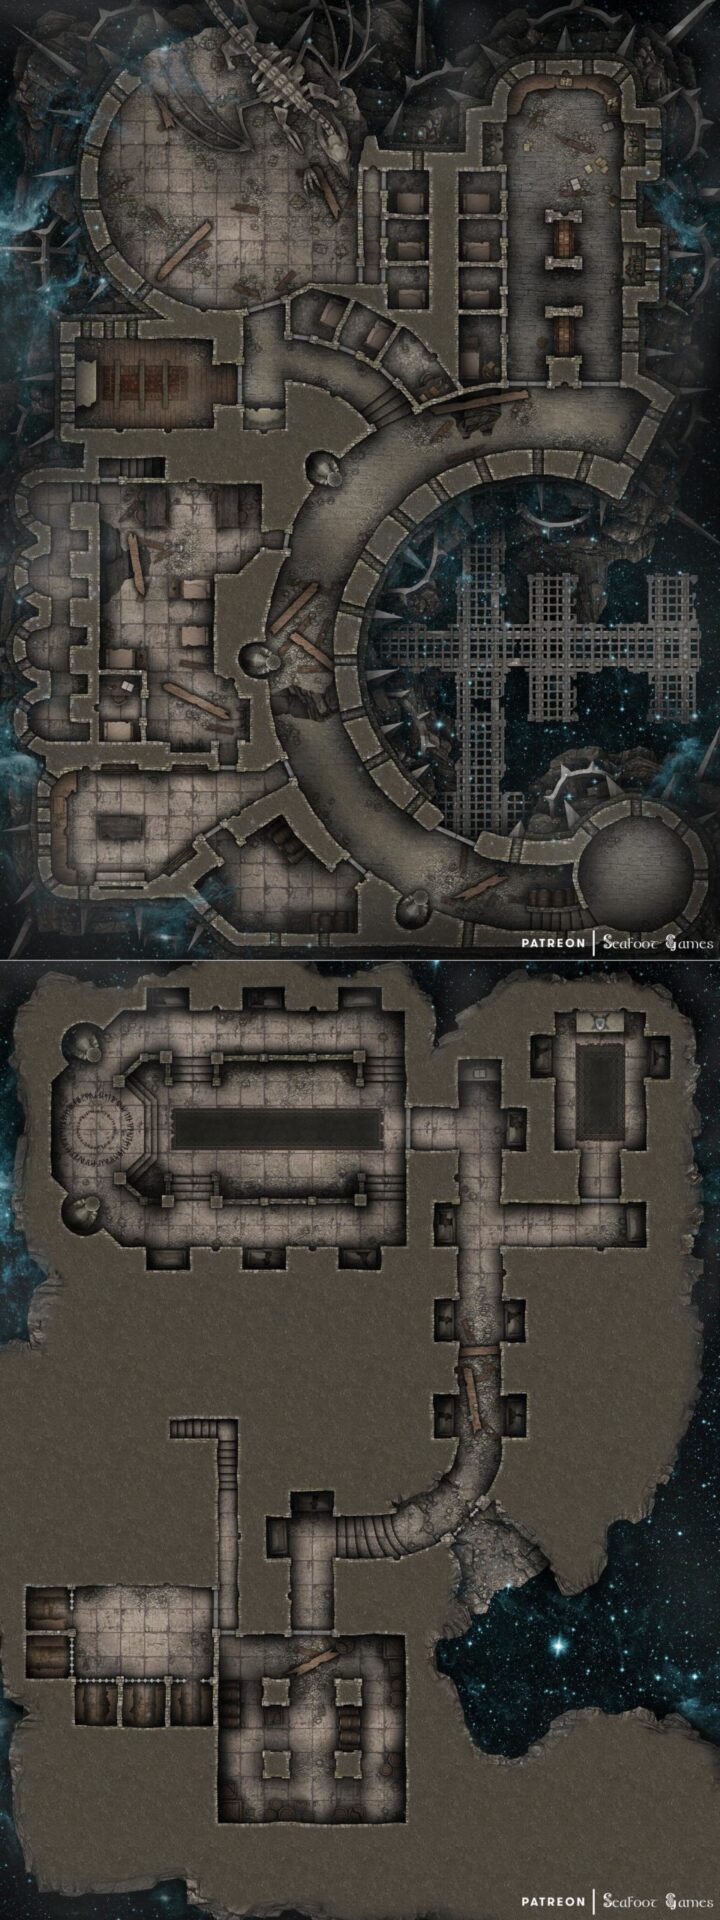
  • Ruined Castle of the Great Void Free Multi-Level DnD Battlemap + Adventure

    Ruined Castle of the Great Void Free Multi-Level DnD Battlemap + Adventure

    Ruined Castle of the Great Void Free Multi-Level DnD Battlemap + Adventure. Sail through the dark sea, to where great evil is sealed.
    Ruined Castle of the Great Void Free Multi-Level DnD Battlemap + Adventure. Sail through the dark sea, to where great evil is sealed.

    Ruined Castle of the Great Void Free Multi-Level DnD Battlemap + Adventure

    Sacrifice of the Silver Dragon

    Once, when a great evil threatened the universe, and the heroes were losing, a powerful sorcerer tore a hole in the fabric of space-time and sacrificed himself to seal the darkness away in a pocket dimension. Everything nearby was obliterated by the formidable spell, and the remaining chasm in the dark sea has a reputation of great evil. Few who go to The Void ever return, and it is marked with a warning on most star-charts.

    However, a young academic now seeks to go to this dreaded place. He claims he has found the doorway to the pocket dimension in his research, and only needs mercenaries to protect him while he ventures inside and accesses the priceless knowledge within.

    While visiting a tavern in a city one night, you come across the academic–then, a stranger to you–drinking himself into a stupor and complaining to no-one in particular. If you talk to him, he explains the history of The Void, and how everyone has called him a fool and mocked his research, but if they only gave him a chance… the incredible things they could learn! Not to mention, that if that part of the dark sea was cleansed, travel routes around the area could be shortened by a month through cutting straight across!

    When he realises you’re a mercenary, he begs you to help him, saying that the treasures you might find inside the pocket dimension are immeasurable and would surely be of great value! He has money, too–he can pay you if that’s not enough!

    Should you agree, he blinks in disbelief, before saying he must prepare at once. He tells you to meet him at the docks tomorrow morning, as he’ll have a ship and everything arranged by then, before stumbling out of the tavern and back to his apartment at the local university.

    In the morning, when you meet the academic at the docks, he blushes bright red and stammers that he wasn’t really sure you’d come. However, he quickly introduces himself as Anniel, and explains that he’s hired the somewhat shabby ship docked behind him, which he assures you he’s quite efficient at sailing as it was his hobby growing up.

    Once inside the ship, you find comfortable enough quarters and discover along the journey that Anniel is something of a good cook, too (though he uses cheap ingredients). If you ask him about it, he blushes again and explains that he’s put his life savings into this venture seeing as no-one else would support his work, and he doesn’t have much left. If this doesn’t work out, he may well be destitute–but at least he’ll have no regrets, he laughs awkwardly.

    While travelling to The Void, if you ask him about himself, he explains in an open and friendly manner that he was always interested in history and understanding the past so that such things do not repeat themselves. The Void has been his life’s work in particular however, as the hero who sealed the darkness away was a great, great, great, great grandfather of his.

    Should you ask what you might expect inside, he explains that it was only a part of the great evil that was trapped within the demi-plane, but that part was enough to shift the tides of battle and allow the ancient heroes to drive the darkness back into hiding. He shakes his head and says softly that there might still be remnants of the evil inside it. His ancestor seemed to have ripped the hole in reality from the citadel he had conducted his research in–research the evil supposedly sought–so you and he are bound by duty to ensure it does not escape as a result of this venture.

    The journey to The Void takes about two weeks, and as you sail closer you pass into an empty patch in space. Even the distant stars seem to glimmer less, as if covered by a thick shroud of darkness. Anniel explains that compasses don’t work here, which is one of the reasons he believes ships don’t return. He has to navigate by calculating the distance between the surrounding stars and the ship.

    As you draw closer to where Anniel believes the demi-plane to be, the shadows on the ship begin doing strange things in the corner of your vision. They seem to flicker, stretch, and move–but only when you don’t look at them directly. It gives you a squirming feeling in your stomach, as if something’s watching you.

    Eventually, Anniel slows the ship to a halt, which you can more feel than see due to the distant, dim stars. Before you are a circle of giant, magical pillars covered with runes just floating in space. Anniel grabs a book from his cabin and begins reading out an incantation. Nothing happens, and he blushes and tries again, inflecting the words slightly differently. This time, the runes on the pillars light up with shining blue light, and the circle begins spinning faster and faster. The pillars eventually rotate outwards, shooting off into space and disappearing. Before you now are the ruins of a citadel, floating in the darkness in front of the ship.

    Anniel is initially ecstatic that his plan worked but soon grows nervous as he docks ship at the ruined metal pier. Once inside, human shaped shadows peel themselves from the walls. They whisper in hissing, almost inaudible voices while they attack; seeking to weaken you enough to take your body over, making you like them. They are almost like ghosts, remembering bits and pieces from their lives, but the shadows are disoriented and almost as if controlled by something else.

    Some of the shadows, however, are not human. They have many legs like spiders, or too many arms, heads, etc. and can crawl along the ceiling and walls. They seem more powerful than the other shadows.

    Inside the library Anniel finds a trove of magic spells, long-lost books documenting what exactly the great evil was, and myths containing different theories of the evil and historical events linked to it. It also contains much lore of metallic dragons. There are also some different magical artifacts. However, he doesn’t find the specific journal he is looking for.

    Deeper in the fortress is the skeleton of a dragon in a room that has no ceiling, which Anniel is surprised to find. Examination of the bones suggests it was a silver, though he’s only heard very few references to a silver dragon supporting in the ancient war.

    Downstairs, in the prison, there are some human shadows which seem to have been successfully locked behind bars that are inscribed with glowing metal runes. Deeper into the crypts is the journal Anniel seeks, which confirms his hypothesis of what happened and even details the spell his ancestor used to create The Void. However, he furrows his brow while reading it, saying that to his knowledge it shouldn’t have been possible for a human to cast.

    There is a flickering white light coming from beneath a door to your left, and if you go inside you see the pale ghost of a man wearing a plain robe, watching some kind of bubbling, black shadowy entity within a circle of runes. The thing is constantly trying to escape, tossing and turning in on itself. The ghost looks at you in surprise, before asking who you are and how you got here.

    If you answer truthfully, he is satisfied with your answers, and looks at Anniel a little longer with a strange curiosity. Then he asks for your help in finally defeating this fragment of shadow–since he is dead, he is not strong enough do so himself. But he cannot rest until it is defeated.

    Anniel is shocked by this, saying that as much as he wants to destroy the evil, he has so many questions to ask him before he moves on! He asks what the other shadows were inside the citadel, and the ghost explains that some came from the people who died when he created this demi-plane. They were corrupted by the darkness trapped inside. The ones which look… less human… are fragments of the darkness which he couldn’t contain within the runes.

    If you ask about the dragon bones, the ghost gives you an odd look, before saying he suspected you may not know. He introduces himself as Yalanor, a silver dragon. He explains that it is his bones at the top of the citadel, though as you see him now is how he spent much of his time during the war; polymorphed as a human.

    Anniel doesn’t know what to say at this news, but Yalanor explains that the evil struggles constantly to escape and now that this demi-plane has been opened he cannot risk it getting out. It MUST be destroyed. He tells Anniel that the answers he seeks will be in his books, and journal. Within those he will find the names of many other metallic dragons he may contact with his questions, should they, of course, deign to answer Anniel’s requests.

    When you attack the contained shadow, it writhes even fiercer, turning in and on itself and displaying a snarling, monstrous face towards you. When it is very injured, the runes glow and crack, and the evil escapes. It fills the room with greyish-black smoke, making it harder to breathe, and sends shadowy illusions of those you once knew to attack; whispering terrible lies at you the whole time, seeking to drown your desire to fight.

    Yalanor yells over the fight that the darkness cannot yet escape the room, as there is a second barrier in place. He urges you to defeat it quickly!

    The monstrous face you saw in the darkness when it was trapped attacks from the smoke, biting and slashing with terrible teeth and terrible claws. Once defeated, the thing roars in fury, before dissipating as it’s roars grow fainter until they disappear altogether.

    Once the evil is gone, Yalanor staggers backwards and steadies himself on a table, thanking you greatly. Near him, two giant double doors made of beaten silver–somehow large enough for a dragon to walk through, despite the small size of the room–appear from thin air and open. Beyond them is a realm of vast light, with the snow-covered peaks of a mountain and clear blue skies overhead. Within it, you can hear distant roars, and the shadow of a flying dragon passes over the snow on the other side. You can also glimpse a glint of silver on a distant peak far away.

    Yalanor looks inside it with longing, then he sighs. He thanks you for your aid, and says it was a pleasure to meet one of his descendants. Now he can finally rest, because the fragment of evil he contained here for so long has finally been destroyed. He says you may take whichever of his belongings you desire, with his blessing. Then he turns and walks through the giant doorway.

    As he crosses over, on the other side you see him entering that realm as a giant, silver dragon. He opens his wings and leaps up into the skies, sending a blast of snow through into the room with you. Then the doors close, leaving the room quiet and filled with fresh powdery snow that’s very real.

    When you leave The Void, the weird shadows are gone and the ship sails sluggishly due to being laden with a veritable library of books and strange artifacts. As you get back to the city you met Anniel in, he pays you very well, shaking your hand for a long time and thanking you profusely for making his life’s work mean something.

    The city is in a stir for the research he’s done, which he now has proof of, and he is awarded several medals from the mayor. He invites you along for the ceremony, where you are cordially thanked and rewarded, too. After that, he finds an esteemed place in the city’s intelligentsia, and you gain a highly positive reputation among them should they need mercenaries for their own projects in future.

    If you enjoyed Ruined Castle of the Great Void Free Multi-Level DnD Battlemap + Adventure, Luke and I released the Hardcore GM’s bundle of 520+ large, 40×30″ DnD battlemaps (double the size of those in our famous Quarantine Bundle) with 255 adventures for $39. It’s a great deal on some of our most beautiful maps and adventures! I’m sure there’s content in it you’d have so much fun running for your friends, from large cities to underwater seascapes. Paying $39, rather than full price per map ($3 – $4.50 each), saves you over 98%! Take a look at all the extra content here.  

    Otherwise, I also recommend our latest bundle of system agnostic campaign sourcebooks, filled with battlemaps, locations, NPCs, loot, AND adventures! Luke and I love them so much, they have some of our favorite adventures in quite often grimdark or Lovecraftian horror settings. If you’re not sure about it, download our favorite campaign sourcebook for FREE—it’s about a super whacky location that will have your players roaring with laughter. That is, if their sense of humor is anything like ours 😉 
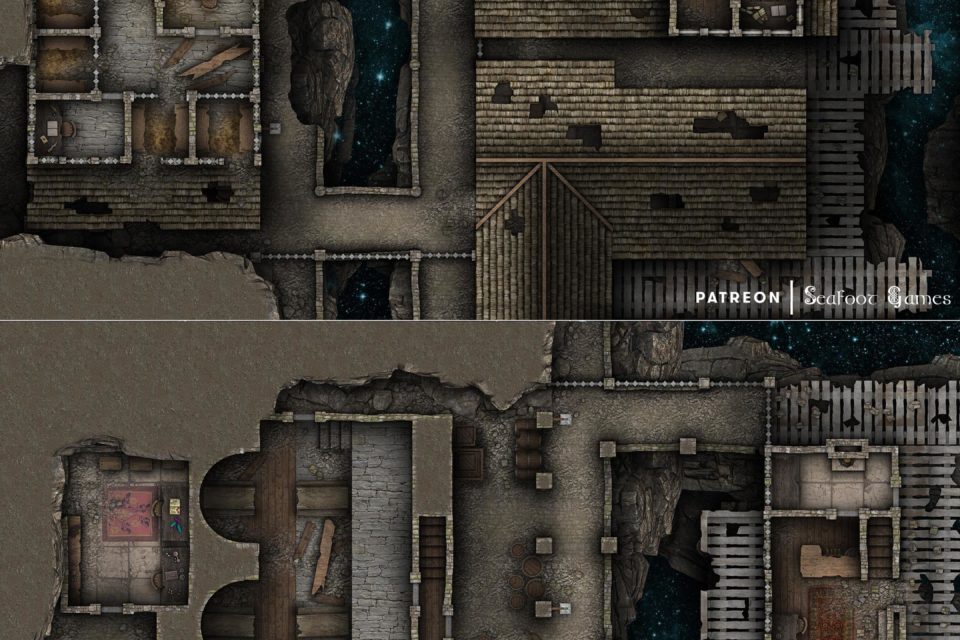
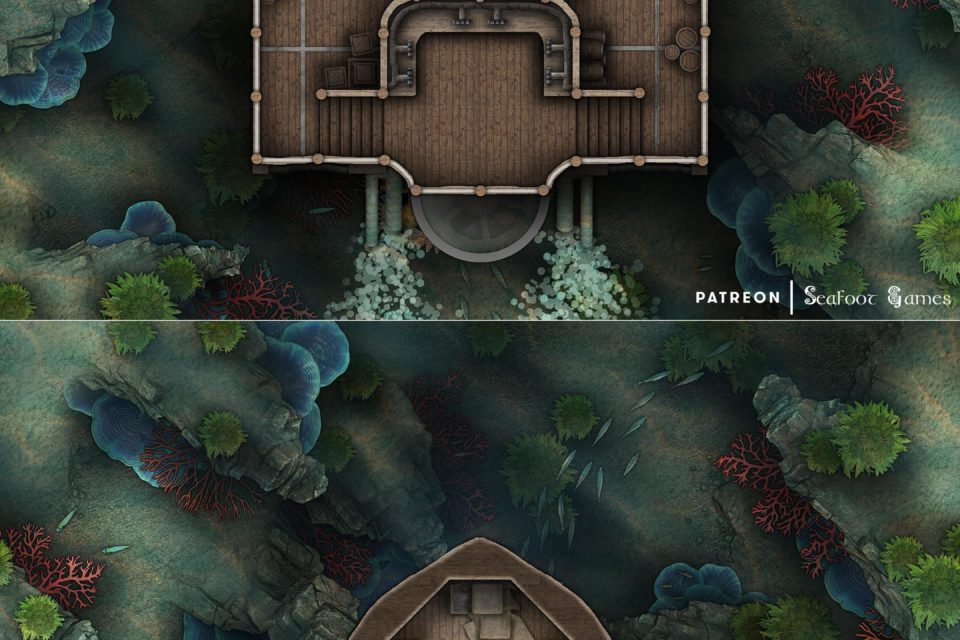
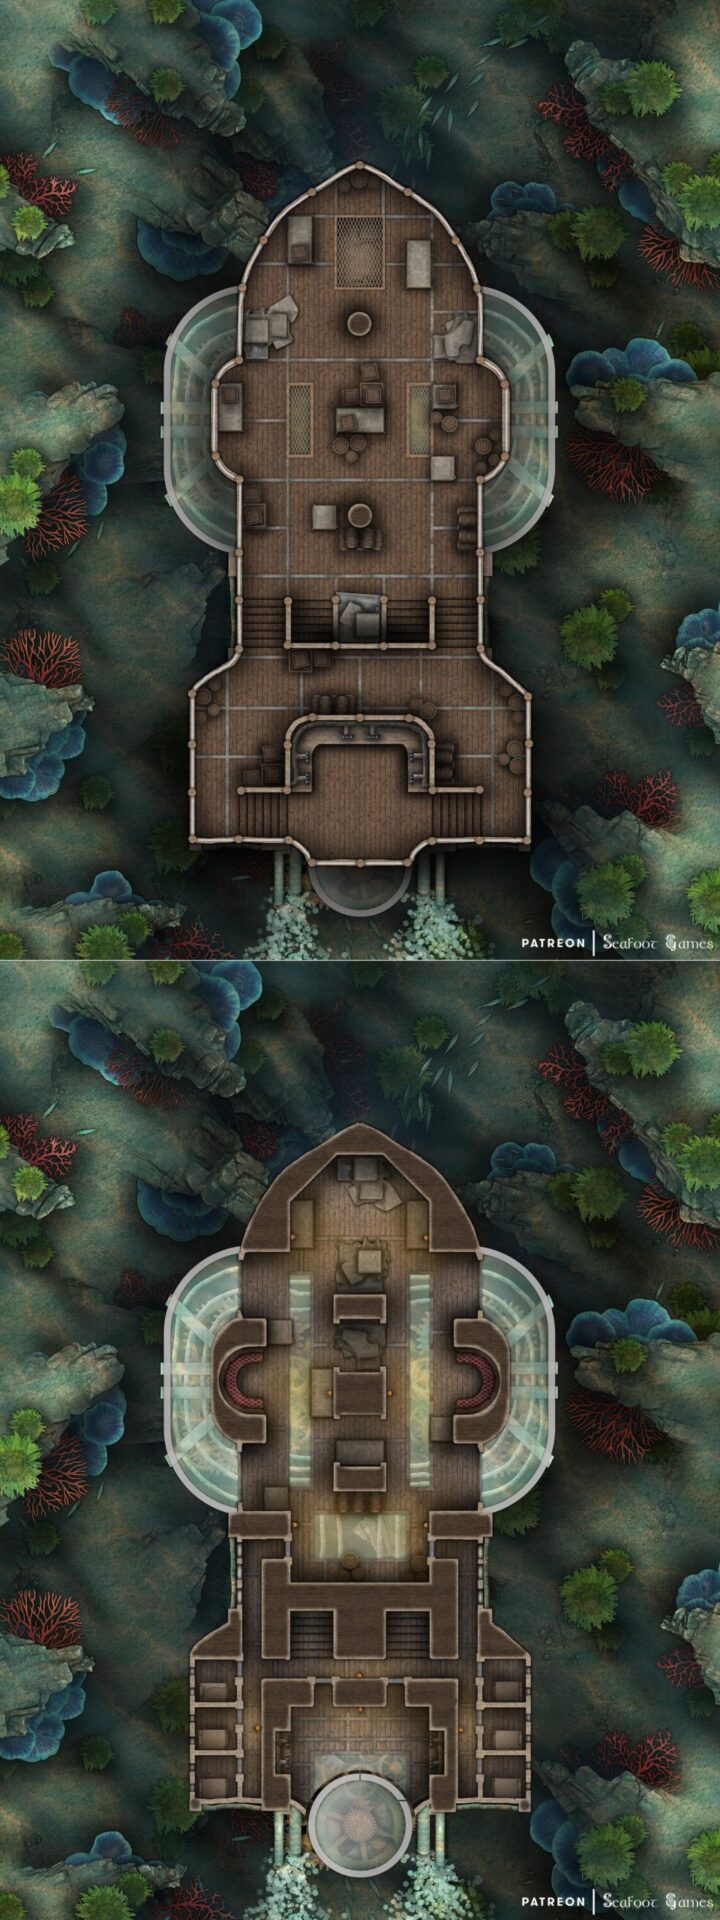
  • Gnomish Submarine Free Multi-Level DnD Battlemap with Adventure

    Gnomish Submarine Free Multi-Level DnD Battlemap with Adventure

    Gnomish Submarine Free Multi-Level DnD Battlemap with Adventure. Drive your players mad beneath the sea! Cthulu waits...
    Gnomish Submarine Free Multi-Level DnD Battlemap with Adventure. Drive your players mad beneath the sea! Cthulu waits…

    Gnomish Submarine Free Multi-Level DnD Battlemap with Adventure

    They Wait Below

    While at a port, you see a large group of dwarves hauling a strange looking ship up out of the water using a giant crane. The ship is unlike any you’ve ever seen, being fully-enclosed with a large sphere of glass built into its hull, which makes up at least a 3rd of it. The strange vessel appears damaged however, and if you ask any of the bystanding dwarves about it, the dwarf you’re speaking to shakes his head and says that they’ve invented a new type of vessel–one which can travel under the water, not above it. Only thing is, none of the ones they’ve sent out have returned. Just this one.

    When the submarine floated to the surface a few knots out from the docks, the dwarf explains, just one member of the crew was left on it. Everyone else was just… gone. And the survivor who sailed it back was stark, raving mad. They couldn’t get a word of sense out of him. They’re taking the submarine in for repairs, but they’re going to need to send her back out again when she’s fixed to figure out what happened and try to reclaim the missing vessels–otherwise his years of hard work and family’s inheritance will have been wasted for nothing. He can’t allow that to happen. If they can just figure out what in the bloody hells is going on, his invention will do the world a lot of good.

    If you ask him what he means, he explains that he’s the dwarf who designed the vessels, and it’s his business which is about to fail. He then catches himself, and introduces himself as Svet, shaking your hand. He seems to look at you properly for the first time, and observes that you’re a mercenary, before asking if you might be willing to go down with his men once the vessel’s repaired, to keep them safe in case things go amiss. He doesn’t have terribly much gold left after he sunk it all into this new venture, but he says he has enough to pay you well for your efforts.

    Should you agree, he thanks you, before saying to meet him back here several days hence to head out. In the meantime, he suggests you speak with the survivor of the last venture, in case he’s recovered enough to talk some sense. His name is Val, and he’s being cared for at the local church.

    When you get to the church and ask after Val, the nuns there lead you to a locked room. Inside it is the dwarf, sitting in a bed curled in a ball, rocking back and forth and mumbling to himself in a language you don’t know and no-one else seems to know, either. The sound of it gives you shivers on your skin, and feels… wrong. His hands are both bound in bandages, and there are strange symbols written on the walls in blood. They make you feel dizzy looking at them.

    Val refuses to acknowledge your presence, and looks through you. Just as you give up to leave, he looks you straight in the eye and warns you that the darkness is alive. Should you ask what he means, he goes back into his dazed state and begins speaking the weird language again.

    Once you set out on the submarine, despite the repairs you can make out strange sentences in an unknown language written in blood on the walls similar to what were in Val’s room. It’s stained the timber and, despite all their attempts to clean them off, the words couldn’t be removed.

    As the ship descends with you and the dwarven crew, following the path of the submarines which went missing, the sea grows dark around you. After several hours travelling deeper and deeper into the darkest depths of the sea, you begin to hear loud groaning noises from outside the submarine, as if large creatures are swimming by–but if you try to look out from the glass interior you can’t see anything.

    Shortly afterwards, the lights on the vessel start flickering off and on again. The few dwarves in your section (the rest are elsewhere on the submarine) start getting nervous, while some among them become paranoid and claim they’re hearing something whispering–can’t you hear it?

    You catch movement out of the corner of your eye beyond the glass, and can see dark shapes moving off in the distance in the water. Soon after one of the dwarves yells in fear, claiming they saw a face outside the ship.

    At this point, the flickering lights go out completely, and the submarine stops moving. Nothing wants to work if you try to engage the magic again. There is a noise at the back of the ship, as of something entering through the airlock. But if you move through the still-dark submarine to inspect it, some of the dwarves who were meant to be stationed nearby there have gone missing. You also find some bloodstains, drag marks, as well as a couple of bodies which have been mauled to death brutally, with claws and bite wounds that look like some kind of animal.

    You hear screams from elsewhere in the submarine, and if you rush towards them you find a monstrous fish-man standing over the bodies. It has large, bulbous eyes, scaly skin, a terribly toothy maw, as well as poisonous spines all over it. It attacks using its teeth and claws, until it’s injured, at which point it shoots spines at you from its hands while attempting to flee into the air vents.

    There are five of the creatures on the ship in total. They kidnapping or murdering those who are too difficult to drag out into the dark abyss.

    When you kill the last monster, as it dies it says something in that strange, terrible language the mad dwarf Val was raving.

    Once all the monsters are dead, the lights flicker back on and the ship’s engine begins whirring again. In front of the submarine, scattered across the sea floor, are all the other submarine wrecks. Amidst them you see the shadows of creatures the size of dwarves…

    GM’s Notes:

    R’lyehian is the language Val speaks, and it’s also what’s written on the walls of the submarine. The monsters your players encounter are Deep Ones.

    Whoever hears the dying words of the last Deep One begins getting unsettling dreams every night, which involve darkness and great, malevolent tentacles in primordial muck. The dreams slowly grow more and more disturbing the longer they plague their victim; eventually a voice within the visions beckons the dreamer to “come to me”.

    Once the lights are on again in the ship, your players might notice that there are fresh symbols on the walls, which some of the dwarves who claimed to hear whispering appear to have written in their own blood.

    If you enjoyed this Gnomish Submarine Free Multi-Level DnD Battlemap with Adventure, Luke and I released the Hardcore GM’s bundle of 520+ large, 40×30″ DnD battlemaps (double the size of those in our famous Quarantine Bundle) with 255 adventures for $39. It’s a great deal on some of our most beautiful maps and adventures! I’m sure there’s content in it you’d have so much fun running for your friends, from large cities to underwater seascapes. Paying $39, rather than full price per map ($3 – $4.50 each), saves you over 98%! Take a look at all the extra content here.  

    Otherwise, I also recommend our latest bundle of system agnostic campaign sourcebooks, filled with battlemaps, locations, NPCs, loot, AND adventures! Luke and I love them so much, they have some of our favorite adventures in quite often grimdark or Lovecraftian horror settings. If you’re not sure about it, download our favorite campaign sourcebook for FREE—it’s about a super whacky location that will have your players roaring with laughter. That is, if their sense of humor is anything like ours 😉 
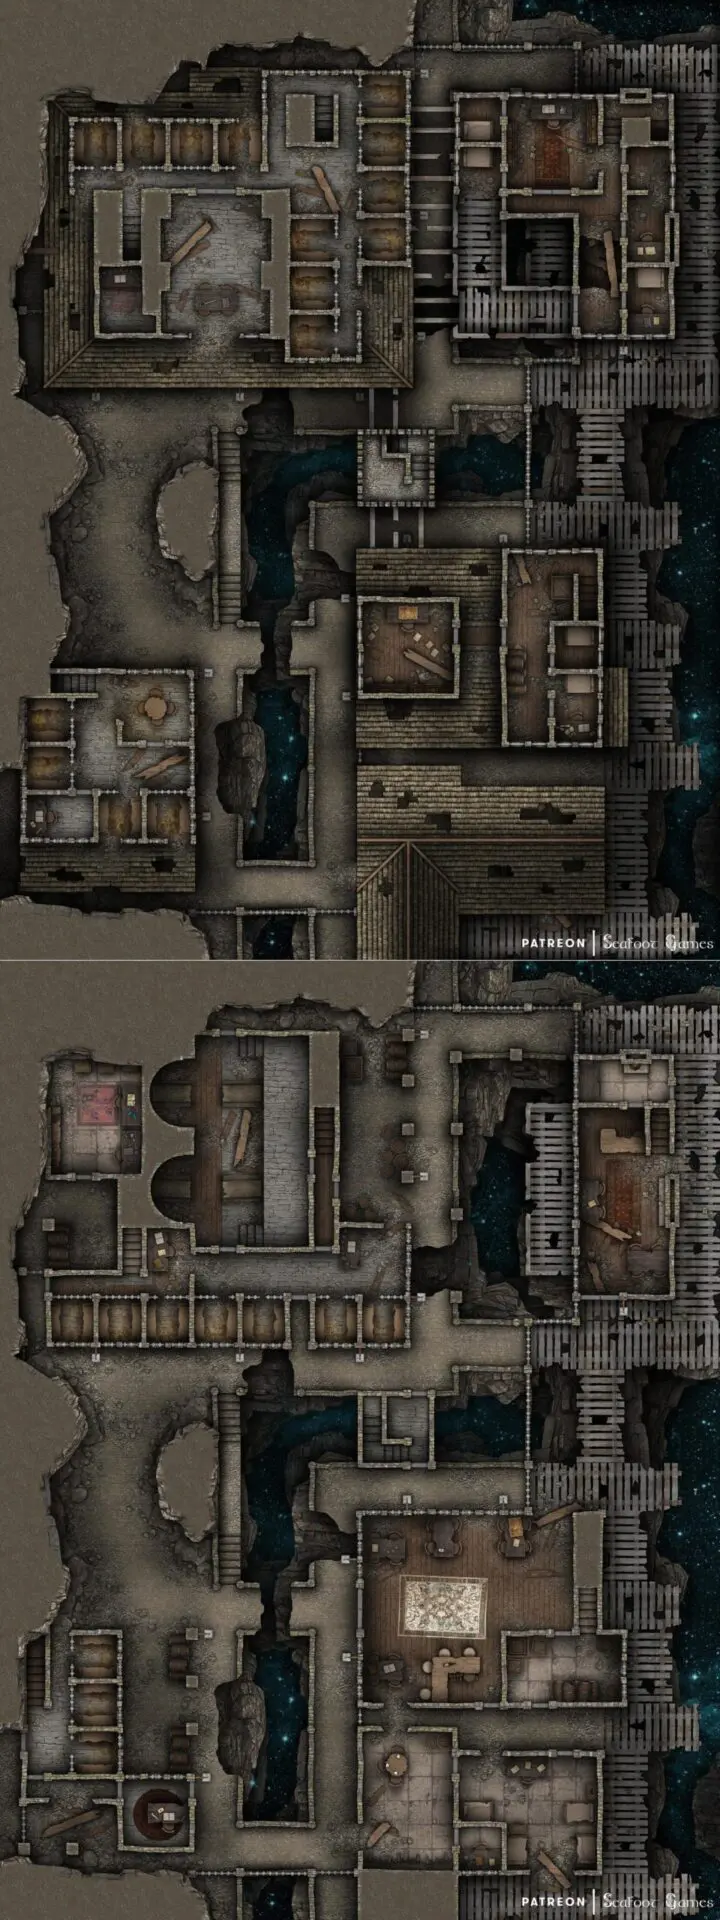
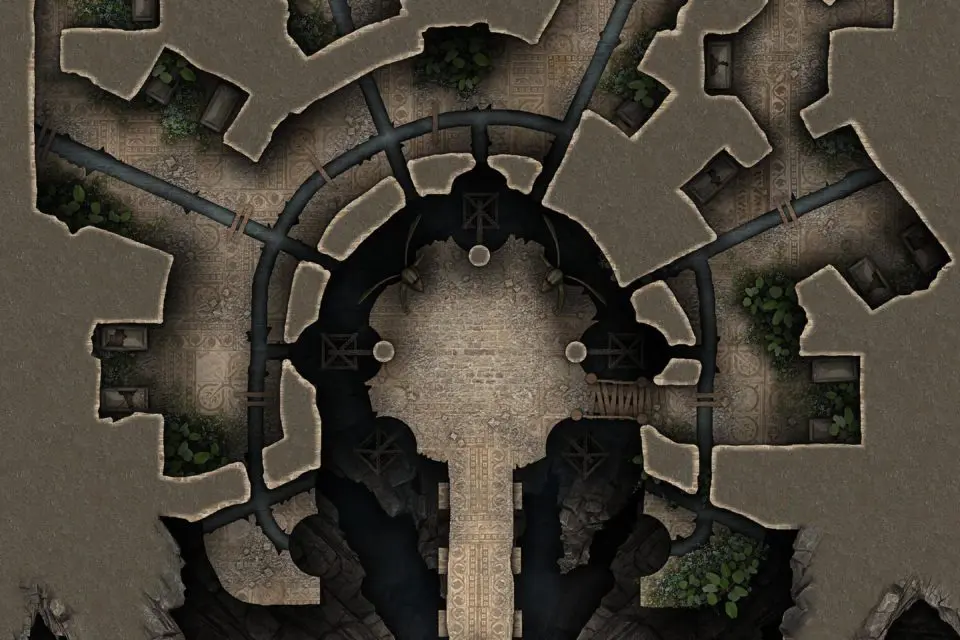
  • Bosaan’s Forbidden Crypt Free DnD Battlemap with Adventure

    Bosaan’s Forbidden Crypt Free DnD Battlemap with Adventure

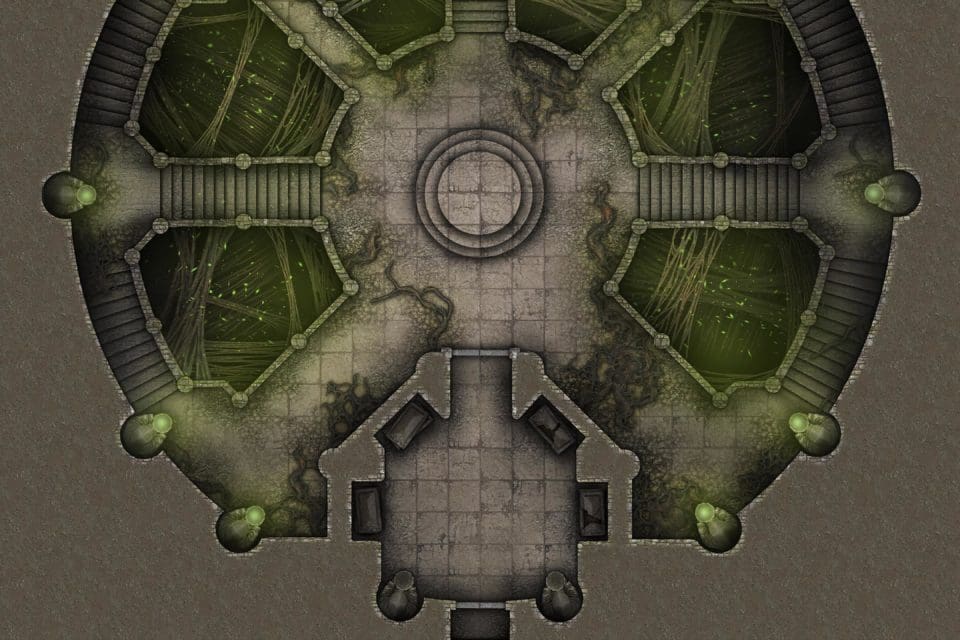
    Bosaan's Forbidden Crypt Free DnD Battlemap with Adventure. Discover the secrets of a forgotten civilization! VTT ready.
    Bosaan’s Forbidden Crypt Free DnD Battlemap with Adventure. Discover the secrets of a forgotten civilization! VTT ready.

    Bosaan’s Forbidden Crypt Free DnD Battlemap with Adventure

    The Answer to Everything

    While visiting the impoverished jungle town of Bosaan, which is made primarily of scrap built onto old ruins, you see that some of the locals are distressed. They are running about talking to each other in worried voices. Should you stop to ask any of them what’s going on, they explain that their children have gone missing, along with many other kids in the village.

    As you talk a thin man runs up, breathless, and explains to the others that he’s tracked the footprints of the children into the forbidden crypt. Because of your clothes, the group know you’re a mercenary, and the distressed parents turn to you; begging you to go down into that dangerous place and save their children from the shadowy creatures that live in there, before it’s too late. If you do, they’ll give you whatever they can as a reward.

    When you go down into the forbidden crypt, you find that the small, barricaded building (which appears to have been made at the same date as the rest of the ruins) leads to a huge underground network of interconnected burial chambers. There are strange carvings on the ancient walls, from the civilisation that collapsed long ago. They tell of the ways that they lived, and the knowledge they held dear.

    After descending the stairs, you find clear evidence that someone’s been living down here in the first room. A couple of furs have been laid on the ground in a kind of crude bed, and all forms of excavating equipment have been laid out around it, alongside a couple of books and a stack of filthy journals.

    If you look inside the journals, aside from the name Dr. Cederik Dooglestein inside the cover, what’s written in them doesn’t make sense. There is only one which does, and it details the journey of a researcher who came to this land to understand the mysteries of the civilization that came before, though that soon descends into nonesense as well.

    You can hear voices coming from further in, and kids excitedly giggling. Should you go look, you find a group of children sitting in front of a bedraggled, homeless looking old man with a blue pendant glowing softly on his chest.

    He appears to be mad, and what he’s telling the kids doesn’t make sense—but they seem entranced by his words nonetheless. If you interrupt and ask what’s going on, he turns to you and proclaims that ‘the children know, oh yes, understand they do. The SECRETS.’ Then he starts laughing. Should you ask what he’s doing with them, he’ll appear confused, proclaiming ‘they know, everything!’

    At that point the kids will take over and explain that Cederic (apparently the man) was lonely so he asked them to come down and offered to tell them stories. Should you explain that their parents are worried about them and try to take them back to the surface, they’ll grow visibly distressed and beg you not to make them leave now. They explain that the Cederik is close to ‘the answer’, saying wide-eyed that he’s told them all about it and they want to know The Great Mystery he’s about to uncover. The kids beg you to help him find out what it is, so they can learn it too!

    It’s inscribed, somewhere deeper within the crypts, but there’s monsters down there so Cederik—who’s an archeologist—can’t get to them to learn the final secrets. They beg you, saying ‘pretty please!’ and generally refuse to leave unless you help them. Some even have tantrums if you try to force them to go.

    Cederik tries to intervene, explaining that the answer is in here. The Great Answer. The answer to everything!

    If you agree, the kids cheer excitedly, and Cederik sighs in relief. He leads you deeper into the crypt, the eager children insisting on trailing behind you both at a safe distance. You encounter skeletons who have risen at the disturbances he’s caused. Once they are defeated, the children praise you loudly. When you make your way to a central chamber it opens up to some kind of underground cavern filled with mist. At the center is a sarcophagus, waiting at the end of a large platform.

    Cederik runs up to the tomb eagerly, but as he gets close the lid of the sarcophagi is pushed off and a tall undead knight emerges, brandishing the great sword he was buried with. If you save the archaeologist, he thanks you profusely (albeit in a very weird, roundabout way). Then he finds a scroll in the inside of the sarcophagi, with something written on it in an ancient language.

    He proclaims excitedly for everyone to hear that ‘the answer is 42!’. The kids think that’s amazing, and are way too excited than what seems to make sense. The batty old archaeologist then takes his amulet from around his neck, and offers it towards you insistently. Once you take it, the archaeologist’s eyes blur for a moment, and he blinks a few times in consternation. Then he sighs, and explains in perfectly understandable language that he’s gifting you his most valuable artifact. He found it in the tombs here, and it allowed him to understand their secrets, among… almost anything he put his mind to. As thanks for rescuing him and helping him complete his life’s work, he believes you should have it.

    If you wear it, you suddenly do understand what the importance of 42 is—but removing it takes that understanding away, and the answer is so profound that you can’t explain it to anyone not wearing the amulet.

    When you leave, the archaeologist insists on remaining behind, explaining that he’s not quite ready to leave the tombs just yet. But he will be moving on soon.

    Once the kids return to the surface, they run about excitedly exclaiming ’42!’ to each other and anyone else who will listen. Their confused parents thank you for rescuing their children, and if you explain to them what happened (without the amulet on) they’re horrified to learn about the archaeologist living down there and his potential influence on their children.

    They explain that the madman was a general nuisance about the village, and they banished him because of it. He must have snuck into the tomb to live and continue his research, and what they thought were creatures leaving the tomb must have been him sneaking out for food.

    If, however, you wear the amulet while trying to explain what happened after the job, they’ll give you a horrified look and say that ‘it’s happened again, the tombs have driven another mad!’. They’ll attempt to heal you with prayers and other nonsense, but if you grow frustrated that they cannot understand, they will be frightened and attempt to drive you from the village, too. This is because you now speak the same, raving nonsense that the archaeologist did while wearing the amulet.

    GM’s Notes:

    The amulet Cederik gives your players is the Amulet of Madness. It’s an amulet made of bright blue glass and blown in the shape of an eye. The iris glows with its own eerie, white light. Its wearer receives stunning insight and clarity on any topic, far beyond what mortal minds should be able to comprehend. As a result of the complexity of what they learn, they appear mad, as language is incapable of conveying what they mean and they use it creatively to try communicate.

    The children understand Cederik’s ravings because they’re young enough to remember, somewhere deep down, the wisdom their souls knew before they became mortals. They cannot articulate as well as adults and the knowledge of what 42 means will be lost to them in time, too.

    If you enjoyed Bosaan’s Forbidden Crypt Free DnD Battlemap with Adventure, Luke and I released the Hardcore GM’s bundle of 520+ large, 40×30″ DnD battlemaps (double the size of those in our famous Quarantine Bundle) with 255 adventures for $39. It’s a great deal on some of our most beautiful maps and adventures! I’m sure there’s content in it you’d have so much fun running for your friends, from large cities to underwater seascapes. Paying $39, rather than full price per map ($3 – $4.50 each), saves you over 98%! Take a look at all the extra content here.  

    Otherwise, I also recommend our latest bundle of system agnostic campaign sourcebooks, filled with battlemaps, locations, NPCs, loot, AND adventures! Luke and I love them so much, they have some of our favorite adventures in quite often grimdark or Lovecraftian horror settings. If you’re not sure about it, download our favorite campaign sourcebook for FREE—it’s about a super whacky location that will have your players roaring with laughter. That is, if their sense of humor is anything like ours 😉 
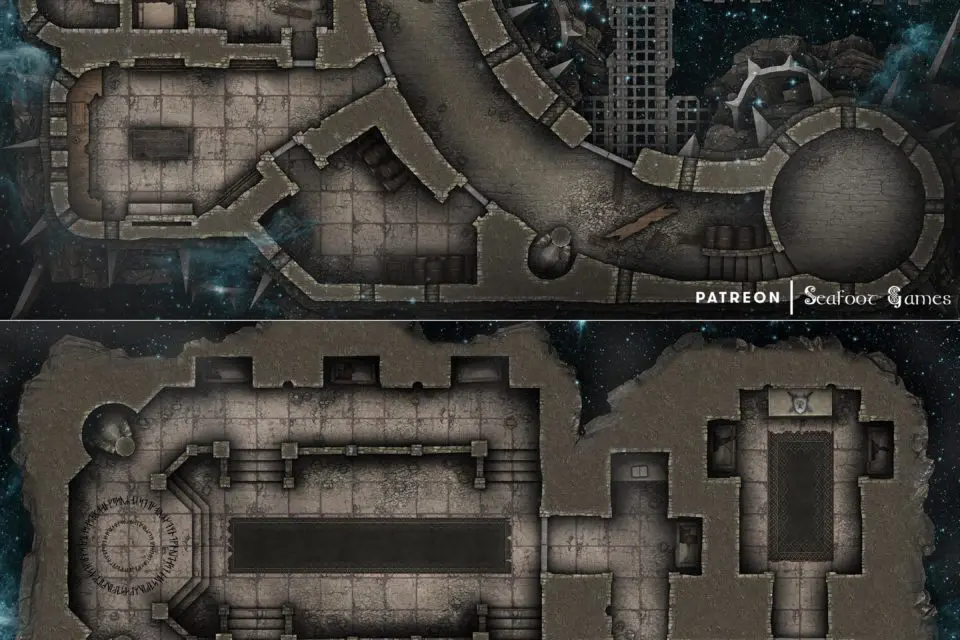
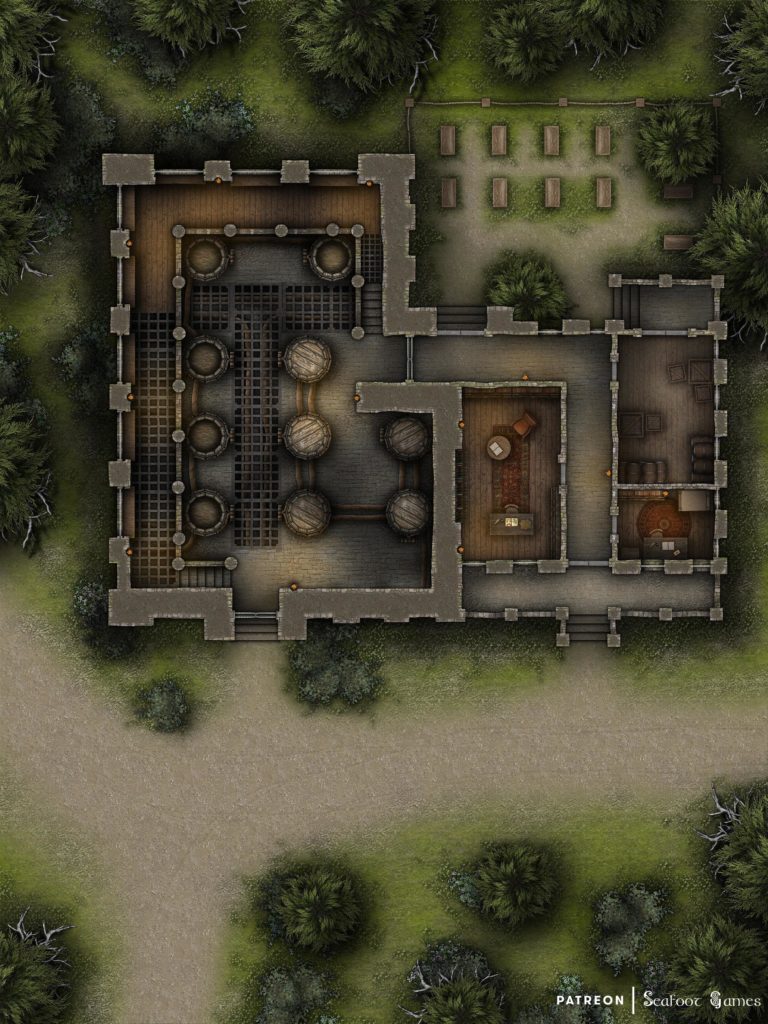
  • Free TTRPG Battlemap with Adventure –Fuzzington’s Brewery

    Free TTRPG Battlemap with Adventure –Fuzzington’s Brewery

    Free TTRPG Battlemap with Adventure –Fuzzington's Brewery

    Meadery-Sitting

    One day Meadmaster Fuzzington comes into the tavern asking if someone can carry a barrel of his finest ale to the nearby school of magic. He’ll pay well for the job.

    If you agree, the task goes uneventfully and the graduating students at the magic school are incredibly grateful to receive the alcohol.

    When you return to the meadery, however, Fuzzington is preparing his horse and cart to leave. There’s a barrel on the back with a particular healing brew, and he says he’s received a letter from a neighbouring town that a building has collapsed in a storm, injuring several of the locals. He’s going to take them this brew to help with the wounded, and should be gone for the night.

    He pays you the agreed upon sum for your earlier task, before asking if you’ll stay here and guard his meadery until he gets back sometime tomorrow. If you do this, he’ll give you a barrel of his special brew.

    Should you agree, he thanks you sincerely before handing you a small notebook from his belt, saying it’s got all the instructions you need to keep the place running.

    Later that day however, once Fuzzington has left, bandits break into the meadery. They somehow know that Fuzzington’s away, and are looking for Fuzzington’s secret mead recipes and notes. They plan to sell them and becoming rich. Their leader is a woman with fiery red hair and grey eyes.

    They are surprised to see you, having not expected anyone to be inside. But, rather than fighting, the woman introduce herself as Myrtal the Red Fox, and tries to strike a deal. She wants Fuzzington’s secret recipes and notes, and if you give it to her and her mates they’ll split their profits with you after they sell it to the highest bidder!

    Should you refuse, they attack, saying that they gave you a chance. Once you’re winning, they surrender and beg for their lives. However, if you show them mercy, Myrtal attempts to backstab you as she doesn’t want her followers to see her as weak–only cunning.

    When Fuzzington finally returns, if you tell him what happened he is horrified, saying that when he got to the town it turns out there was no emergency, and no house had even fallen. He suspects the bandits who broke in might have been responsible for the letter.

    If you kept his recipe safe, he is thankful you were there to safeguard his meadery. If you say you couldn’t protect it and the bandits got the recipes, Fuzzington laughs heartily, and explains that the group of bandits aren’t the first to have come seeking his secret recipes.

    He says that the book he gave you had real notes about some of the things that could have gone wrong, but the recipes inside it were all silly and fake. He thinks that whoever tries to make them will be sorely disappointed.

    As thanks for your efforts, he gives you a barrel of his normal mead along with the promised healing mead.

    GM’s Notes:

    Grab our free adventurer’s guide for the location to run this adventure in here. It details everything you need to know about Craobh Agus’tur, plus Measmaster Fuzzington (though there’s more on him below!) 🙂

    Next is a roll chart for other random things which can happen while your players are safeguarding the meadery.

    1: The mead grows watery mouths and facial expressions like a bear, coming alive. The now-animated vats squeal in high-pitched cries. In Fuzzington’s notes, he instructs that when this happens they need to be sung to so they go “back to sleep”.

    2: The bees in the hive begin striking, saying that they’re not getting paid enough. They demand The Pendant of Argoyle, which is located in the village near the herbalist’s. When you get there, you find the Pendant of Argoyle is a purple bell flower. Once you give it to the bees, they look at it in happiness and awe saying “so beautiful!”

    3: Gnomes knock on the door, claiming that Fuzzington agreed that they could test their vat-stirring invention when it was finished. They’re ahead of schedule, but they insist it’s ok for them to come inside and test it. They grow offended if you tell them to wait until Fuzzington returns, or otherwise leave, but if you let them in their machine will destroy the barrel it is tested on. They were also lying about having Fuzzington’s permission, but were confident the invention would work and gain his approval–they just needed to demonstrate it!

    4: Inspector comes in complaining about a customer who grew ill after drinking the mead, but the inspector is really sent by Fuzzington’s competition to inspect the vats and sneak real poisons in.

    5: Magical mites start overrunning the beehives. Fuzzington’s instructions write that should this happen, you need to use up a magical scroll to banish them. Problem is, it’s amongst 2 scrolls which all do different things. One is a scroll of enlarge person, the second is burning hands.

    Meadmaster Fuzzington

    At first glance, this individual appears to be a brown bear, albeit one dressed in a large apron and wearing spectacles that have seen better days. He is, in reality, a sapient and articulate fellow who, in spite of his huge, imposing form, is beloved by the townsfolk and is the proprietor of Meadmaster Fuzzington’s Meadery, the fanciest place in town.

    When he isn’t hosting functions or weddings at his magnificent and highly successful establishment, Fuzzington is a professional apiarist who cares for his bees, who in turn provide the honey he uses to make the finest mead in the region. 

    His personality is as sweet as the mead he brews, and he has a reputation for helping adventurers and travelers in need. But troublemakers who mistake his easy-going nature for weakness soon find themselves being literally tossed from his establishment in short order.

    Easily the most popular person in town, Fuzzington is thought of as something of a leader in the community, and it is a poorly kept secret that he’s actually running the place, even though he holds no official position. Repeated attempts to get him into any sort of official job are repeatedly rebuffed, as the brewer has no love for the tedium and weight of responsibility that comes with high office.

    Still, when times are tough, there is no-one better to count upon than this quiet and unassuming bear-man.

    If you’d enjoy way more TTRPG battlemaps with adventures like this free one, Luke and I have just released our newest bundle of 420 large, 40×30″ battlemaps (double the size of those in the Quarantine Bundle) for $59.99. It’s your chance to have a great deal on some of our most beautiful maps! We guarantee that is something here for every GM—no matter what setting you prefer, from large cities to underwater seascapes.

    Paying just $59.99 rather than full price saves you over 97%! Take a look at all the extra maps you can download with one click here

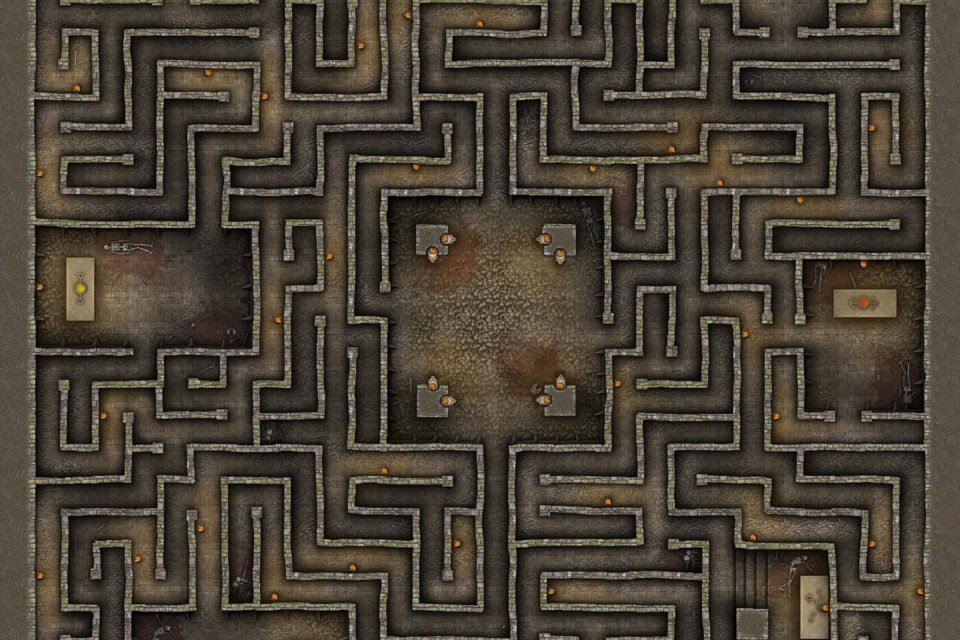
  • Free TTRPG Battlemap with Adventure – Minotaur’s Maze

    Free TTRPG Battlemap with Adventure – Minotaur’s Maze

    The First Minotaur

    While sailing the seas, the ship you booked passage on docks at a large, mediterranean island to resupply. The captain recommends you go and explore the city as the resupply could take a few days and the island’s known for great food in taverns that are built into the sheer stone cliffs, as well as warm beaches to relax on, frequented by beautiful women who work at very fine brothels. There is even a renowned library, if you are so inclined.

    As you leave the docks, a woman wearing a purple cloak in gold trim runs up to you. She has a few scrolls tied to her waist, as well as a satchel of books. Her eyes are purple, and she has long, black curly hair. The woman, panting, introduces herself as Ariadne, and says that you look like a warrior. She says she desperately needs your help, explaining that her husband has been sent into the island’s labyrinth to be eaten by a monster and she needs you to save him.

    If you ask what she means, she gets a pained look on her face and explains hurriedly that the city sends its worst criminals to die at the hands of a terrible monster living in an underground labyrinth. Her husband was about to uncover the corruption of the royalty in this city, and before he could show his evidence he was kidnapped in the middle of the night and accused of treason.

    Few of the locals believed her claims of his innocence, and those who did said they could do nothing against it. He was sent into the labyrinth earlier today, and she has no-one else to turn to for help. She has bars of gold and jewels–the fortune of her household–which she will pay you gladly if you save him!

    If you ask what the monster in the labyrinth is, she explains that he is called Minotauros. He’s a being with the head and strength of a bull, but the cunning of a man. He was a ferocious seafaring conqueror, long ago, who’s atrocities pleased a dark god. They say he made the seas red with blood from the islands and coasts he raided, and as a gift from that god he was transformed into the immortal monster he is now.

    Minotauros was unstoppable, until a powerful cleric met him in battle on this very island, and cursed him. Now, he is condemned to forever wander a labyrinth the cleric’s god made, and never find his way out; killing and devouring any who stray inside.

    If you ask how Ariadne thinks you can save her husband, she says she’s been reading as much as she can about the labyrinth and Minotauros since her husband was abducted, and pulls out one of the scrolls from her belt as she speaks. She unravels it; revealing an illustration of a stone statue of a bull’s head, with hollow marks in the floor in front of it. Ariadne points at it with shaking hands, explaining that from what she’s read, the marks in the ground are for four magical keys. They are hidden throughout the labyrinth, and if you collect them all you should be able to open up some kind of rear passage to escape.

    If you point out that none have survived the labyrinth, and ask where the information comes from, Ariadne pales and stammers, saying that perhaps someone got out once, long ago, using these keys, which is why they wrote about them. Or perhaps it was notes left by the cleric who locked Minotauros away.

    Should you ask about bringing a spool of rope in behind you, so that you may find your way out the way you came in instead of relying on the keys, Ariadne shakes her head angrily, saying the labyrinth doesn’t work like that–but she doesn’t have time to explain or answer any more questions, her husband could already be dead and you need to hurry if you’re going to save him in time!

    The journey to the labyrinth takes a few hours on foot from the city, up steep and winding pathways to the high hills at the top of the island. While walking, Ariadne describes her husband to you, saying he is a large man with burly muscles, short curly black hair, and a black beard and moustache. She doesn’t know if she guards stripped him of his clothes, but he is likely wearing the purple clothes of their household and has a signet ring with a seagull on it. His name is Thesius, she tells you.

    When you arrive at the labyrinth, it is a huge structure, with a large stone façade as its exterior. It’s built into the cliff, and unguarded. If you ask about that, Ariadne explains quickly that when the prisoners are delivered they are guarded by a large retinue of warriors from the palace until they’re lost inside. However, you can tell she’s hiding something–but she won’t elaborate if you ask her, instead insisting that you need to hurry.

    You can see a couple of metal doors, engraved with a bull’s head and the curving corridors of a labyrinth in the metal, in-between stone columns. When you place your hands on them, your hands begin to pass through–and you can’t pull them out again. You find yourself being slowly sucked through, no matter how hard you try to pull away, and the experience is excruciating. If you give in and step through quickly, the experience will be easier.

    Once inside the labyrinth, the air is oddly warm, and humid. Sweat begins to cling to your skin, and you can hear the sounds of dripping water from elsewhere in the labyrinth. It smells putrid, like rotting meat and offal, and there are bloodstains on the ground and walls. It looks like rudimentary barriers have been set up, long ago, in various places.

    There are echoing screams, and terrible ripping and snapping noises–as of breaking bones and tearing flesh–further in. If you turn around, there is only a solid stone wall behind you; there are no signs of the door you touched to enter, and there is no way out.

    While traversing the labyrinth looking for the keys, Minotauros will smell your scent. He is hunting you, and every now and then you can hear him getting closer, on the other side of a wall, or around a corner; breathing heavy breaths like an angry bull, hoofs thudding on the floor loudly.

    You eventually come across Ariadne’s husband Thesius in one of the rooms with the keys. He is covered in blood and one of his arms is hanging limply by his side. He is surprised to see you, as you weren’t with the original group and you haven’t been stripped of weapons–as he says this, you can see he’s wielding a modified stake he must have ripped off one of the sharpened timber barricades throughout the labyrinth.

    He will be relieved to hear that his wife sent you, and glad to know that she’s ok. If you explain the keys to him, he will say that he passed another similar object as the one in the room but didn’t take it because he didn’t know what it was. He can guide you back to that key.

    When you’ve collected all the keys and are about to put them into the keyholes, Minotauros comes through the entrance into the room behind you, preparing to attack. His body is covered in a thick layer of black fur, on an even thicker hide. While his shape is vaguely human, his muscles are far larger than they should be, and there is a bull-ring in his nose.

    Two curved horns tipped with steel and blood arch in front of his bovine face, and his eyes glow red with rage; steaming breath pouring forth from his flared nostrils. He prepares to attack.

    Once the keys are in place, Minotauros collapses to his knees, saying in a deep, huffing voice “finally, peace…” before collapsing into ash. Behind the bulls-head statue, two doors will open to the outside world.

    If you go through them, you will be in front of the doors you used to enter the labyrinth, only this time they are swung ajar behind you.

    Ariadne is out there, pacing frantically back and forth, crying silently to herself. She spins around when she hears you exiting, then gasps “you did it!” while running to her husband. If his arm hasn’t been healed, she begins tearing strips of cloth from her dress and using them to bind the wound, crying about how relieved she is to see him while she does. When she is done, she kisses him intensely and strokes his hair, before saying that she better get him back to a healer in the town.

    She gives you your reward before rushing him away, thanking you profusely and saying that thanks to your efforts they can root out the corruption in the royalty of their city–they will not have expected Thesius to survive, and will be unprepared for his return. If anything, his injuries further cement his claims!

    GM’s Notes:

    If the players kill Minotauros, he will regenerate somewhere else in the labyrinth and resume hunting them down. It is part of his curse, he can never die in the labyrinth. However, when the labyrinth is unlocked, the curse ends; finally releasing him from his torture.

    Should your players remain on the island for a couple more days, the royalty will be overthrown by Thesius, who will institute a republic. He will try find your players again, to thank them for what they did one last time, and show them the fruits of his efforts, before they leave.

    If you’d enjoy way more maps like this free Minotaur’s Maze TTRPG battlemap, Luke and I have just released our newest bundle of 420 large, 40×30″ battlemaps (double the size of those in the Quarantine Bundle) for $59.99. It’s your chance to have a great deal on some of our most beautiful maps! We guarantee that is something here for every GM—no matter what setting you prefer, from large cities to underwater seascapes.

    Paying just $59.99 rather than full price saves you over 97%! Take a look at all the extra maps you can download with one click here

  • Free TTRPG Battlemap with Adventure – Merchanist’s Guild of Aeraveska

    Free TTRPG Battlemap with Adventure – Merchanist’s Guild of Aeraveska

    Free TTRPG map the Mechanist’s Guild of Aeraveska

    The Screw

    There are posters up inside Ms. Eva’s Saloon and the Blue Bridge Inn within the floating city of Aeraveska. They’re from an old woman who is looking for help finalizing her deceased husband’s estate. She writes that she wants to donate a lot of the items to the Mechanist’s Guild, so they can melt them down and use the scrap to continue repairing the city. It’s a simple job, just labor intensive–though it pays alright.
     
    Should you go meet with the old woman who’s offering the job, you’ll find she lives in the wealthy district of Aeraveska, known as Old Glin’s Docks. When you arrive at her considerably well-maintained house (compared to the rest of the rusting city), a middle-aged maid will open the door and invite you inside. Once in, she’ll sit you down at a small coffee table in the midst of an indoor garden, before leaving to get the matron.
     
    When the matron arrives, you’ll see she’s a woman easily in her 80s, with her gray hair tied up in a neat bun. She is wearing a long, blue dress and some simple jewelry made with expensive gold and colorful jewels, and moves smoothly.
     
    She will welcome you warmly, before taking a seat opposite you. She’ll explain that her husband had a lot of things she has no need for, and since his passing she’s been tying up the loose ends to prepare for her own, eventual death. Her now-adult children moved away from Aeraveska many years ago you see, and they don’t have need for their father’s things. So, she’s decided to send much of it to the Mechanist’s Guild to become scrap and much-needed parts to repair the city. If you would take it there for her–chairs, mechanical contraptions, a metal workbench and some tools–she can pay you once the job is complete.
     
    Should you accept, she will thank you, and pay you half in advance before getting her maid to show you where the things are located.
     
    When you arrive at the Mechanist’s Guild, there are two burly men standing outside the front door, with light leather armor and weapons on their belts. Should you try to enter, they’ll say that you can’t in thick voices. If you ask why not, they’ll pause for a moment, before saying the Guild is closed for maintenance.
     
    Should you explain that you’re bringing scrap to donate so that they can melt it down and use it to help repair the dying city, one will shake their head fervently and say that they’re not accepting scrap today, go take it elsewhere. At this point, however, a loud scream will sound from somewhere within the building.
     
    If you insist on entering to see what’s going on, the “guards” will fight you rather than willingly letting you in. Should you make it past, you’ll find a handful more of the thugs beyond the door, in a room with a statue at its heart.
     
    Further in, there are a couple of crumpled receptionists who have been knocked out and tied up behind the desks. If you succeed at waking either of them up, they’ll beg you to free them and warn you that there are armed men in the building looking for an artifact.
     
    Should you free the girls, they’ll thank you before running out the way you came in, saying they’re going to go get help. In the room beyond the receptionist’s section, you’ll find a number of soot-stained tinkerers, wearing leather working clothes, who have been tied up and surrounded by more of the goons. If the goons see you, they’ll attack–muttering to themselves about “giving the boss more time to get the artifact”.
     
    When you’ve defeated the goons and freed tinkerers, they’ll thank you before urging you to hurry. They’ll say that those goons don’t seem particularly bright and kept mumbling to themselves about this being some kind of a distraction!
     
    There’s a loud bang from the upper floor as they say this. If you race up the stairs to see what it is, you’ll encounter a couple of men in brown leather armor with mechanical wings made of scrap metal. They’re in an outdoors area in front of Grand Artificer Alkali’s office. They will attack on sight, flying and using aerial combat to their advantage as well as any trained aeronaut.
     
    The sounds of combat come from Alkali’s office while this happens. 
     
    Should you defeat the winged defenders and go into the office, there are a number of holes which have been cut into the ceiling. Dead goons lie on the floor (some with darts in their neck), but there is a tall man with mechanical wings still standing, quite alive. He is wearing light leather armor, with a crossbow aimed at Alkari, but one side of his face is covered with a splatter of blue dye and his body is already covered in scrape wounds.
     
    Alkari is a person reminiscent of a raven, with smooth black feathers and a tool belt on his waist. He is wearing goggles over his eyes, and hefting a small contraption in a clawed “hand” at the tip of his wing, from where he perches on a desk. Unusual traps have been set off all over the tower, and they appear to have done damage to the tall, winged man–who is both frustrated and out of breath.
    When you enter the tower you walk into this stalemate, and both the men will look at you in confusion. Alkari will twist his head at you thoughtfully, before asking if you have come to his aid. The winged man will spit, saying of course it’s outsiders. Then he will growl at you to leave the affairs of Aeraveska to the skyfolk, warning that you have no idea what you’re meddling with. 
     
    If you ask him what you’re meddling with, he’ll say plans that will enable his people to finally reach the true glory this city dreamed of–plans which Alkali Corvus is getting in the way of.
     
    At this point Alkari will clack his beak, and say that if the True Defenders of Aeraveska’s plans for greatness rely on The Screw, they are doomed to fail. Far more goes into mechanical engineering than relying on a magical artifact.
     
    Should you ask what The Screw is, he’ll explain that it’s a wondrous screw created by Kolgar the Frustrated. It will make any invention it’s added to work, though it doesn’t guarantee that it won’t explode or fail later on. Only a desperate man–or a fool–would wager important plans on such an item. Alkari will then look at the winged man, saying that, while he has had his differences with Magnus Sharpe, he never imagined he was a fool. 
     
    The winged man will growl, telling Alkari to stop speaking ill of his leader, and demanding that he hand over the artifact and let them be done with this nonsense. He’ll tell the bird that he does not want to harm one of the city’s own skyfolk–despite him killing so many of his men–but he will end him if he doesn’t hand over what he wants.
     
    At this, Alkari will look at you, a twinkle in his eye, and say that he supposes that you are the deciding factor in this stalemate. He warns you that Magnus Sharpe is a religious extremist, as are his followers. The blood of many innocents are on their hands, and he has never found them to be reasonable. Whatever they are planning, it will not be good.
     
    Should you side with Alkari, if the winged man is injured enough he will attempt to flee back out through one of the holes in the ceiling. Afterwards, Alkari will sigh, and say that today was a near miss. He’ll ask after the health of the mechanists below, and once he knows they were saved, he’ll visibly relax. Then he will hop down to his seat and open up a draw; pulling out a screw from a box amidst all the other junk.
     
    He talks while he hops back over to you with it, saying that he supposes after today’s events it is far too dangerous to keep The Screw here. Magnus is the last person who should be allowed access to the artifact, due to the terrible damage he could do with it. So, as thanks for your good deeds today, you may have it, he says. He finishes with a small, gracious bow.
     
    If you side with the winged man instead, Alkari will not surrender. Instead he will stare you down determinedly, saying that he will never hand over The Screw to a man known to be violent and wholly unreasonable. His death will slow you down, for it’s a large office to search for such a small screw–and by now, the Aeronauts will have heard of the fighting here. They’ll be here any minute.
     
    Should you attack him, he’ll attempt to shoot you with a poison dart from his small revolver. If you manage to kill him, his dying words will be a warning that Magnus may be charming, but he will try to kill you. If you turn back now, you can still save the city from whatever evil he is planning…
     
    Once Alkari is dead, the winged man will step on his small feathered body, spitting that he was a traitor to his true brethren; the skyfolk. He’ll then ask for your help pilfering through all the drawers for The Screw, and when he gets his hands on it, he will thank you for your assistance. After that, he’ll fly out through the hole in the ceiling, before dropping a firebomb from his belt into the room you’re still in; calling you a useful idiot. 
     
    He’ll laugh as he flies away, not looking back to see if you survived or not.
     
     
    GM’s Notes:
     
    If you’d like to know more worldbuilding for the flying city of Aeraveska, download our free, illustrated adventurer’s guide! It details the area, as well as who the True Defenders of Aeraveska are, who Magnus Sharpe is, and the Aeronauts, etc. 

    It’s got some really great worldbuilding and a lot of love and effort went into it, from a bunch of talented people.   

    If you’d enjoy way more maps like this free Merchanist’s Guild of Aeraveska TTRPG battlemap, Luke and I have just released our newest bundle of 420 large, 40×30″ battlemaps (double the size of those in the Quarantine Bundle) for $59.99. It’s your chance to have a great deal on some of our most beautiful maps! We guarantee that is something here for every GM—no matter what setting you prefer, from large cities to underwater seascapes.

    Paying just $59.99 rather than full price saves you over 97%! Take a look at all the extra maps you can download with one click here